No Spice Honey Gingerbread

< Back to Recipe Listings

No Spice Honey Gingerbread

by Claire Marie Chang

Make your kids this No Spice Honey Gingerbread this festive season!

Cuisine : Baking  Course : Dessert Skill Level : Novice
Prep : 1 hr 20 mins  Cook : 11 mins Ready in : 1 hr 31 mins  Serves : 6-8 Servings


INGREDIENTS:

  • 150g Unsalted Butter, Cubed
  • 100g Mix of Light & Dark Brown Sugar
  • *Can use Molasses Sugar as well
  • 170g Honey
  • 1/4 tsp Seas Salt/Fine Salt
  • 1 tsp Baking Soda
  • 1 Egg (65g)
  • 1 tsp Vanilla Bean Paste/Extract
  • 535g Plain Flour
  • 1 tsp Baking Powder

DIRECTIONS:

  1. Preheat oven to 180°C
    1. Combine butter, sugar and honey. Heat over gentle heat till the butter is fully melted. Transfer to metal/glass mixing bowl.
    2. Add Baking Soda and salt. Stir well to combine. Leave to cool to room temperature.
    3. Sift dry ingredients together.
    4. Using the paddle attachment, mix in on low speed egg and vanilla.
    5. On low speed, add flour in 2-4 additions till full combined.
    6. The dough will be soft. Divide into two portions. Flatten and cling wrap dough.
    7. Refrigerate for 1hr or till firm to handle.
    8. When ready to use, flour your worktop, dough and rolling pin.
    9. Roll to your desired thickness. Cut using floured cookie cutters.
    10. Bake for 9-11 minutes depending on cookie size.

    * Keep at room temperature for up to 7 days. Best eaten within 2 days for its soft texture.

    Chilled dough keeps well in fridge for up to 7 days.

    Alternative flavours:

    • Honey Cinnamon: Add 1-2tsp ground cinnamon
    • Honey Gingerbread: Add 1 tsp ground all spice and 1-2tsp ground ginger
Posted in

Cilantro Lime Chicken Thigh

< Back to Recipe Listings

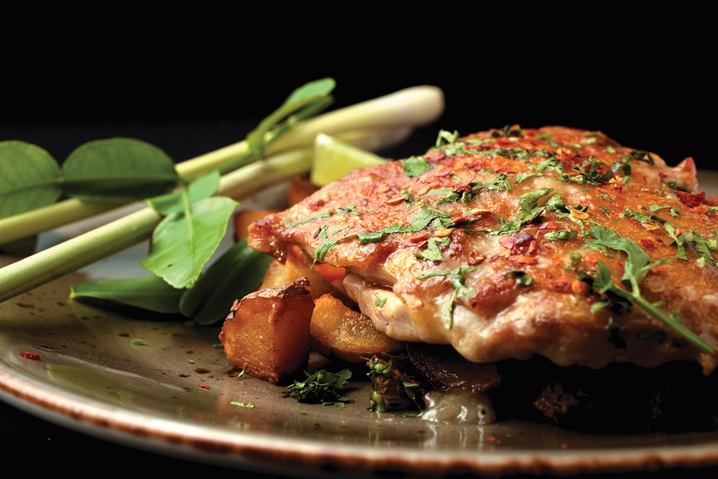
Cilantro Lime Chicken Thigh

by Andrea Lim

Learn to make Cilantro Lime Chicken Thigh that is sous vide to perfection with Chef Andrea’a recipe!

Cuisine : European Course : Main Skill Level : Novice
Prep : 20 mins Cook : 1 hr 25 mins Ready in : 1 hr 45 mins Serves : 1 Serving


INGREDIENTS:

  • 1 no (200g) Chicken Thigh
  • 50g Roasted Potatoes
  • 50g Garden Vegetables
  • 10g Cilantro
  • 10g Lime
  • 10g Garlic

DIRECTIONS FOR CILANTRO LIME CHICKEN THIGH

  1. Marinate the chicken thigh with cilantro and minced garlic.
  2. Vacuum the chicken thigh & sous-vide for 1hour at 65˚C.
  3. Remove the meat from the bag and sear till golden brown on both side.
  4. Garnish with chopped cilantro and lime juice.

DIRECTIONS FOR GARDEN VEGETABLES

  1. Boil a pot of water to blanch the garden vegetables.
  2. In a pot, melt butter, sauté & season the garden vegetables with salt & pepper.
  3. Cook the potatoes in boiling water.
  4. When the potatoes are cooled down, cut into bite-sizes.
  5. Marinate with olive oil, salt and pepper.
  6. Preheat the oven to 180˚C, and bake for 15-20 minutes.
Posted in

Potato Gratin

d

< Back to Recipe Listings

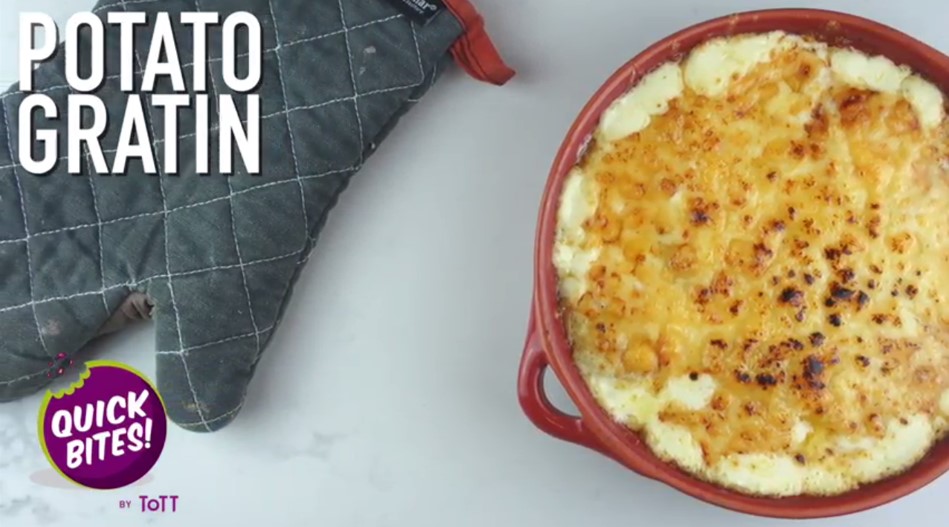
Potato Gratin

by ToTT

How will you serve your potatoes this Christmas? If rich and creamy is your thing, try this indulgent gratin – you’ll be left wanting more! #QuickBites

Cuisine : European Course : Appetzer Skill Level : Novice
Prep : 20 mins Cook : 60 mins Ready in : 80 mins Serves : 6-8 Servings


INGREDIENTS:

  • 1kg Potatoes, peeled and sliced into 3mm slices
  • 3 tbsp All Purpose Flor
  • 3 tbsp Unsalted Butter
  • 1 1/2 cups Whole Milk
  • 1/2 cup Heavy Cream
  • 2 tbsb Fresh Thyme
  • Few Leaves of Sage
  • 2 cloves Garlic
  • Pinch of Grated Nutmeg
  • 1 1/4 cups of Gruyere Cheese, grated

DIRECTIONS 

  1. Preheat your oven to 200C, grease a baking dish with some butter and set aside.
  2. Place half of your potato slices evenly in your buttered baking dish and set aside.
  3. Melt butter over medium heat in a saucepan, then add the flour and stir together for about until combined.
  4. Add the milk, cream, thyme, sage and garlic, bring to a simmer and cook until thickened. Season with some salt, pepper and nutmeg. Using a sieve, remove the garlic and herbs once the sauce is done.
  5. Pour half of the cream sauce over the potatoes, repeat with the last layer of potatoes and cream, cover with aluminum foil and bake for 45 minutes.
  6. Remove foil, scatter the cheese all over the top and finish baking the potatoes for 15 minutes or until golden brown and bubbly.
Posted in

Stuffed Bell Peppers

< Back to Recipe Listings

Stuffed Bell Peppers

by ToTT

Perfect comfort food! Bell peppers stuffed with minced chicken, vegetables, rice and cheese. A delicious, relatively easy weeknight dinner. Switch up the protein and use your favourite veggies to customise it!

Cuisine : European Course : Appetizer Skill Level : Novice
Prep : 15 mins Cook : 60 mins Ready in : 75 mins Serves : 6 Servings


INGREDIENTS:

  • 6 Whole Bell Peppers
  • 2 tbsp Olive Oil
  • 8 ounces, weight Lean Ground Chicken/ Beef
  • Salt and Pepper, to taste
  • 1 whole Medium Onion, Diced
  • 3 cloves Garlic, Minced
  • 1 whole Large Zucchini, Diced
  • 4 whole Roma Tomatoes, Diced
  • 1 cup Cooked Rice
  • 2 cups Pepper Jack Cheese

DIRECTIONS 

  1. Cut the tops off the pepper. Remove and discard the stems, then finely shop the tops; set aside. Scoop out the seeds and as much of the membrane as you can. Place in a plastic bag.
  2. Heat 2 tbsp of olive oil in a large skillet over medium-high heat and fry the garlic. Add the chicken, season with salt and pepper and cook until the meat is cooked through. Transfer to a plate.
  3. Add the onions, chopped peppers and zucchini. Add the tomatoes and season with salt and pepper. Cook until everything is heated through, then add in the rice. Taste and adjust the seasoning. Stir in 1 1/2 cups of the cheese. Allow the mixture to cool and store it in a fridge container. Store the extra cheese in a small container. ( All ingredients can stay in the fridge for up to 3 days)
  4. When you’re ready to make dinner, preheat the oven to 350 degrees F.
  5. Place the peppers cut-side up in a baking dish just large enough to hold them upright. Fill the peppers with the rice mixture and bake for 30 minutes.
  6. Serve piping hot!
Posted in

Traditional Baked Mooncake

< Back to Recipe Listings

Traditional Baked Mooncake

by Charlynn Gwee

Bake your own Traditional Baked Mooncake this Mid-Autumn Festival with Chef Charlynn’s recipe!

Cuisine : Asian Course : Dessert Skill Level : Novice
Prep : 60 mins Cook : 10 mins Ready in : 70 mins Serves : 12 pieces of Mooncakes


INGREDIENTS:

  • Pastry
    • 100g Plain Flour
    • 60g Golden Syrup
    • ½ tsp Alkaline Water
    • 28g Vegetable Oil
  • Fillings
    • 420g Lotus paste
  • Egg Wash
    • 1 Egg, lightly whisk & sieve

DIRECTIONS:

  1. Use a large bowl; mix the golden syrup, alkaline water and oil well. Sift in the flour. Knead into dough. Cover with film wrap and rest for 40 minutes.
  2. Roll lotus paste into a long tube. Cut into 12 equal portions, each 35g.
  3. Preheat oven to 180C.
  4. Divide the dough into 12 equal portions (15g each). Wrap and seal the lotus paste ball with the dough disc.
  5. Dust the mooncake mould and place the stuffed mooncake into the mould.
  6. Bake in the preheated oven for about 10 minutes.
  7. Brush the mooncakes with egg wash & continue to bake until the pastry turns golden brown.
Posted in

Healthy Yogurt Bark

< Back to Recipe Listings

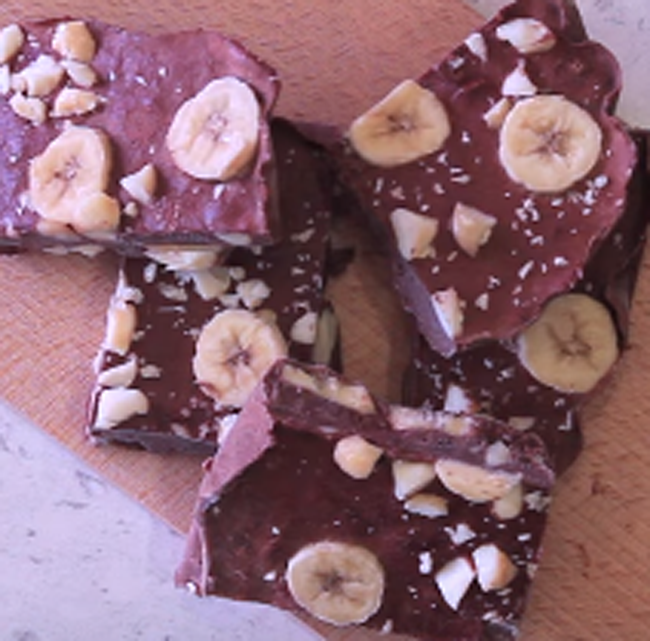
Healthy Yogurt Bark

by ToTT

Who says healthy food are not yummy? They will realised that its not true when they try this Healthy Yogurt Bark. It’s easy to do and most importantly, it’s delicious!

Cuisine : Healthy Cooking Course : Dessert Skill Level : Novice
Prep : 10 mins Cook : 0 mins Ready in : 190 mins Serves : 20 pieces


INGREDIENTS:

  • 1 cup Natural Yogurt
  • 1 Banana – mashed
  • 3 tbsp Cocoa Powder
  • 1 tbsp Honey
  • 2 tbsp Macadamia Nuts
  • Garnish with nuts of your choice and sliced bananas

DIRECTIONS:

  1. Mix all ingredients in a large bowl until well incorporated.
  2. Spread evenly on baking tray with baking sheet.
  3. Sprinkle chopped nuts and layer sliced bananas.
  4. Freeze for 3 hours to harden.
  5. Cut and serve!
Posted in

Black Sesame Macaron

< Back to Recipe Listings

Black Sesame Macron

by Mimi Wahadi

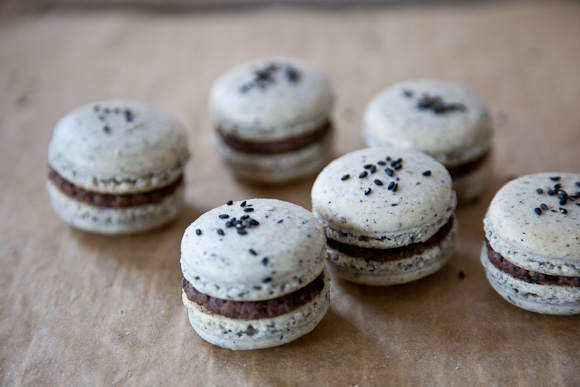
If you love sesame seeds, you’ve got to give this Black Sesame Macarons a try! This recipe by Chef Mimi teaches you to bake the perfect macaron that is light and airy that sandwiches the fragrant Black Sesame Custard Filling.

Cuisine : Baking Course : Dessert Skill Level : Novice
Prep : 45mins Cook : 25 mins Ready in : 70 mins Serves : 20-25


INGREDIENTS:

  • 125 g Almond Ground (Sifted)
  • 125 g Icing Sugar (Sifted)
  • 125 g Sugar
  • 100 g Egg Whites
  • 5 g Toasted Black Sesame

Black Sesame Seed Custard Filling

  • 160 g Egg Yolks 
  • 100 g Corn Flour 
  • 1000 ml Milk 
  • 100 g Sugar 
  • 150 g Black Sesame Powder [instant, add in 30 ml of hot water to form a paste] 
  • 50 g Butter

DIRECTIONS:

1. To make the macaron shell, kindly follow Step 2 – 16.

2. Mix the sifted ground almond and icing sugar in a bowl.

3. Heat up a pot of water for the bain marie.

4. Place the egg whites and sugar into a bowl.

5. Whisk the egg whites and sugar vigorously on top of the pot of bain marie.

6. While whisking, insert a finger to test the temperature of the egg whites.

7. The temperature should be very hot to touch.

8. Quickly transfer the mixture into the mixer and whisk on a highest speed.

9. When the meringue starts to form, lower the speed and add the colouring.

10. Continue to whisk until firm.

11. Fold in the almond ground and icing sugar into the meringue when it firms up.

12. Beat the mixture to a smooth dropping consistency. Add toasted black sesame.

13. Fill the mixture into a piping bag with a piping tube.

14. Pipe into drops of round shape onto the baking tray lined with baking paper.

15. Bake at 160°C for approximately 14 minutes. (Temperature and the timing of baking will varies according to the size of the piping and the oven used)

16. When the macaron shells are ready, put aside to cool.

17. To make the Black Sesame Seed Custard Filling, kindly follow Step 18 – 22.

18. Mix egg yolks and corn flour together in a bowl. Add in a little milk to dilute the mixture. Sift.

19. Heat up the rest of the milk and sugar in a pot till boiling.

20. When mixture boils, add in the egg yolk and corn flour mixture. Whisk till thicken. Add the sesame paste, continue to boil till thickens.

21. Take off from the heat and whisk in butter. Transfer to a bowl, cover with cling film and leave it to cool. Use as required.

22. Pipe in the filling and it is ready to be served.

Posted in

Sous Vide Wagyu Beef

< Back to Recipe Listings

Sous Vide Wagyu Beef

by Francois Mermilliod

Indulge in this all-star, easy-to-make Sous Vide Wagyu Beef that melts in your mouth.

Cuisine : European Course : Main Skill Level : Novice
Prep : 5 mins Cook : 65 mins Ready in : 70 mins Serves : 1


INGREDIENTS:

  • 200g Wagyu sirloin
  • 10ml Evoo
  • Few Sprigs
  • Black Pepper

DIRECTIONS:

  1. Vacuum pack the beef.
  2. Cook in water at 58 degrees for 1 hour.
  3. Sear the beef in a hot pan before serving.
  4. Served with a mesclun Salad.
Posted in

Apple Pie

< Back to Recipe Listings

Apple Pie

by Trish Yee

This homemade Apple Pie is a classic, from a scrumptious filling to the flaky pastry crust. 

Cuisine : Baking Course : Dessert Skill Level : Novice
Prep : 70 mins Cook : 45 mins Ready in : 115 mins Serves : 8-10 


INGREDIENTS:

Pastry

  • 110g Plain flour (Pastry)
  • 1/4 teasp Salt (Pastry)
  • 45g Unsalted butter, chilled and cubed (Pastry)
  • 75g Vegetable shortening, chilled (Pastry)
  • 50-60ml Ice water (Pastry)

Apple Pie Filling

  • 2 Green and 2 red apples (Apple Pie Filling)
  • 1/4 cup Sugar (Apple Pie Filling)
  • Dash of Nutmeg (Apple Pie Filling)
  • Dash of Cinnamon (Apple Pie Filling)
  • Pinch of Salt (Apple Pie Filling)
  • 1 tbsp Apple cider (Apple Pie Filling)
  • Vanilla pod extract (Apple Pie Filling)
  • 20g Butter (Apple Pie Filling)

DIRECTIONS:

For the pastry, follow steps 2 to 5.

2. Mix the flour and salt together in a large bowl. Add the butter and shortening.

3. Using two forks, cut the butter and shortening into the mixture until it resembles coarse meal or you may use food processer to do the work.

4. Drizzle the cold water in, 1 Tablespoon at a time, and stir with a rubber spatula or wooden spoon after every Tablespoon added. Do not add any more water than you need to. Stop adding water when the dough begins to form large clumps

5. Transfer the pie dough to a floured work surface. The dough should come together easily and should not feel overly sticky. Using floured hands, fold the dough into itself until the flour is fully incorporated into the fats. Form it into a ball. Divide dough in half. Wrap each tightly in plastic wrap. Refrigerate for at least 30 minutes.

6. For the Apple Pie Filling, follow steps 6 to 12.

7. In a large skillet, melt the butter over medium-high heat. Add the apples, and cook, stirring, until the sugar dissolves and the mixture begins to simmer, about 2 minutes. Cover, reduce heat to medium-low, and cook until the apples soften and release most of their juices, about 7 minutes.

8. Simmer over medium heat until thickened and lightly caramelized, about 10 minutes.

9. Add in the spices and the apple cider or lemon juice. Set aside to cool.

10. Line the bottom of a pie pan with one of the discs of dough, and trim it so it lays about ½ inch beyond the edge of the pan. Put the apple filling in the pan and mound it slightly in the centre.

11. Brush the top edges of the dough with the egg. Place the second disc of dough over the top. Fold the top layer of dough under the edge of the bottom layer and press the edges together to form a seal. Flute the edge as desired. Brush the surface of the dough with egg and then sprinkle with sugar. Pierce the top of the dough in several places to allow steam to escape while baking.

12. Bake the pie on a baking sheet until the crust is golden, about 30-45 minutes. Cool on a rack before serving.

Posted in

Bossam

< Back to Recipe Listings

Bossam

by Michele Ow

Bossam is Korean boiled pork belly that is juicy, tender; and served with letture, kimchi and topping sauce for the ultimate appetizer!

Cuisine : Asian Course : Appetizer Skill Level : Novice
Prep : 10 mins Cook : 60 mins Ready in : 70 mins Serves : 2-4


INGREDIENTS:

  • Apple infused bossam (Korean pork lettuce wraps)
  • Pork Belly
    • ½ Onion, skin peeled and cut into quarters
    • 1 pear rinsed and cut in half
    • 1 stalk Green onions (chef used only the weight part)
    • 3 slices Young ginger
    • 3 cloves Fresh garlic, skin peeled
    • 1 tsp Black whole pepper
    • 1 tbsp Korean soy bean paste (Doenjang)
    • 1 tbsp Soy sauce
    • 1 ½ tbsp. Rice wine
    • 2 ½ cups Water
  • Sauce
    • Korean soybean paste (Doenjang)
    • Korean chili paste (Gochujang)
    • Minced garlic
    • Minced onion
    • Chopped green onion
    • Sesame Oil

DIRECTIONS:

For the Pork Belly

  1. Put into pot and boil for 60 minutes

For the Sauce

  1. Mix until well-incorporated
Posted in