Chocolate Popsicles

< Back to Recipe Listings

Chocolate Popsicles

by ToTT

Chocolate + Popsicles! The one thing you need to learn how to do in this hot summer. You just need a Popsicle mould and this video and you are good to go.

Cuisine : Baking Course : Dessert Skill Level : Novice
Prep : 5 mins Cook : 10 mins Ready in : 375 mins Serves : 8


INGREDIENTS:

  • 2 cups of Southdale Farm Milk
  • 2 tbsp Sugar
  • 2 tbsp Cocoa Powder
  • 1 cup Semi-sweet Chocolate Chips

DIRECTIONS:

  1. Heat up 2 cups of Southdale Farm Milk on high heat.
  2. Turn off heat before milk boils.
  3. Whisk in 2 tbsp of sugar and cocoa powder.
  4. Pour mixture into 1 cup of semi-sweet chocolate chips and let it sit for 2 minutes.
  5. Whisk until chocolate is completely melted.
  6. Let mixture cool before pouring into Popsicle mould.
  7. Place Popsicle sticks into the mould.
  8. Freeze it for 6 hours or more.
  9. Unmould the Popsicle and enjoy!
Posted in

Flourless Chocolate Cake

< Back to Recipe Listings

Flourless Chocolate Cake

by Thripti Hinduja

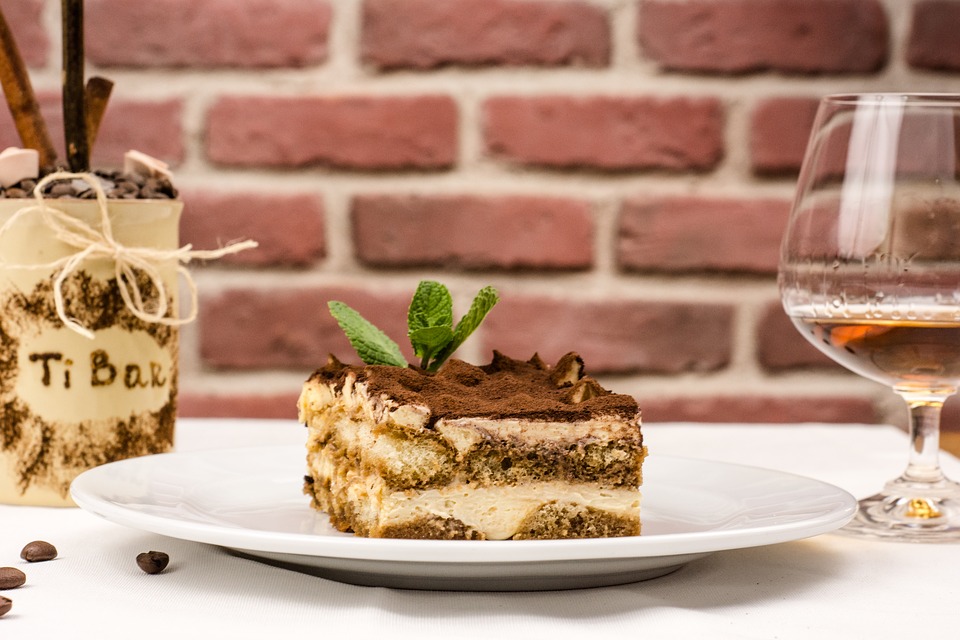
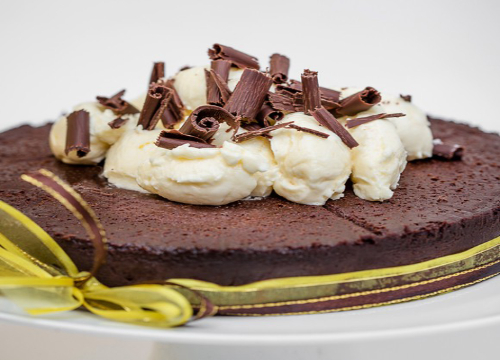
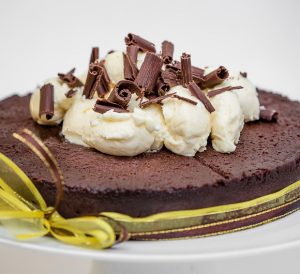
This flourless recipe is richer than a regular chocolate cake. Create a dense piece of delicacy with mainly butter and chocolate and adapt this versatile recipe into your own invention according to your preference.

Cuisine : Baking Course : Dessert Skill Level : Novice
Prep : 135 mins Cook : 10 mins Ready in : 145 mins Serves : 6


INGREDIENTS:

  • 300g Chocolate
  • 200g Butter
  • 2 Eggs
  • 120g Caster Sugar

DIRECTIONS:

  1. Preheat the oven to 180°C.
  2. Butter and line a 6″ loose bottom tin with baking paper.
  3. Melt the chocolate and butter in a baine marie.
  4. Beat the eggs with sugar with an electrical whisk for 5 minutes, or until very thick and pale.
  5. Gently fold in the chocolate in two batches.
  6. Pour the mixture into the tin and bake for about 8-10 minutes. The cakes should be slightly soft.
  7. Cool completely. Refrigerate for at least two hours for it to set. Remove from mould and serve with ice cream or sour cream if desired
Posted in

Kalamata Olive Bread

< Back to Recipe Listings

Kalamata Olive Bread

by Lam Soon

This rustic bread is worth the extra effort to make. The kalamata olives add enough flavor to enhance the loaf without masking the overall taste of the bread.

Cuisine : Mediterranean Course : Appetizer Skill Level : Novice
Prep : 90 mins Cook : 45 mins Ready in : 135 mins Serves : 8


INGREDIENTS:

  • 1 loaf of Bread
  • 3 tbsp of Naturel Pure Olive Oil
  • 3 cups of Bread Flour
  • 2 tsp of Active Dry Yeast
  • 2 tsp of White Sugar
  • ½ tsp of Salt
  • ½ cup of Chopped Kalamata (black olives)
  • 1¼ cups of Warm Water (45°C)
  • 1 tbsp of Cornmeal

DIRECTIONS:

  1. In a large bowl, mix together warm water and yeast. Then add sifted flour, sugar, salt and black olives. Mix them well.
  2. Sprinkle flour on the kneaded board. Place dough onto a floured board, knead dough until smooth and elastic, 5 to 10 minutes. Put the dough into a bowl and cover with a damp kitchen towel to prevent the surface from drying. Set aside, and let rise for about 45 minutes, until it doubles in size.
  3. Round the dough on a kneading board. Place upside down in a bowl lined with a lint-free cloth. Let rise until it doubles in size.
  4. While the bread is rising for the third time, put a pan of water inside the oven. Preheat the oven to 260°C.
  5. Gently turn the loaf out onto a sheet pan that has been lightly oiled with Naturel Pure Olive Oil and dusted with cornmeal.
  6. Bake the loaf at 260°C for 15 minutes. Remove the water. Reduce heat to 190°C. Bake for another 30 minutes more, or until done.
  7. Tip: You can replace Kalamata olives with minced garlic, garlic powder, Italian seasoning, sun dried tomatoes or Cheddar cheese
Posted in

Raspberry Mini-Charlotte

< Back to Recipe Listings

Raspberry Mini-Charlotte

by Susanne Despature

Surround the smooth pudding with crunchy ladyfingers and top with berries. Just like that, you have created a refreshing dessert packed with anti-oxidants and health benefits. Oh, don’t forget that it looks so delicate that your family and friends would be impressed for sure!

Cuisine : Baking Course : Dessert Skill Level : Novice
Prep : 150 mins Cook : 5 mins Ready in : 155 mins Serves : 6


INGREDIENTS:

  • Charlotte
    • 24 Ladyfingers

    Yogurt Cream

    • 100g Mixed Raspberries (frozen puree)
    • 50-60g Icing Sugar
    • 150g Greek Yogurt
    • 150g Mascarpone
    • ½ Lemon (or lime juice)
    • 160g Cream (35% fat)
    • 4 sheets of Gelatine (10g)
    • 125g Berries (raspberries, strawberries, blueberries, mint leaves)

    Raspberry Jelly

    • 125g Mixed Raspberries (frozen puree)
    • 50g Caster Sugar
    • ¼ tsp Agar-Agar

DIRECTIONS:

         Charlotte

  1. Put 6 circles on a tray (covered with baking paper) and line them with 8 ladyfingers (cut in 2 lengthwise), the sugar coated side towards the circle

    Raspberry Jelly

  2. Heat the raspberry puree with sugar and agar-agar in a small pan and let cook for 1 minute.

  3. Let cool out until room temperature (25 – 30°C)

    Yogurt Cream

  4. Whip the very cold whipping cream in a chilled bowl until stiff and refrigerate.

  5. Soak gelatine sheets in cold water for 10 minutes. Heat up raspberry puree and lemon juice in a small pan or in microwave (40°C), then dissolve soaked gelatine in the warm puree, stirring gently with a spoon.

  6. In a bowl, mix soft mascarpone with yogurt and icing sugar. Add raspberry puree and mix thoroughly. Refrigerate.

  7. When raspberry cream starts to gelify on the border, fold in carefully whipped cream with a rubber spatula.

  8. Fill raspberry cream in circles, almost to the top – let some space for raspberry jelly. Refrigerate the Charlottes for 1-2 hours, then pour gently raspberry jelly on top.

  9. Garnish with berries and mint leaves and refrigerate.

    To Serve

  10. Take away circles and present each Charlotte on individual plates.

Posted in

Fresh Raspberry Tart

< Back to Recipe Listings

Fresh Raspberry Tart

by Thripti Hinduja

This classic is made with fresh raspberries, pastry cream and tart dough. Satisfy your sweet tooth and make your own version of a fresh fruit tart at home!

Cuisine : Baking Course : Dessert Skill Level : Novice
Prep : 105 mins Cook : 20 mins Ready in : 125 mins Serves : 6


INGREDIENTS:

  • Crust
    • 250g Flour
    • 125g Cold Butter
    • 60g Sugar
    • 1 Egg

    Filling

    • 100g Raspberry Jam
    • 375g Milk
    • 75g Sugar
    • 25g Corn Flour
    • 1 tbsp Vanilla Bean Paste
    • 35g Butter
    • 5 Egg Yolks
    • 200g Raspberries

DIRECTIONS:

        Crust

  1. Line a pie mould with parchment paper.

  2. Cut the cold butter into small cubes. Crumble it into the flour and sugar.

  3. Add in the egg and form the mixture into a dough. Do not knead or overwork the dough. Cover it in cling film and let it sit in the refrigerator for 20 minutes.

  4. Roll out the dough in between two sheets of baking paper.

  5. Invert into a greased and lined pie mould. Let sit in the refrigerator for another 20 minutes.

  6. Dock the pie crust and blind bake in a preheated oven at 180°C for 15 minutes or until light brown.

  7. Brush with slightly beaten egg and place it back in the oven for 1 minute.

  8. Allow to cool 5 minutes before filling.

    Filling          

  9. Heat the milk in a sauce pan.

  10. At the same time, whisk the egg yolks and sugar together till creamy. Whisk in the corn flour and the vanilla bean paste.

  11. Drizzle in the warm milk, whisking all the time.

  12. Pour it back into the sauce pan and cook until the custard bubbles and thickens.

  13. Take it off the heat and add in the butter. Cool completely

    Assembling Tart

  14. Brush the base of the tart with the jam, reserving 2 tbsp for the topping.

  15. Pipe over the cold custard and arrange fresh raspberries over it.

  16. Warm the remaining jam with 1 tbsp of water and brush the raspberries with the jam.

  17. Refrigerate for at least an hour before serving.

Posted in

Braised Sea Cucumber and Pork

< Back to Recipe Listings

Braised Sea Cucumber and Pork

by Lam Soon

The ingredients may look daunting, but this delicacy is well worth the effort. Achieve restaurant-like quality with this simple recipe.

Cuisine : Asian Course : Main Skill Level : Novice
Prep : 5 mins Cook : 210 mins Ready in : 215 mins Serves : 8


INGREDIENTS:

    • 700g Pork Belly
    • 3 Rehydrated Sea Cucumber (about 500g)
    • Shredded Leeks

    Seasoning A

    • 2 stalks of Spring Onion
    • 2 slices of Ginger
    • 1 Star Anise
    • 2 tbsp of Wine
    • 5-6 cups of Water

    Seasoning B

    • 2 tbsp of Knife Salted Soy Bean
    • ¼ cup of Dark Soy Sauce
    • ¼ cup of Hua Diao Wine
    • 1 tsp of Dark Soy Sauce
    • 1½ tsp of Rock Sugar
    • 2-3 cups of Water

    Seasoning C

    • 1 tbsp Wine
    • 1 stalk Spring Onion
    • 2 slices Ginger
    • 4 cups Cold Water

DIRECTIONS:

  1. Cook the whole piece of pork in boiling water for about 1 minute. Remove and rinse well. Cook together with Seasoning A for about 1 hour. Remove pork.
  2. Place pork in a steaming bowl, skin side down. Add Seasoning B and cover the bowl with cling wrap. Steam over high heat for about 2 hours until the meat is very soft.
  3. Rinse sea cucumber. Place in a pot and add Seasoning C. Bring it to a boil, then cook over low heat for about 10 minutes. Remove.
  4. Strain the juice and pour in a soup pot, put in pork (skin side up) and sea cucumber. Cook over medium low heat, drizzle gravy over the pork skin as you cook until the gravy is only about 2/3 cup left and turns thick and shiny. Remove.
  5. Cut pork into big slices and place together with the sea cucumber on a serving dish, pour gravy over and scatter some shredded leeks to serve.
Posted in

Multigrain Sandwich Loaf

< Back to Recipe Listings

Multigrain Sandwich Loaf

by Jehanne Ali

Start your day right with homemade Mulitgrain Sandwich Loaf for a hearty breakfast sandwich!

Cuisine : Baking Course : Appetizer Skill Level : Novice
Prep : 120 mins Cook : 30 mins Ready in : 150 mins Serves : 6


INGREDIENTS:

  • 3 3/4 cups Multigrain Flour (9 blend variety)
  • 1 1/2 tsp Yeast
  • 1 cup Milk (or water)
  • 1 Large Egg
  • 1 tsp Salt
  • 1 tsp Sugar
  • 1 tbsp Olive Oil for grease

DIRECTIONS:

     Directions using KENWOOD BREAD MAKER:

  1. Add the yeast on the bottom.
  2. Add the multigrain flour.
  3. Tip it in followed by sugar, salt, honey and liquid (water or milk).
  4. Set as ‘basic bread’ as per the bread maker manual.

     Directions using KENWOOD MIXER or Hands Kneading:

  1. Add all the ingredients in a mixer, or knead by hand, adding liquid gradually to achieve soft tacky dough.
  2. Leave to rise for about an hour.
  3. Do not punch down the air, instead roll and shape into a loaf pan.
  4. Leave it to rise for another 30 minutes.
  5. Brush top with milk and sprinkle some grains or seeds.
  6. Bake at preheated oven of 190°C for 30-35 minutes.
Posted in

Champion Tiramisu

< Back to Recipe Listings

Champion Tiramisu

by Eric Low

Tiramisu is a famous italian dessert consisting of alternating layers of coffee-soaked Savoiardi biscuits and sweet mixture of mascarpone cheese, eggs and sugar. Make this luscious dessert and find yourself wanting for more.

Cuisine : European Course : Dessert Skill Level : Novice
Prep : 330 mins Cook : 0 mins Ready in : 330 mins Serves : 4


INGREDIENTS:

  • 250g Mascarpone Cheese
  • 200ml Whipped Cream
  • 2 Egg Yolks
  • 50g Sugar
  • 50ml Marsala Wine
  • 40ml Rum
  • 4pcs of White Sponge Fingers

Sponge Finger Syrup

  • 75ml Strong Coffee
  • 25ml Marsala Wine
  • 30ml Rum
  • Cocoa Powder (for dusting or bitter chocolate shavings)

DIRECTIONS:

  1. Cream egg yolks and sugar together until pale yellow. Add cheese, whipped cream, Marsala wine and Rum. Mix well and chill.
  2. Combine ingredients for sponge finger syrup.
  3. Arrange the sponge fingers in setting containers. Dab generously with the sponge finger syrup. Cover with the remaining cheese. Chill the tiramisu until set.
  4. Dust the tiramisu with cocoa powder. Add some chocolate shavings to the tiramisu before serving.
Posted in

Karaage Chicken

< Back to Recipe Listings

Karaage Chicken

by Eric Low

In this classic Japanese recipe, the Karage Chicken should be crispy on the outside and juicy on the inside. Try this at home and give your kids another choice for fried chicken.

Cuisine : Asian Course : Appetizer Skill Level : Novice
Prep : 135 mins Cook : 10 mins Ready in : 145 mins Serves : 2


INGREDIENTS:

Marinade

  • 2 tbsp All-Purpose Japanese Soya Sauce
  • 2 tbsp Mirin
  • 1 tsp Sugar
  • 10g Ginger (grounded)
  • 10g Garlic (grounded)
  • 300g Boneless Chicken Leg (diced)
  • 150g Rice Flour (for dusting)

Wasabi Mayonnaise

  • 3 tbsp Mayonnaise
  • 1 tsp Wasabi Paste
  • 1 tbsp Condensed Milk

DIRECTIONS:

  1. Combine ingredients for marinade except the two flours and use it to season the chicken for at least 2 hours.
  2. Combine ingredients for wasabi mayonnaise.
  3. Dust the marinated chicken with the rice flour. Preheat oil for deep-frying.
  4. Deep fry chicken until golden brown.
  5. Serve with wasabi mayonnaise.
Posted in

Lavender Crème Brûlée


< Back to Recipe Listings

Lavender Crème Brûlée

by Eric Low


Lavender Crème Brulee simply blends the intriguing scent of lavender flowers into a velvety custard dessert. You can never go wrong with this indulging dessert!

Cuisine : Baking Course : Dessert Skill Level : Novice
Prep : 305 mins Cook : 50 mins Ready in : 355 mins Serves : 2


INGREDIENTS:

  • 200ml Dairy-Based Whipping Cream
  • ½ tsp Dried Lavender Flowers
  • 35g Sugar
  • 2 Egg Yolks


DIRECTIONS:

  1. Preheat steamer to 95°C. For home stove top steamers, keep water to a slow gentle simmer.
  2. Heat whipping cream to just boiling point, remove from heat and add lavender. Add cream to infuse with herb for 15 minutes.
  3. Pass the cream through fine sieve, discard lavender.
  4. Whisk sugar and egg yolks till pale and ivory white. Slowly trickle in the cream with the egg yolks and incorporate the rest of the cream until fully tempered.
  5. Fill each ramekin or fire proof baking container ¾ full with the custard. Place ramekins in the steamer and steam for 15-20 minutes, add on a few more minutes if custards take slightly longer to set.
  6. Cool the custard and chill the custard overnight or 4-5 hours to allow the custard to set.
  7. To serve, sprinkle a layer of sugar over the custards, caramelize the sugar with a blowtorch. Return the custards to the fridge and chill for 10 minutes before serve. It should have a caramelized sugar crackling on the surface.
Posted in