Blueberry Cream Cheese Macaron

< Back to Recipe Listings

Blueberry Cream Cheese Macaron

by Lin Weixian

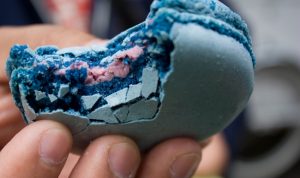
Enjoy your weekend with these delicate and sweet macaron filled with rich blueberry cream cheese goodness!

Cuisine : Baking Course : Dessert Skill Level : Novice
Prep : 45 mins Cook : 15 mins Ready in : 60 mins Serves : 30 macarons


INGREDIENTS:

  • 250gm TPT (125gm Almond Flour + 125gm Sifted Icing Sugar)
  • 45gm “Liquefied” Egg White
  • 112gm Sugar
  • 40gm Water
  • 45gm “Liquefied” Egg White
  • 40gm Egg
  • 80gm Yolk
  • 220gm Sugar
  • 560gm Unsalted Butter (soften)
  • 375gm Cream Cheese, room temp
  • As needed Blueberry Jam

DIRECTIONS:

  1. Mix the TPT with 45gm of egg white using a paddle. 
  2. Prepare an Italian meringue with 45gm of egg white, sugar and water. Cook till 118⁰C. 
  3. Fold the Italian meringue lukewarm into the first mixture in three stages. 
  4. Pipe macaron batter on parchment paper. 
  5. Leave it aside till tops are dry to touch. 
  6. Bake at 140⁰C for 14mins 
  7. Remove from baking tray and onto cooling rack once out of the oven to prevent over baking the shells. 
  8. Whisk egg and egg yolks to ribbon stage. 
  9. Prepare sugar syrup and cook till 118⁰C. 
  10. Pour into the egg and egg yolks mixture and whisk until mixture is pale and completely cool. 
  11. Switch to a paddle and gradually add soften butter. 
  12. Mix till mixture is light and smooth. Set aside. 
  13. Soften cream cheese before combining with 250gm of buttercream. 
  14. Pipe a generous amount of cream on to the shells follow by a small amount of blueberry 
  15. Sandwich and store macarons in fridge for 24hrs before consuming.
Posted in

Croquetas

These addictive Croquetas are a sure hit as an appetizer or as a snack to share with friends. Creamy, crunchy and flavourful – and you can add in different fillings to your desired taste!

Cuisine : European Course : Appetizer Skill Level : Novice
Prep : 100 mins Cook : 10 mins Ready in : 110 mins Serves : 4


INGREDIENTS:

  • 1 large or 2 small Potatoes, peeled, cooked and mashed well
  • 3 tbsp Butter
  • 4 tbsp Flour
  • ½ – ¾ c Milk
  • Lemon juice
  • Salt and pepper
  • A few sprigs thyme, picked
  • To taste: additions such as chopped ham, cubed cheese, diced olives, roasted pepper, etc.
  • ½ c Flour
  • ½ c Breadcrumbs
  • 1 Egg, beaten with a little water
  • Enough vegetable oil for deep frying

DIRECTIONS:

  1. Melt the butter in a small pot and add flour. Stir to form a paste and cook for a minute. Add the milk little by little, stirring all the while, until fully incorporated. Cook over medium heat until thickened.
  2. In a medium bowl, add white sauce to mashed potato and mix well to combine. Add some lemon juice, salt, pepper and thyme and stir. Add chosen additions, mix, taste and adjust seasoning.
  3. Refrigerate about 1 hour, until firm. Divide cooled mixture into heaped tablespoon portions. Roll each portion into a cylinder shape.
  4. Place ½ c flour, breadcrumbs and egg in a bowl each. Roll each cylinder first in flour, then egg, then breadcrumbs, and place on a tray or plate. Refrigerate 15-30 minutes to set.
  5. Pour oil in a pot, enough to go about halfway up the side of the pot. When oil is hot and shimmering, fry crumbed cylinders in batches until golden brown and crispy. Drain on paper towel and serve right away.
Posted in

Braised Pork Belly, Handmade Egg Noodles, Kimchi

< Back to Recipe Listings

Braised Pork Belly, Handmade Egg Noodles, Kimchi

by Aurdra Morice

A well-loved dish in Asia, braised pork belly is succulent, tender and oh-so-satisfying. Try Chef Audra Morrice’s take on incorporating the pork belly with handmade egg noodles and kimchi! This is an indulgent dish, but definitely worth the treat!

Cuisine : Asian Course : Main Skill Level : Novice
Prep : 30 mins Cook : 35 mins Ready in : 65 mins Serves : 4


INGREDIENTS:

    • 400g Pork belly, cleaned and trimmed
    • Braising Stock
    • 2 tbsp Vegetable oil
    • 1 tsp Black peppercorns
    • 2 Baby leeks, or 1 medium leek, washed and trimmed
    • 4 sprigs Spring onion, washed, root discarded
    • 1½ cups Beef stock
    • ½ cup Chicken stock
    • ¼ cup Light soy
    • 2-3 tbsp Black vinegar

    Boiled Eggs

    • 2 Free-range eggs, room temperature

    Egg Noodles

    • 200g “00” flour
    • 3 Egg yolks
    • 1 Egg
    • Pinch of salt
    • 1 tbsp Olive oil

    To serve:

    • 150g Kimchi
    • 2 sprigs Spring onion, darker green leaves only, thinly sliced
    • Shiso leaves, for garnish (optional)

DIRECTIONS:

  1. Start with the braising stock by heating the oil in a pressure cooker over a medium high heat. Add the peppercorns, leeks and spring onion and cook for 2 mins. Pour in both stocks, soy sauce and black vinegar and bring to the boil.
Posted in

Lemon Meringue Tart

< Back to Recipe Listings

Lemon Meringue Tart

By Mimi Wahadi

A crispy base filled with tangy citrus lemon curd and topped with fluffy meringue makes this a tart to die for!

Cuisine : Baking Course : Dessert Skill Level : Novice
Prep : 60 mins Cook : 40 mins
Ready in : 100 mins Serves : 6


INGREDIENTS:

  • 50g Butter (Sable Dough)
  • 420g Flour (Sable Dough)
  • 160g Icing sugar (Sable Dough)
  • 50g Almond Ground (Sable Dough)
  • 5g Salt (Sable Dough)
  • 85g Whole Eggs (approx 2 no) (Sable Dough)
  • 4 Lemons Juice (Lemon Curd)
  • 175g Sugar (Lemon Curd)
  • 4 Whole eggs (Lemon Curd)
  • 15g Corn flour (Lemon Curd)
  • 2 Lemon zest (Lemon Curd)
  • 110g Butter (Lemon Curd)
  • 200g Egg whites (Meringue)
  • 400g Sugar (Meringue)

DIRECTIONS:

Sable Dough

  1. Cut the butter into smaller cubes
  2. Mix butter, flour, icing sugar, almond ground and salt in the mixing bowl.
  3. Use a paddle beater and mix all. Add eggs. Do not over work the dough.
  4. When mixture forms dough like consistency, wrap in a cling film and chill at least half hour before use.
  5. Line tart moulds and bake at 160° for about 30-40 minutes.

Lemon Curd

  1. Warm up lemon juice and sugar gently in a pot.
  2. Whisk the whole eggs and corn flour together and sift.
  3. Add lemon zest into the lemon juice mixture and allow it to boil.
  4. When the mixture boils and forms a thick consistency, lower down the heat and whisk in the butter cubes.
  5. Chill before use.

Meringue 

  1. Boil the sugar to 116°c.
  2. Add to the egg white; whisk till the egg white and sugar forms a thick stable meringue.
  3. Ready to be piped.
Posted in

Hello Kitty Pan with Red Bean Filling

< Back to Recipe Listings

Hello Kitty Pan with Red Bean Filling

by Trish Yee

This Hello Kitty-inspired Pan with Red Bean Filling is a great way to get the kids baking! These buns are soft, fluffy and the Azuki Bean Paste adds a sweet flavour. If you prefer a smoother Azuki filling, try mashing it with a fork before adding it into the buns!

Cuisine : Baking Course : Dessert Skill Level : Novice
Prep : 95 mins Cook : 8 mins Ready in : 103 mins Serves : 2-4


INGREDIENTS:

  • Basic Bread Dough
    • 200g Bread flour
    • 50g Cake flour
    • 110g Milk
    • 45g Sugar
    • 8g Milk powder
    • 7g Yeast
    • 1 Egg
    • 30g Olive oil
    • ¼ tsp Salt
    • 5g Bread improver

    Azuki Bean Paste

    • 1 cup Azuki beans
    • 5 cups Water
    • ¼ tsp Salt
    • ¼ tsp Sugar

DIRECTIONS:

          For the Basic Bread Dough

  1. Mix yeast and egg in a separate bowl. In a mixing bowl, add bread flour, sugar, milk powder, bread improver and salt. Add in eggs and yeast at the side.

  2. Using a kitchen machine, insert the dough attachment. Mix the mixture using low speed. Pour in milk and oil and beat for 6 mins till it forms into a ball.

  3. Cling wrap and set aside for 45 mins to proof.

  4. Divide the dough into 10 pieces and shape dough into balls. Slightly flatten and wrap it with fillings.

  5. Leave it aside to proof for 30 mins and bake for 8 mins at 200°C.

  6. Remove from oven and let it cool before decorating.

    For the Azuki Bean Paste

  7. Soak azuki beans overnight (8-12 hours). Rinse azuki beans and drain excess water in colander.

  8. Put washed azuki beans in the pot and pour water till 1-2 inch above azuki beans. Turn the heat on high.

  9. When boiling, turn off heat and cover with lid. Let it stand for 5 mins. Throw away water and put the azuki beans into a sieve.

  10. Put the azuki beans back in the pot. Add enough water just to cover the beans and turn the heat on high. Once boiling, turn down the heat to medium-low and keep it simmering.

  11. Once in a while push the azuki beans under the water with a slotted spoon. Water will evaporate – keep adding water to cover just above the beans. If you put too much water, the beans will move and break.

  12. Turn up the heat to high and add sugar in 3 separate times. Stir constantly.

  13. Pour into a container to cool down. Do not leave it in the pot. Cover with plastic wrap and keep in the fridge to store after it cools.


Posted in

Rainbow Chiffon Cake

< Back to Recipe Listings

Rainbow Chiffon Cake

by Philia Ng

Brighten up your day with this colourful Rainbow Chiffon Cake by Chef Philia Ng! This recipe is light, fluffy and simple-to-make!

Cuisine : Baking Course : Dessert Skill Level : Novice
Prep : 35 mins Cook : 45 mins Ready in : 80 mins Serves : 6-8


INGREDIENTS:

  • Group A
  • 85g Egg Yolks
  • 30g Castor Sugar
  • Group B
  • 65g Sunflower Oil
  • 72g Water/ Full Cream Milk
  • 1 tsp Vanilla Paste
  • Group C
  • 102g Cake Flour
  • Group D
  • 285g Egg Whites
  • 78g Castor Sugar

DIRECTIONS:

  1. Whisk group A (Egg Yolks, Castor Sugar) until whitish and fluffy.
  2. Add in group B (Sunflower Oil, Water/full cream milk, Vanilla Paste) and mix well.
  3. Sift in group C (Cake Flour) and fold well. Divide into 5 portions of 69g into pink, yellow, green, blue and purple.
  4. Whisk group D (Egg whites, Castor Sugar) until stiff and glossy looking.
  5. Whisk group D until stiff and glossy looking. Divide into 5 portions at 71g to the divided coloured portions.
  6. Ladle pink, yellow, green, blue and purple batter gently into the chiffon tin.
  7. Bake at 160 degree Celsius non fan for 45 mins.
  8. Invert the cake immediately on a height of 8cm until cooled.
Posted in

Baked Organic Pumpkin Gnocchi

< Back to Recipe Listings

Baked Organic Pumpkin Gnocchi

by Daniele Sarno

Indulge yourself in this delicious yet healthy organic pumpkin gnocchi without any guilt!

Cuisine : European Course : Appetizer Skill Level : Novice
Prep : 50 mins Cook : 20 mins Ready in : 70 mins Serves : 4


INGREDIENTS:

  • ½ kg Organic pumpkin or butternut squash
  • 1 no. Onion
  • 1 clove Garlic
  • ½ no. Tomatoes, skinned
  • A few leaves of Basil
  • Cold pressed extra virgin olive oil
  • 80g Unbleached white flour (you may need more or less depending on how wet your pumpkin is)
  • 50g Grated Italian Parmesan cheese
  • Toasted organic pumpkin seeds


DIRECTIONS:

  1. Peel the squash, remove the seeds and cut into 2 cm (1 inch) cubes.
  2. In a heavy-bottomed pan, begin to stir-fry the squash in a good splash of olive oil. Add salt and pepper.
  3. Peel and chop the onions and garlic.
  4. When the squash has softened, add the onions and garlic to the pan and continue to fry for a few more minutes. Turn off the heat when the onion begins to brown.
  5. In a saucepan, combine a splash of olive oil, the tomatoes and the torn basil leaves.
  6. Cook on a low flame for 10 minutes.
  7. Transfer the squash mixture to an appropriate container and use a hand-blender to process. Return the mixture to the pan.
  8. Heat the mixture. Begin adding flour to it, little by little, stirring constantly.
  9. When the mixture is considerably thicker but still creamy (stiff mashed potato consistency), stop adding flour, turn off the heat and allow cooling a little.
  10. Pour the tomato sauce into a large shallow ovenproof dish.
  11. With 2 spoons, make walnut-sized balls of squash mixture and place in the sauce. Sprinkle with Parmesan.
  12. Cook for 15-20 minutes on 180°C/350°F, until the cheese is browned.
Posted in

Coffee Rubbed Pork Loin with Watermelon Rind Relish

< Back to Recipe Listings

Coffee Rubbed Pork Loin with Watermelon Rind Relish

Don’t toss out your watermelon rinds just yet! They make for an excellent relish that absorbs the dressing perfectly. The ground coffee beans infuse the pork with its rich, bittersweet notes and goes perfectly with the pork loins.

Cuisine : Fusion Course : Main Skill Level : Novice
Prep : 40 mins Cook : 80 mins Ready in : 120 mins Serves : 2


INGREDIENTS:

  • For the Pork
    • 1 tbsp Very finely ground coffee beans
    • 2 tsp Packed light brown sugar
    • 1 tsp Chili powder
    • Salt
    • 2 tbsp Olive oil
    • 400g Pork loin, trimmed

    For the Relish

    • ¼ Watermelon
    • 1 Orange
    • ½ cup Packed light brown sugar
    • ¼ cup Apple cide vinegar
    • 1 Medium onion, thinly sliced
    • 2 Red chillies, finely chopped (with ribs and seeds)
    • Salt

DIRECTIONS:

          For the Pork

  1. In a small bowl, combine the coffee, brown sugar, chili powder, and 2 tsp salt. Add the olive oil and mix well. Rub the mixture evenly over the pork and set aside.

  2. Preheat the oven (grill function) at 180ºC.

  3. Sear the pork loin on all sides on a very hot frying pan. Move the loin into the oven and continue cooking for another 8 mins. Check the internal temperature it should reach 60ºC to 63ºC.

  4. Transfer to a cutting board, and let rest for about 10 mins.

  5. Slice the pork and serve with the watermelon rind relish.

    For the Relish

  6. Cut the flesh away from the watermelon rind. Cut enough of the flesh into ¼-inch dice to yield ½ cup (reserve the rest for another use). Cut the rind into ¼-inch dice; you should have about 1½ cups.

  7. Slice the ends off one of the orange. Stand the orange on one cut end and cut off the peel and white pith to expose the flesh. Cut the orange segments from the membrane, cut each segment into 3 pieces, and put them in a small bowl. Squeeze the juice from the membrane into the bowl.

  8. In a 3-quart saucepan, combine ½ cup water with the watermelon flesh and rind, orange segments and juice, brown sugar, vinegar, onion, chilli, and ¼ tsp. salt. Bring to a boil over medium-high heat, stirring occasionally, until the sugar dissolves, about 4 minutes. Reduce the heat to low and simmer, stirring occasionally, until the rind is translucent and the mixture thickens, about 40 minutes. Season to taste with salt, and let cool to room temperature.

Posted in

Thai Pandan Chicken

< Back to Recipe Listings

Thai Pandan Chicken

by Trish Yee

Savour this aromatic Thai Pandan Chicken which is tender and packed with flavour! It is marinated and fried to perfection!

Cuisine : Asian Course : Appetizer Skill Level : Novice
Prep : 70 mins Cook : 10 mins Ready in : 80 mins Serves : 4-6


INGREDIENTS:

  • 200g Chicken Thigh
  • 1tbsp Oyster Sauce
  • 1tbsp Soy Sauce
  • 1tbsp Sugar
  • 1tsp Pepper
  • 1tbsp Sesame Oil
  • 1/2 tbsp Coriander Root
  • 1/2 tbsp Minced Garlic
  • Pandan Leaves, cleaned and ends trimmed

DIRECTIONS:

  1. Cut chicken thigh into 1 inch pieces.
  2. Marinate chicken with all ingredients. Set aside for 1-hour.
  3. Wrap the marinated chicken with pandan leaves.
  4. Put the chicken fried in medium heat oil. Drain dry and serve.
Posted in

Assam Fish Curry

< Back to Recipe Listings

Assam Fish Curry

by Eric Low

Nothing packs a punch like a fiery bowl of creamy Assam Fish Curry. This recipe features lemongrass, tamarind and fresh pineapples for the perfect blend of sweet, tangy and spicy. Try it now!  

Cuisine : Asian Course : Main Skill Level : Novice
Prep : 30 mins Cook : 40 mins Ready in : 70 mins Serves : 2


INGREDIENTS:

  • For the Spice Paste
    • 200g Shallots
    • 90g Lemongrass
    • 80g Galangal
    • 60g Garlic
    • 40g Ginger
    • 1 tbsp Turmeric powder
    • 20g Belachan paste
    • 50g Buah keras (candlenuts)

    For the Curry

    • 6 tbsp Oil
    • 40g Spice paste from above (rempah)
    • 30g Chili paste (chili boh)
    • 1 tbsp Curry powder
    • 1 tsp Mustard seeds
    • 1 tsp Tomato paste
    • 250ml Coconut milk
    • 80g Assam (tamarind) paste
    • 250ml Water
    • 2 sprigs Curry leaves
    • 1 tsp Salt
    • ½ tsp MSG
    • Sugar to taste

    Assembly

    • 300g Fish fillet, cut into bite sized pieces. (Snapper, seabass, ikan batang, premium Sutchi, stingray) OR onion, cut into wedges
    • ½ no Eggplant, cut into wedges
    • ½ no Ladies fingers, sliced thickly
    • 2 pcs Tomatoes, cut into wedges
    • 1 no Fresh pineapples
    • 80g Tau pok, cut into smaller squares
    • 2 pcs Coriander leaves

DIRECTIONS:

  1. Blend all ingredients for spice paste together. Reserve desired amount and freeze the rest of the spice paste till the next use.
  2. Heat oil, sauté garlic and spice paste till fragrant. Add the chili paste and cook for another 2 mins.
  3. Mix in the curry powder and mustard seeds; fry the paste for another minute before adding in tomato paste. Cook paste for another 2 mins.
  4. Pour in coconut and evaporated milk. Mix the assam paste with water and strain. Add the liquid to the spice paste mixture together with the curry leaves.
  5. Bring curry to boil and simmer for 20 mins. Add the fish fillets and tau pok, simmer till ingredients are cooked. Pre blanched the egg plants and ladies fingers in hot oil, add to the curry with the tomatoes and pineapples. Adjust taste with salt and MSG, add sugar to taste.
  6. Serve curry garnished with coriander leaves.
Posted in