Essential Grilling Tools for the Perfect Cook-Out
A barbecue party is a convenient and fun way of hosting a gathering. To ensure things go smoothly, it’s always good to be prepared! Specialised grilling tools that can withstand constant close contact to high heat should definitely be on your checklist. Ideally, these tools have long handles so you can avoid a situation of overheated food or risked getting burnt.
Here is a rundown of must-haves for your ultimate barbeque cook-out:
1) Tongs
A good pair of tongs ensures you have good grip on your food. It should also be easy to squeeze and bounce back quickly. Have at least two tongs — one for moving charcoal or adjusting the hot grill grates and another for handling food items. Tongs with scalloped edges and non-slip rubber handles are ideal.
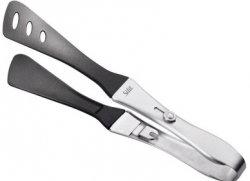
2) Spatula
A good spatula for grilling should have a deep offset handle that allows you to slip food under easily and keeps delicate food like fish from being damaged in the process. Silicone and metal spatulas are recommended for this purpose as they are heat-resistant and sturdy enough to lift heavier food items. Get one with a large blade so that fish fillets can fit comfortably and be flipped over easily.
3) Skewer
Skewers comes in either metal or bamboo versions. If you opt for metal skewers, choose a flat blade design as it will not spin when you flip the skewer. Make sure your skewers come with heat-resistant handles if you do not intend to get mittens or hot pads for picking the skewers up. For the best convenience, buy disposable bamboo skewers with various lengths packed in 50s or 100s.
4) Brushes
Brushes are handy for oiling the grill surface or flavouring grilled meats. It is good to use a specific one for a single purpose. Using the same brush will dilute the intended flavour of the marinades. A typical brush is made from boar or plastic bristles which can potentially trap bacteria as they cannot be cleaned in the dishwasher and manual washing might not be thorough enough. Newer and more modern brushes today are made from dishwasher-safe silicone and are more importantly, heat-resistant.
5) Mittens/Gloves
For better heat protection, wear a glove or mitten. Not all kitchen gloves are suitable for a hot grill. Mittens made of cloth or suede has to be thick and heat-resistant certified. Fire-retardant fabrics make better choices since there would be actual contact with fire. Silicone gloves are ideal as they are dishwasher safe and will not catch fire.
6) Instant-read thermometer
The difference between a perfectly cooked piece of meat and a stomach-ache can be a mere few degrees. Cook beef and lamb to at least 62 °C; pork at least 72 °C and poultry at least 75 °C. With an instant-read thermometer, every piece of meat leaving your grill can be of perfect doneness. Insert your thermometer into the thickest part of the meat for accuracy. Check your meat near the end of the recommended cooking time to avoid overcooking. Always remove your meat from the grill before it reaches the desired doneness as the meat will continue to cook after it is removed from the flame.
Silit works on the fusion of innovations, function, exceptional design and uncompromising commitment to excellent workmanship, reliability and durability like no other manufacturer.