Fruit Tartlets with Almond Filling

< Back to Recipe Listings

Fruit Tartlets with Almond Filling

by Susanne Despature

These colourful and jewel-like fruit tartlets you might see in traditional French bakeries are always an eye-catcher. Filled with almond cream and a hint of bitter almond, everyone loves them! And, good news: they are deceptively easy to prepare! These are perfect for a summer afternoon tea with friends, when soft fruits and berries are plentiful and at their best. Don’t hesitate to prepare the tartlets one day before your tea – the almond filling will set and the taste is even better!

Cuisine : Baking Course : Dessert Skill Level : Novice
Prep : 30 mins Cook : 20 mins Ready in : 60 mins Serves : 12


INGREDIENTS:

    • 150g Pâte sablée sucrée*
    • 70g White almond powder
    • 70g Unsalted butter
    • 90g Sugar
    • 2 Eggs
    • ¼ tsp Bitter almond extract
    • 1 tbsp Plain flour
    • 100g Heavy cream 35 %
    • 200g Fresh berries & fruits

    *For the Pâte sablée (French term for a delicate cookie-like crust)

    • 125g Unsalted butter
    • 80g Icing sugar
    • ½ tsp Vanilla flavour
    • 1 egg, 60g
    • 200g Plain flour
    • 40g White almond powder
    • ½ tsp Salt

DIRECTIONS:

  1. Preheat oven at 200°C.
  2. Roll out the pastry on lightly floured surface, 3 mm thick and cut 12 rounds of pastry about 10 cm in diameter.
  3. Line French tartlette pan with rounds of pastry, trimming away any excess using a rolling pin.
  4. Prepare almond filling : in a bowl of your stand mixer, whisk soft butter with sugar, almond powder and bitter almond extract until very light and fluffy – add eggs little by little, then flour and cream in a steady stream and continue to whisk until it doubled in volume.
  5. Spread 1 tablespoon almond filling on the bottom of the tartlet mould (you can do a second tray with the remaining filling).
  6. Bake in the lowest part of the preheated oven for 20 or until golden brown.
  7. Take tartlets out of the pan and let them cool out on a wire rack.
  8. Decorate your almond tartlets with colour berries, kiwi or grapes.

    *For the Pâte sablée

  9. In a stand mixer, mix butter and icing sugar using a flat beater, until creamy.

  10. Add vanilla flavour, salt and egg. Mix well on medium speed.

  11. Sift the flour and almond powder into butter/egg cream, then mix just until the dough comes together.

  12. Remove dough from the mixer, pat into a rectangle and cover in cling wrap. Refrigerate for at least one night before using.

Posted in

Cream Cheese Brownie

< Back to Recipe Listings

Cream Cheese Brownie

by Philia Ng

Learn to make these deliciously healthy Air Fried Seaweed Chips and snack on it throughout this Chinese New Year without having to worry about the calories!

Cuisine : Baking Course : Dessert Skill Level : Novice
Prep : 30 mins Cook : 35 mins Ready in : 65 mins Serves : 6-8


INGREDIENTS:

  • 250g Cream cheese
  • 80g Icing sugar
  • 1 tsp Vanilla essence
  • 55g Egg
  • 125g Chocolates feves ( 55%- 70%)
  • 125g Golden churn unsalted butter
  • 40g Brown sugar
  • 110g Eggs
  • 65g Plain flour

DIRECTIONS:

  1. Melt chocolate, butter and sugar over a pot of simmering water.
  2. Add in the eggs and mix well.
  3. Add in the flour to combine well.
  4. Cheese Layer: Whip the softened cream cheese and sugar until fluffy than add in the eggs and vanilla essence and combine well
  5. Pour the brownies batter into a pan.
  6. Pour the cheese layer on top and level it well.
  7. Bake at 170 degree Celsius for 35 mins.
  8. Variations: You may omit the cheese layer and topped with marshmallows, any roasted nuts of your choice.
Posted in

Lemon Drizzle Cake

< Back to Recipe Listings

Lemon Drizzle Cake

by Thripti Hinduja

Impress your guests with this toothsome treat for your next tea party. You can whip up this delicious and easy Lemon Drizzle Cake recipe in no time!

Cuisine : Baking Course : Dessert Skill Level : Novice
Prep : 25 mins Cook : 30 mins Ready in : 55 mins Serves : 6-8


INGREDIENTS:

  • 90 g Unsalted butter
  • 120 g Caster Sugar
  • 1 no Lemon Zest
  • 2 Eggs
  • 50 g Sour Cream
  • 1 tsp Vanilla Extracts
  • 1/8 tsp Salt
  • 70 g Plain Flour
  • 25 g Cake Flour
  • 1/4 tsp Baking Soda
  • 1 no Lemon Juice (Crunchy Glaze)
  • 55 g Granulated Sugar (Crunchy Glaze)

DIRECTIONS:

  1. Cream the butter and the sugar together until light and fluffy.
  2. Add in the eggs one by one until fully incorporated.
  3. Mix the sour cream and the vanilla extract. Do not over beat at this point or the mixture might split.
  4. Sift in the dry ingredients and mix until smooth.
  5. Pour the batter in a 6 or 7″ baking tin lined with parchment paper and greased with a little butter.
  6. Bake at 170 C for 25-30 minutes or until a skewer inserted comes out clean.
  7. As soon as the cake is out of the oven, prick it all over with a skewer or tooth pick.
  8. Mix the lemon juice with the granulated sugar for a minute and then brush it all over the
Posted in

Classic Chocolate Chip Cookies

< Back to Recipe Listings

Classic Chocolate Chip Cookies

by Philia Ng

Who can resist cookies especially so when they taste so much like those from popular cookie shops? Now you can make them at home, hand-made from scratch – they are a breeze to make! These cookies are good for a couple of weeks in an air-tight container and you can even sandwich them with vanilla ice cream anytime you want a delicious treat!

Cuisine : Baking Course : Dessert Skill Level : Novice
Prep : 10 mins Cook : 20 mins Ready in : 30 mins Serves : 80pcs


INGREDIENTS:

  • 200g Unsalted Butter
  • 150g Castor Sugar
  • 150g Light Brown Sugar
  • 3 Eggs
  • 390g Plain Flour
  • 1¼ tsp Baking Soda
  • 250g Mini Chocolate Chips

DIRECTIONS:

  1. Cream the softened butter and sugar together until just combined and not fluffy.
  2. Add in the eggs and mix well.
  3. Add in the plain flour and baking soda.
  4. Lastly, add in the chocolate chips and mix well.
  5. Using the Nordic Ware Cookie Dropper, scoop onto the baking tray and space out evenly and bake it at fan mode oven at 180° for 20 min or until golden brown.
Posted in

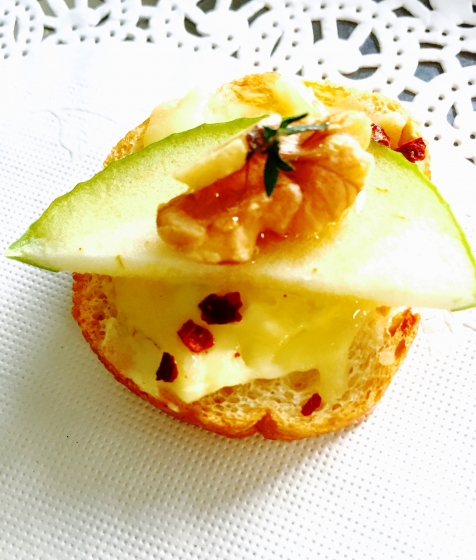
Apple and Cheese Crostini

< Back to Recipe Listings

Apple and Cheese Crostini

by Liza Kassim

Try this elegant and low-fat party appetizer for this Christmas dinner! The perfect combination of cheese and apple with an extra crunch from the toasted walnut!

Cuisine : European Course : Appetizer Skill Level : Novice
Prep : 20 mins Cook : 10 mins Ready in : 30 mins Serves : 8


INGREDIENTS:

  • 1 Granny smith apples, sliced ¼ inch thick
  • 3 tbsp Cream Cheese (original)
  • 2 tsp Fresh thyme
  • 4 tbsp Shredded cheddar
  • 4 pcs Toasted walnut (split into halves)
  • 1 tsp Honey
  • Baguette, cut into ¼ nch thick slices (8 pcs)
  • 2 tsp Olive oil
  • A pinch of salt

DIRECTIONS:

  1. Pre-heat oven to 200 deg F.
  2. Slice apples and set it aside in a bowl with water and a bit of salt. Set aside.
  3. Slice baguette into ¼ inch thickness.
  4. Arrange on a sheet tray.
  5. Drizzle with a little olive oil and sprinkle salt.
  6. Bake baguette till slightly crispy about 5 to 7 mins.
  7. Carefully, remove the baked crostini and leave it to cool slightly.
  8. In a pan, toast walnuts till golden brown. Remove and set aside.
  9. Mix fresh thyme and cream cheese and pinch of salt.
  10. Scoop a small spoonful of cream cheese and spread on each baguette.
  11. Next, add shredded cheddar cheese.
  12. Bake till cheese melts, careful not to burn them.
  13. Carefully remove from oven.
  14. Drain all water from the apples.
  15. Immediately arrange sliced apple pressing it slightly on the warm cheese.
  16. Garnish with toasted walnut, drizzle with honey and sprinkle a bit of fresh thyme.
Posted in

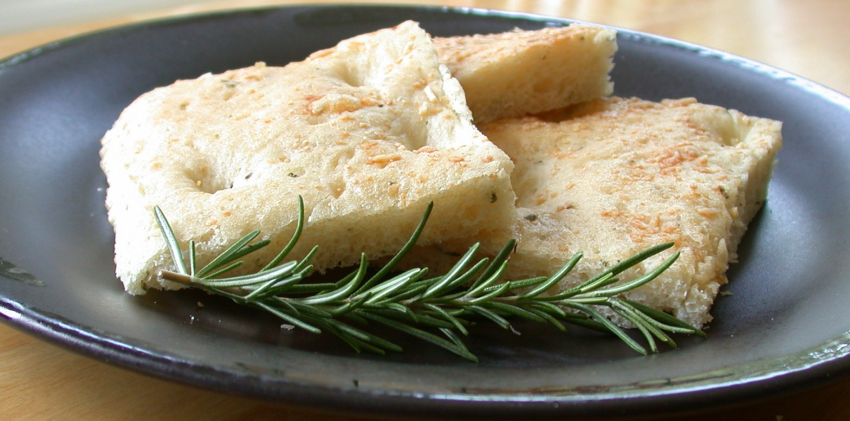
Garlic and Rosemary Focaccia

< Back to Recipe Listings

Garlic and Rosemary Focaccia

by Thripti Hinduja

This beautiful Italian focaccia is packed with garlic and rosemary. It tastes amazing by itself and even better when served alongside spaghetti!

Cuisine : Baking Course : Appetizer Skill Level : Novice
Prep : 60 mins Cook : 20 mins Ready in : 80 mins Serves : 8-10


INGREDIENTS:

  • 11/4 cups of Water (Dough)
  • 2 tbsp Olive Oil (Dough)
  • 1 tsp Sugar (Dough)
  • 11/2 tsp Salt (Dough)
  • 1 tsp Minced Garlic (Dough)
  • 1 tbsp Chopped Rosemary (Dough)
  • 3 cups Bread Flour (Dough)
  • 2 tsp Instant Yeast (Dough)
  • 2 tbsp Olive Oil
  • 1 tbsp Rosemary, chopped
  • 1 tsp Garlic

DIRECTIONS:

  1. Add all dough ingredients except the rosemary in the order mentioned and select the dough cycle.
  2. When the cycle is complete punch down the dough and remove it from the bread pan.
  3. Stretch and push the dough onto a lightly greased shallow baking pan. Cover with a clean tea towel and allow it to rise in a warm place for 30 minutes or until double in height.
  4. With your fingers make indentions I the dough to give is a dimple effect.
  5. Stir the topping ingredients together and brush the top of it.
  6. Bake at 220 C for 15 mins – 20 mins or until the crust is browned. 
Posted in

Home-Smoked Norwegian Salmon with Arugula Salad, Yoghurt and Cucumber Dressing

< Back to Recipe Listings

Home-Smoked Norwegian Salmon with Arugula Salad, Yoghurt and Cucumber Dressing

by Felix Chong

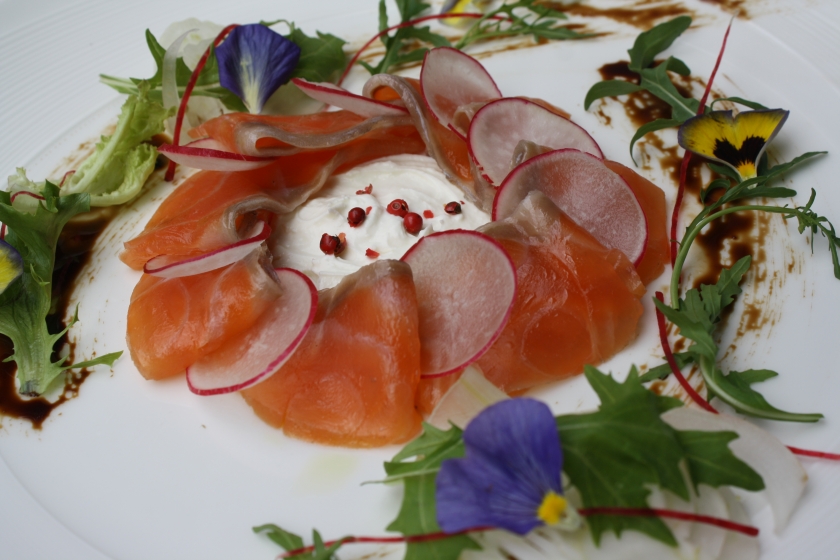
Fancy home-smoked salmon for sandwiches or salad? It’s right at your fingertips now with the Nordic Ware Kettle Smoker where everything is possible! Don’t worry about getting your kitchen all smoky because the Smoker will do the job for you. Once you get the hang of smoking your own seafood, meat or even dessert, you will never stop experimenting! You will also be able to create all kinds of smoked flavours that you want to achieve, such as fruity smoke flavour, tea smoke flavour or herbal flavour smoke.. it never ends!

Cuisine : European Course : Appetizer Skill Level : Novice
Prep : 45 mins Cook : 15 mins Ready in : 60 mins Serves : 4


INGREDIENTS:

  • 100g Smoked Oak Chips
  • 250g Salmon
  • 20g Arugula Salad
  • 4 tbsp Plain Yoghurt
  • 1 piece Japanese Cucumber
  • Pinch of Pink Peppercorns (optional)
  • Extra Virgin Oil (enough to drizzle)
  • Pinch of Sea Salt Flakes

DIRECTIONS:

  1. Lightly season the salmon with sea salt for 20 minutes.
  2. Wash off the salt after 20 minutes and pat dry the salmon.
  3. Place the oak chips in the kettle and heat it up.
  4. Once the smoke is out, place 1 cup of ice cubes into it, place the salmon on the round tray that’s with the holes and place it on top of the cold smoke and cover it, allow it to smoke for 15 minutes.
  5. After 15 minutes, remove from the tray and set aside.
  6. Place the yoghurt and chopped cucumber into a mixing bowl and mix well.
  7. Slice the salmon diagonally thinly and place it around the plate.
  8. Toss the arugula salad with sea salt flakes and extra virgin oil and place it around the smoked salmon.
  9. A spoonful of the yoghurt and cucumber dressing in the middle of the dish.
  10. Lightly crush few pieces of pink peppercorn on the dish (optional).
  11. Ready to serve!


Posted in

Nonya Crispy Kueh Bulu

< Back to Recipe Listings

Nonya Crispy Kueh Bulu

by Julie Yee

Bake this delicate Nonya Kueh Bulu for the perfect Chinese New Year snack! It is crispy on the outside and fluffy on the inside!

Cuisine : Asian Course : Dessert Skill Level : Novice
Prep : 20 mins Cook : 10 mins Ready in : 30 mins Serves : 6-10


INGREDIENTS:

  • 5 Egg (320gm)
  • 300gm Sugar
  • 1/2 tsp Vanilla Powder
  • 50gm of Cake Flour with every 180gm of batter

DIRECTIONS:

  1. Preheat oven at 180°C.
  2. Whisk eggs, sugar & vanilla till fluffy.
  3. Fold in 50gm flour with 180gm batter. Place mixture into piping bag.
  4. Heat up empty mould at the stove / oven & grease with melted butter or coconut oil.
  5. Pipe the batter inside and cook over stove for a couple of minutes till bulu expand slightly.
  6. Place in oven for 8-10mins till brown.
  7. Use the satay stick to take out the kueh bulu.
Posted in

Fried Five Spice Pork Rolls (Hokkien Ngoh Hiang)

< Back to Recipe Listings

Fried Five Spice Pork Rolls (Hokkien Ngoh Hiang)

by Julie Yee

Learn to make these deliciously healthy Air Fried Seaweed Chips and snack on it throughout this Chinese New Year without having to worry about the calories!

Cuisine : Asian Course : Appetizer Skill Level : Novice
Prep : 10 mins Cook : 5 mins Ready in : 15 mins Serves : 1 tub


INGREDIENTS:

  • Dried Bean Curd Skin cut into 6 sheets of 18×18cm (As Needed)
  • 1tbsp Egg White
  • Bread Crumbs or Biscuit Crumbs (As Needed)
  • Cooking Oil (As Needed)
  • 1tbsp Corn Flour
  • 150g Minced Pork
  • 150g Prawns, shelled, deveined and minced
  • 1/2 Onion, peeled and chopped
  • 4 Water Chestnuts, peeled and chopped
  • 100g Cabbage, shredded
  • 1/2 Carrot, shredded
  • 1tsp Light Soy Sauce
  • 3 drops Dark Soy Sauce
  • 1 tbsp Oyster Sauce
  • 1/2 tsp Ground White Pepper
  • 1/4 tsp Five-spice Powder
  • 1/8 tsp Salt
  • 1/2 tsp Sugar

DIRECTIONS:

  1. In a large bowl, combine ngoh hiang ingredients and mix well.
  2. Add seasoning and mix well.
  3. Spoon the mixture onto a sheet of bean curd skin. Fold in the two sides and roll up tightly. Repeat until mixture is used up.
  4. Place in steamer and steam for 10mins.
  5. Remove from steamer and coat ngoh hiang with egg white and bread OR biscuit crumbs.
  6. Heat the oil in a pan over medium heat and deep fry ngoh hiang until golden brown.
  7. Remove from heat and drain oil before transferring ngoh hiang to a plate lined with absorbent paper towels. Set aside to cool.
  8. When cool enough to handle, divide the 6 rolls of ngoh hiang into serving portions and serve with chilli sauce and sweet sauce.
Posted in

Roasted Herbed Chicken and Garlic Potatoes with thyme

< Back to Recipe Listings

Roasted Herbed Chicken and Garlic Potatoes with thyme

by Jehanne Ali

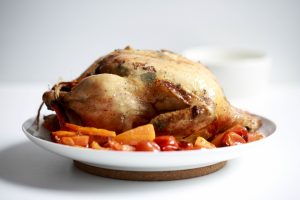
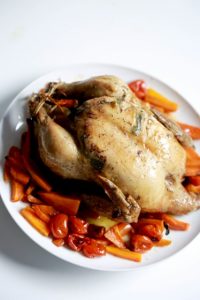
The holiday season is here! And that also means it is time to bring out the roasting tin and prepare family holiday meals.Poultry such as turkey and chicken usually takes centrestage during this time, but causes frantic preparation for plenty of home cooks. Do not fret, they are easy to prepare with few step-by-step preparation and tips, you would be pleasantly surprised!

Cuisine : European Course : Main Skill Level : Novice
Prep : 100 mins Cook : 60 mins Ready in : 160 mins Serves : 4


INGREDIENTS:

  • Roasted Herbed Chicken or Turkey (For 1.5 to 2 kg chicken – double ingredients for an average 4 kg turkey) For Brining
    • 1/3 cup Salt
    • 4 cups Water
    • 1 tbsp Peppercorns
    • 1 Bay Leaf
    • 2 tbsp Sugar
    • Lemon – cut into wedges
    • 1 tbsp Oregano
    • Few sprigs Fresh Basil Leaves
    • Few sprigs Rosemary

    For Marinade

    • 1 tsp Salt
    • 1 tbsp Black Pepper
    • 1 tbsp Olive Oil
    • Few cloves Garlic
    • 50g Butter
    • 1 tsp Honey
    • Few sprigs Rosemary

    Garlic Roasted Potatoes with Thyme

    • 1kg Russet Potatoes, cut into 4
    • 3 cloves Garlic, minced coarsely
    • 2 tbsp Extra Virgin Olive Oil
    • 1 tbsp Dried Thyme
    • 1 tsp Black Pepper

DIRECTIONS:

          Roasted Herbed Chicken or Turkey

  1. In a large pot, simmer all ingredients listed under ‘brining’ for around 15 min.

  2. Let the brine cool slightly before soaking the chicken or turkey in. Cover the pot and refrigerate for 12 hours.

  3. The next day, rinse the bird.

  4. Combine the butter and minced garlic, and insert into the breast pockets, leaving the skin intact.

  5. Rub the whole chicken or turkey with salt, black pepper and honey. Throw in the rosemary and marinade for an hour.

  6. Preheat the oven to 180°C.

  7. Roast the bird for around 1 hour, or an average of 3 hours for turkey.

    Garlic Roasted Potatoes with Thyme

  8. Wash the potatoes and pat dry.

  9. Heat the olive oil in a skillet or casserole.

  10. Saute the garlic until fragrant.

  11. Add in the thyme, potatoes, salt and black pepper.

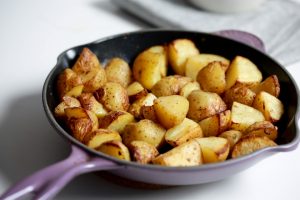
  12. Once the edges start to brown, transfer the skillet to preheated oven of 180°C and roast for 20 min, stirring twice during the process.

Posted in