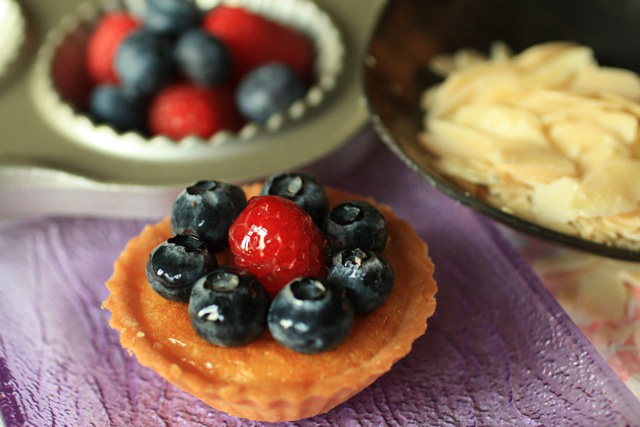
Orange Hokkaido Cupcakes by The Cooking Doctor

< Back to Recipe Listings

Orange Hokkaido Cupcakes by The Cooking Doctor

by Jehanne Ali

Fluffy cottony cupcakes are at your disposal with this easy recipe, which is low in calorie yet tastes so good and versatile. Using a Kitchenaid mixer, whip the egg whites until meringue-like in no time at all, it is after all the one investment that most home bakers fall in love with. Silicone cupcake liners are not only trendy but you are also doing your part for the environment – they are re-usable and each pack comes in gorgeous multiple colours!

Cuisine : Baking Course : Dessert Skill Level : Novice
Prep : 20 mins Cook : 20 mins Ready in : 40 mins Serves : 12-15 large cupcakes


INGREDIENTS:

  • 3 large eggs, separated
  • 60g castor sugar
  • 50ml canola oil
  • 50ml milk
  • 1 tsp vanilla extract
  • ½ orange (juice and rinds)
  • 80g cake flour
  • A pinch of salt
  • ¼ tsp cream of tartar

DIRECTIONS:

  1. Using the stand mixer, whip the egg whites with cream of tartar until soft peaks are formed.
  2. Add half of the sugar and continue beating until stiff peaks meringue are formed.
  3. In a separate bowl, hand whisk the egg yolks with salt, remaining sugar, vanilla and orange rinds until almost pale.
  4. Add 2 tbsp orange juice and milk.
  5. Once combined, add the cake flour and combine well.
  6. Fold in the egg white meringue into the batter and spoon into silicone cupcake liners.
  7. Bake the cakes for 18-20 minutes at preheated oven of 170°C.
  8. Sprinkle with icing sugar on serving and orange wedges.
Posted in

Traditional Italian Risotto with Saffron and Parmesan Cheese (Risotto alla Milanese)

< Back to Recipe Listings

Traditional Italian Risotto with Saffron and Parmesan Cheese (Risotto alla Milanese)

by Daniele Sarno

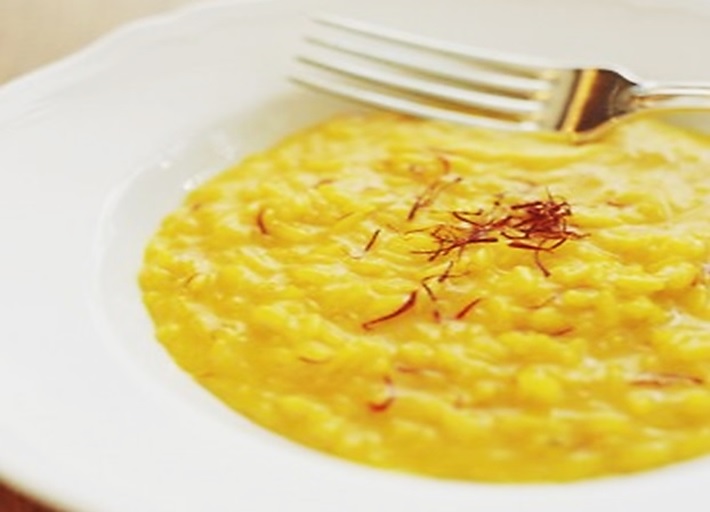
If you are looking for a simple dish, that both tastes and look beautiful, this recipe for Traditional Italian Risotto with Saffron and Parmesan Cheese will not disappoint!

Cuisine : European Course : Main Skill Level : Novice
Prep : 10 mins Cook : 35 mins Ready in : 45 mins Serves : 12


INGREDIENTS:

  • 150 ml Extra-virgin olive oil
  • 1 Diced medium onion
  • 5 gr Saffron threads
  • 3 1/2 Cups chicken stock, hot
  • 1 kg Vialone Nano rice
  • 200 ml White wine
  • 250 g Unsalted butter
  • 250 g Grated Parmigiano-Reggiano

DIRECTIONS:

  1. In a 12 to 14-inch skillet, heat the olive oil over medium heat. Add the onion and cook until softened and translucent but not browned, 8 to 10 minutes.
  2. Meanwhile add the saffron to the stock, stirring to infuse.
  3. Once the onions are translucent add the rice and stir with a wooden spoon until toasted and opaque, 3 to 4 minutes.
  4. Add the wine to the toasting rice, and then add a 4 to 6-ounce ladle of the saffron-infused stock and cook, stirring, until it is absorbed.
  5. Continue adding the stock a ladle at a time, waiting until the liquid is absorbed before adding more
  6. Cook until the rice is tender and creamy and yet still a little al dente, about 15 minutes.
  7. Stir in the butter and cheese until well mixed.
  8.  Portion risotto into 12 warmed serving plates, serving with extra cheese.
Posted in

Panna Cotta with Fruit Compote

< Back to Recipe Listings

Panna Cotta with Fruit Compote

by Jehanne Ali

Panna Cotta is an Italian classic which is simple to make at home with this recipe shared by Chef Jehanne Ali! It tastes amazing when served with fruit compote!

Cuisine : Baking Course : Dessert Skill Level : Novice
Prep : 20 mins Cook : 25 mins Ready in : 45 mins Serves : 6


INGREDIENTS:

  • 100ml Heavy cream
  • 100ml Greek yogurt, cold
  • ½ no. Vanilla pod
  • 2 tbsp Caster sugar (or honey)
  • 1 tbsp Gelatin powder

DIRECTIONS:

  1. Simmer the cream with sugar and vanilla beans until it reaches boiling point.
  2. In a separate bowl, sprinkle the gelatin in a bowl of 3 tbsp cold water.
  3. Using double boiling or microwave, melt the gelatin and pour into the hot cream.
  4. Add the yogurt, and mix well.
  5. Divide into jars and chill until set.
  6. Serve with fruit compote on top.
Posted in

Seared Salmon Fillet with Creamy Garlic Sauce

< Back to Recipe Listings

Seared Salmon Fillet with Creamy Garlic Sauce

by Susanne Despature

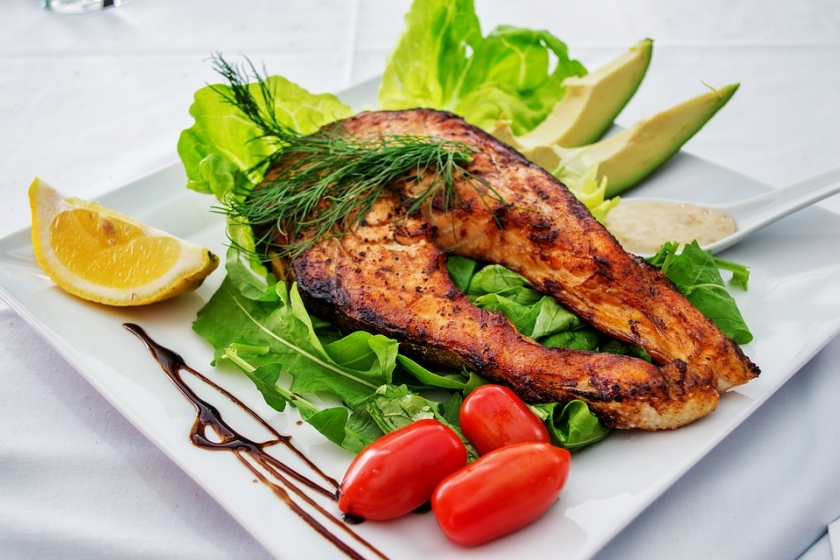
Indulge in this perfectly Seared Salmon Fillet topped with flavoursome Creamy Garlic Sauce that will leave you wanting more!

Cuisine : European Course : Main Skill Level : Novice
Prep : 20 mins Cook : 5 mins Ready in : 25 mins Serves : 4


INGREDIENTS:

  • 60 ml Fish Stock
  • 60 ml Dry White Wine
  • 100 ml Liquid Cream, 35% fat
  • 50 g Cold Butter
  • 2 cloves Garlic, chopped or crushed
  • 3 Ripe Tomatoes, diced
  • 20 g Basil Leaves, finely chopped
  • Salt, Pepper, Lemon Juice
  • 4 Thick Salmon Fillet, 120g per fillet, with skin
  • 1-2 tbsp Grape Seed Oil
  • Salt & Pepper

DIRECTIONS:

  1. Bring fish stock and white wine to the boil in a small saucepan – let reduce to half of the initial quantity. Add cream and continue to simmer for some minutes.
  2. Season to taste with salt, pepper and some drops of lemon juice, a hint of curry powder. Whisk in the cold butter in small amounts until you get a glossy, creamy consistency.
  3. Add garlic, then just before serving, add diced tomatoes and chopped basil.
  4. Heat some oil in a pan and start to pan-fry skin side first on high to medium heat for 2 minutes or until skin is golden & crispy.
  5. Gently turn fish over and reduce heat to low.
  6. Allow fish to cook through on the other side, turn off heat and let rest in pan for 2-3 minutes.
Posted in

Angel Hair Aglio e Olio

< Back to Recipe Listings

Angel Hair Aglio e Olio

by Jehanne Ali

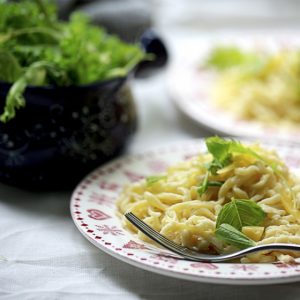
This summer holiday, indulge your kids in a very interesting homely activity – let’s make pasta from scratch! Not only would they be more likely to eat their own creations but it is such a fun activity that they will remember for years to come. Yes there will be mess, but the rewards is better than any shop bought dried pasta. Once you try the fresh version there is no turning back!

Aglio e Olio is nothing fancier than the\ garlic and extra virgin olive oil sauce. Even though it is simple, the flavours combined with basil is always delicious, all the while making sure the fresh pasta is the crowning glory in this recipe.

Cuisine : European Course : Main Skill Level : Novice
Prep : 30 mins Cook : 15 mins Ready in : 45 mins Serves : 4


INGREDIENTS:

  • For the Pasta
    • ¾ cup 00 flour (or plain flour)
    • 1 tbsp semolina
    • 1 large egg
    • 2 egg yolks
    • A pinch of salt
    • 1 tsp extra virgin olive oil

    For the Aglio e Olio Sauce

    • 3 cloves minced garlic
    • ¼ cup extra virgin olive oil
    • ½ cup drained pasta water
    • Few fresh basil leaves
    • 2 inch parmesan, grated
    • 1 tsp chilli flakes (optional)
    • A pinch of salt

DIRECTIONS:

          For the Pasta

  1. Combine the semolina, salt and flour and make a mound.

  2. Add 1 egg yolk and large egg in the middle and drizzle the olive oil.

  3. Whisk gently with a fork, incorporating as much flour in.

  4. Add the second egg yolk if needed to form soft dough, or olive oil if dough is too dry.

  5. Roll out and using pasta machine, form a sheet.

  6. Keep rolling the pasta for few times into thinner sheet, then cut into strips to make tagliatelle, spaghetti or angel hair

  7. Keep the sheet flat if you are making lasagne

  8. Boil the pasta in hot boiling water, slightly salted, until al dente. It takes less than 10 minutes!

    For the Aglio E Olio Sauce

  9. Heat the olive oil in saucepan

  10. Saute the garlic until fragrant, and add the salt and chilli flakes

  11. Add in 2 tbsp of pasta water and toss in the fresh pasta which is cooked al dente

  12. Add in more drained pasta water for ‘wet’ sauce, otherwise serve immediately with sprigs of basil leaves and grated parmesan

Posted in

Chicken Pot Pie

< Back to Recipe Listings

Chicken Pot Pie

by Eric Low

Enjoy this classic Chicken Pot Pie and learn how to make the pie crust and creamy chicken filling from scratch with Chef Trish Yee’s recipe!

Cuisine : European Course : Appetizer Skill Level : Novice
Prep : 30 mins Cook : 55 mins Ready in : 130 mins Serves : 2


INGREDIENTS:

  • 110g Plain flour
  • 1/4 tsp Salt
  • 45g Unsalted butter, chilled and cubed
  • 75g Vegetable shortening, chilled
  • 50-60ml Ice water
  • 2 tbsp Unsalted butter
  • 1/2 medium Yellow onion, diced small
  • 1-2 Potatoes, diced small
  • 1 Carrot, diced small
  • 2 Minced Garlic Cloves
  • 2 tbsp Flour
  • 200ml Chicken broth
  • Frozen peas & corn
  • Coarse salt and ground pepper

DIRECTIONS:

  1. Mix the flour and salt together in a large bowl. Add the butter and shortening.
  2. Using two forks, cut the butter and shortening into the mixture until it resembles coarse meal or you may use food processor to do the work.
  3. Drizzle the cold water in, 1 Tablespoon at a time, and stir with a rubber spatula or wooden spoon after every Tablespoon added. Do not add any more water than you need to. Stop adding water when the dough begins to form large clumps.
  4. Transfer the pie dough to a floured work surface. The dough should come together easily and should not feel overly sticky. Using floured hands, fold the dough into itself until the flour is fully incorporated into the fats. Form it into a ball. Divide dough in half. Wrap each tightly in plastic wrap. Refrigerate for at least 30mins.
  5. Preheat oven to 180°. Place potatoes and carrots in a large saucepan; add water to cover. Bring to a boil. Reduce heat; cook, covered, 8-10 minutes or until vegetables are crisp-tender; drain.
  6. In a large skillet, heat butter over medium-high heat. Add onion; cook and stir until tender. Stir in flour and seasonings until blended. Gradually stir in broth and milk. Bring to a boil, stirring constantly; cook and stir 2 minutes or until thickened. Stir in chicken, peas, corn and potato mixture; remove from heat.
  7. Unroll a pastry sheet into each of two 9-in. pie plates; trim even with rims. Add chicken mixture. Unroll remaining pastry; place over filling. Trim, seal and flute edges. Cut slits in tops.
  8. Bake 35-40 minutes or until crust is lightly browned. Let stand 15 minutes before cutting.
Posted in

5-Herb Sirloin Steak with Glazed Butter Carrots

< Back to Recipe Listings

5-Herb Sirloin Steak with Glazed Butter Carrots

by Jehanne Ali

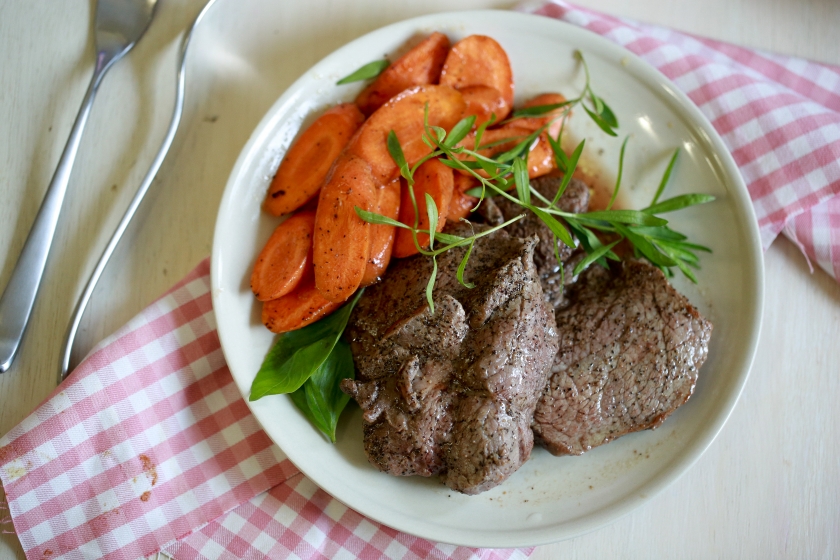
Sous Vide Cooking is a very popular method of cooking at the highest accuracy in most high-end restaurants. With affordable SousVide machines available for us to try, this healthy way of cooking has now found its way into the kitchens of home cooks! This sirloin steak is well-seasoned with 5 herbs, and one of the tastiest recipes that can be tried at home. The steak can be seared on the pan afterwards if you fancy more ‘char’. Serve them with glazed carrots, which are also prepared via the sous vide method of cooking.

Cuisine : European Course : Main Skill Level : Novice
Prep : 15 mins Cook : 45 mins Ready in : 60 mins Serves : 2-4


INGREDIENTS:


  • 2 pieces sirloin steak
  • 1 tsp black pepper
  • ½ tsp salt
  • 1 tsp extra virgin olive oil
  • 1 clove garlic, minced
  • A small bunch of rosemary
  • Few sprigs basil
  • Few sprigs Thyme
  • Small bunch of tarragon
  • Small handful of oregano leaves

For the carrots:

  • 2 medium-sized carrots, sliced
  • 2 tsp butter
  • A pinch of salt

DIRECTIONS:

  1. Set the sous vide temperature at 54°C for rare, 58°C for medium rare, 65°C for medium- well or 70°C for well done steak.
  2. Marinade the steak with remaining ingredients, and leave in the fridge overnight.
  3. The next day, place each steak into the vacuum sealable bag, and immerse in the sous vide until the desired temperature is reached.
  4. Unpack the steak and either blow torch or pan sear both sides until desired char is achieved.
  5. For the carrots, mix the sliced carrots with pinch of salt and butter and place in the sous vide at temperature setting of 65°C.
  6. Unpack and serve with the steaks, and salads.
  7. Note: Cooking time varies • For a 0.5 in / 1.25 cm steak: ~15 minutes • For a 1 in / 2.5 cm steak: ~45 minutes • For a 1.5 in / 3.8 cm steak: ~ 90 minutes • For a 2 in / 5 cm thick steak: ~ 2 hours
Posted in

Roast Pepper and Mascarpone Soup

< Back to Recipe Listings

Roast Pepper and Mascarpone Soup

by Sarab Kapoor

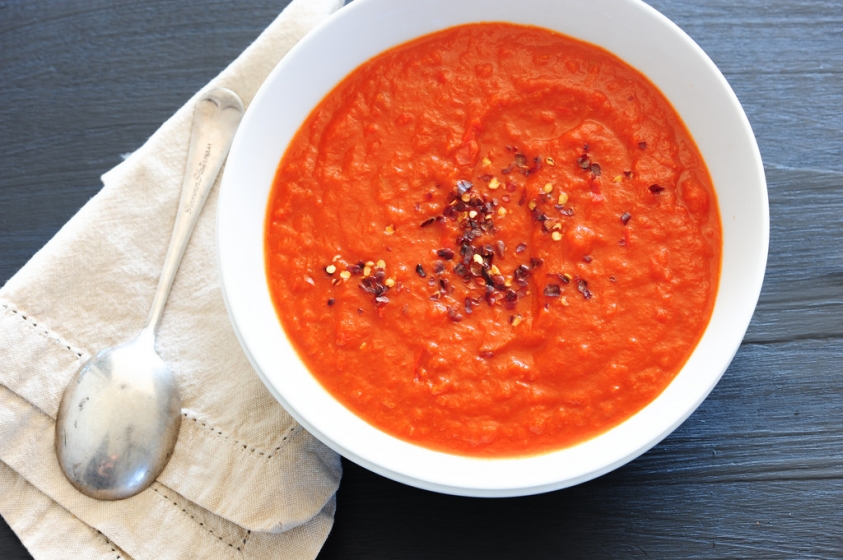
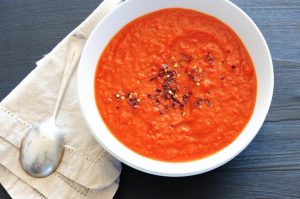
Relish every spoonful of this hearty Roast Pepper and Mascarpone soup that is packed with flavour and simple-to-make!

Cuisine : Mediterranean Course : Appetizer Skill Level : Novice
Prep : 15 mins Cook : 15 mins Ready in : 30 mins Serves : 4-6


INGREDIENTS:

  • 3 (600g) Red Peppers
  • 2 tbsp Olive Oil
  • 1 medium Onion, chopped
  • 2 cloves Garlic, crushed
  • 2 Tomatoes, skinned and chopped
  • 2 cups Vegetable stock or 1 stock cube dissolved in 2 cups of hot water
  • 3 tbsp Mascarpone
  • Handful of Fresh Basil
  • Salt and Black Pepper

DIRECTIONS:

  1. Roast peppers in a hot oven or on a grill pan till charred.
  2. Transfer peppers into a bowl, cover with cling wrap and leave to stand for about 10 minutes.
  3. Heat oil and sauté garlic and onions. Add tomatoes and stock. Simmer for 10 minutes.
  4. Peel peppers, remove seeds and blend. Add them to the soup.
  5. Add mascarpone cheese and basil leaves to the soup and cook till smooth. Process if necessary. Season with salt and pepper. Garnish with basil leaves.
Posted in

Cream Cheese Biscuit Bun

< Back to Recipe Listings

Cream Cheese Biscuit Bun

by Julie Yee

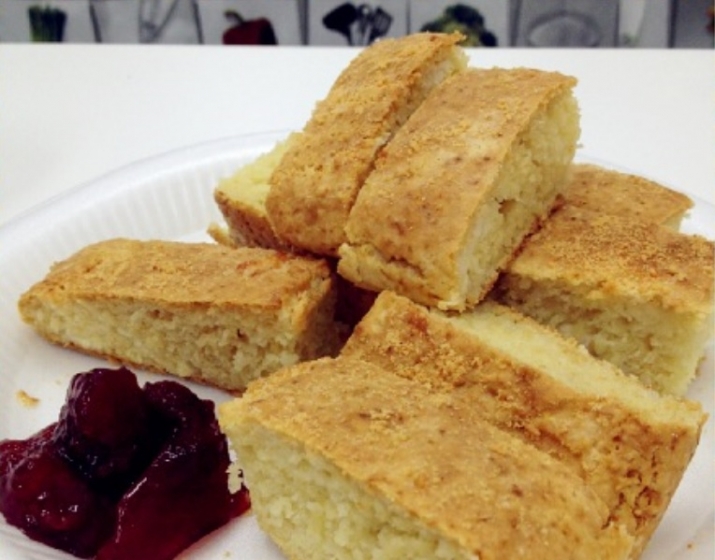
Enjoy the simplicity of this Cream Cheese Biscuit Bun with Cranberry Jam for the perfect snack!

Cuisine : Baking Course : Dessert Skill Level : Novice
Prep : 20 mins Cook : 15 mins Ready in : 35 mins Serves : 16


INGREDIENTS:

  • 90g Bread flour
  • 80g Cake flour
  • 1 tbsp Sugar
  • 1 tbsp Baking powder
  • 5 tsp Salt
  • ¾ tsp Baking soda
  • 130g Buttermilk
  • 60g Cream cheese
  • 30g Salted butter
  • Sprinkling of Parmesan cheese

DIRECTIONS:

  1. Mix all items except the buttermilk in a big bowl to crumb-like texture.
  2. Make a well in the centre and pour in the buttermilk. Knead gently and briefly until dough comes together.
  3. Roll into a rectangle 10cm x 8cm x 2cm thick and cut into 5cm square.
  4. Bake at 220ºC till light brown for 12 -15mins. Serve warm.
Posted in

Florentines

< Back to Recipe Listings

Florentines

by Thripti Hinduja

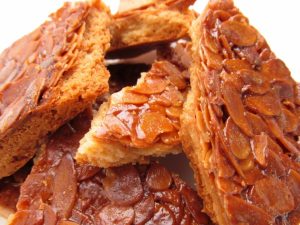
Try making these chewy, luxurious biscuits at home that is worth the calories!

Cuisine : Baking Course : Dessert Skill Level : Novice
Prep : 35 mins Cook : 10 mins Ready in : 45 mins Serves : 1 container


INGREDIENTS:

  • 10 g Butter
  • 50 g Sugar
  • 10 g Liquid Glucose
  • 50 g Whipping Cream
  • 60 g Sliced Almonds
  • 50 g Candied Orange Rind
  • 100 g Chocolate For Coating

DIRECTIONS:

  1. Put the butter, sugar, liquid glucose and the cream in a pan.
  2. Cook the mixture stirring occasionally until it turns golden brown.
  3. Take it off the heat and add in the sliced almonds and the candied orange peel
  4. Divide the mixture into 20 g balls and place them into silicone molds.
  5. Flatten them slightly and bake them in a preheated oven at 180 ºC for 8-10minutes.
  6. Allow to cool, take them out and spread with melted coating chocolate.
  7. Allow the chocolate to set in the refrigerator for about 15 minutes.
  8. Store in an airtight container for a week.
Posted in