Breakfast Sliders

< Back to Recipe Listings

Breakfast Sliders

by Chef Autumn Brown of Bruno Hotplate

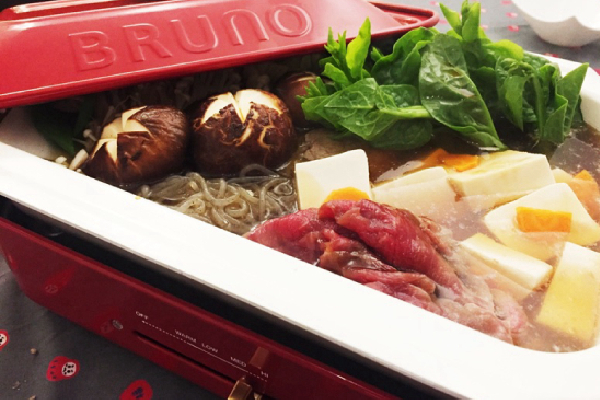
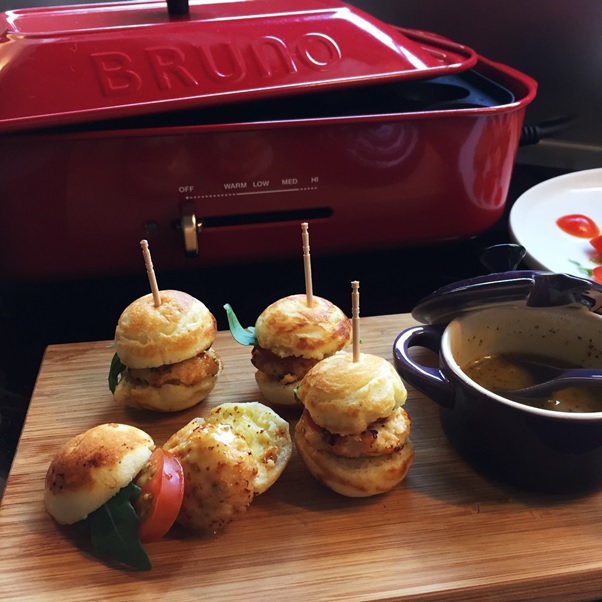
Breakfast sliders just the perfect food to have! This recipe was made using the Bruno Takoyaki Hotplate that makes the job of cooking, easy for you! of Have a quick bite of this dish and head out to start your day!

Cuisine : Asian  Course : Appetizer  Skill Level : Novice

Prep : 20 mins Cook : 25 mins Ready in : 45 mins  Serves : 6 servings


INGREDIENTS             

  • Turkey Patty Mixture
    • 300g Minced Turkey Breast
    • 25g Breadcrumbs
    • 45g Milk
    • 1 clove Garlic, grated
    • 1-2 sprigs Fresh Thyme
    • 1/8 tsp Smoked Paprika
    • 1 tsp Oil
    • Salt (to taste)
    • Ground Black Pepper (to taste)
  • Savoury Fluffy Pancake
    • 180g Self-raising Flour
    • 5g Salt
    • 10g Sugar
    • 1/8 tsp Ground Black Pepper
    • 150g Buttermilk or substitute with 100g Milk
    • 1 tbsp Lemon
    • 100g Milk
    • 1 pc Large Egg
    • 30g Olive Oil
    • 20g Fresh Chives, chiffonade
  • Maple Mustard Sauce
    • 1 tbsp Dijon Mustard
    • 2 tsp Maple Syrup
    • Salt (to taste)
    • Ground Black Pepper (to taste)
  • Others
    • Quail Eggs
    • Cherry Tomatoes slices
    • Baby Spinach / Arugula / Lettuce
    • Grated Gruyere Cheese / Others
    • Toothpicks

DIRECTIONS

Turkey Patty Mixture 

  1. To make turkey patty, mix all ingredients and stir vigorously until sticky. Set aside.
  2. Lightly grease and preheat Bruno Takoyaki Hotplate on low.
  3. Place 1 tsp of turkey mixture each in 6 slots, and flatten.
  4. Place a pinch of grated cheese on the turkey patty and eggs onto a plate.
  5. Once cheese has melted, remove turkey patty and egg onto a plate.

Savoury Fluffy Pancake

  1. Mix self-raising flour, salt, sugar and pepper in a large mixing bowl with a whisk.
  2. In a separate bowl, whisk together buttermilk, milk, egg, olive oil.
  3. Create a well in the flour mixture, gradually pour in the milk mixture, whisk outwards to moisten the flour until it be takes on a thick gloopy consistency.
  4. Transfer into a squeeze bottle, and set aside to rest. (Optional)
  5. Fill the next 12 slots with pancake batter until almost full.
  6. Turn the heat up to low-med.
  7. Flip the pancake slots when bubbles start forming on the surface to make balls.
  8. Remove the pancake balls when they are done, and cut in half to make buns for sliders.

Maple Syrup Mustard

  1. To prepare maple-mustard sauce, mix all ingredients together. Set aside.

Assemble

  1. Crack quail’s eggs into the remaining 6 slots and let it cook.
  2. To assemble mini sliders, stack in in this order – pancake, maple-mustard, turkey patty / quail egg (cheese side up), tomato slice, baby spinach, maple-mustard, pancake.
  3. And poke in toothpick to hold.
  4. Repeat to make the rest.
  5. Serve as a snack or perfect finger food.
  6. Enjoy!

FOOD NOTES

  • Turkey patty mixture can be made in advance and stored in the fridge (up to 48 hours).
  • Turkey patty recipe can also be used to make meatballs, simply place 1 tbsp of mince into each slot of Bruno Takoyaki Hotplate.
  • Flip constantly until meatballs are brown and cooked through.
  • Pancake recipe can be adapted to make them sweet, simply increase sugar to 15g, reduce salt to a pinch, and omit ground black pepper and chives.
Posted in

Drunken Chicken with Shaoxing Wine Granita

< Back to Recipe Listings

Drunken Chicken with Shaoxing Wine Granita

by Chef Eric Low

Traditionally served as a cold appetizer, this Drunken Chicken with Shaoxing Wine Granita is packed with flavours and simple-to-make.

Cuisine : Asian  Course : Appetizer  Skill Level : Novice
Prep : 8h 30 mins Cook : 10 mins Ready in : 8h 40 mins  Serves : 4 servings


INGREDIENTS             

  • 2 whole Boneless Chicken Legs
  • ½ tsp Salt
  • 4 slices Old Ginger
  • 2 stalks Spring Onion

Granita

  • 8-10pcs Ice Cubes
  • 1 tbsp Concentrated Chicken Stock
  • 3 tbsps Shaoxing Huatiao Wine

Garnish

  • Wolfberries, soaked in Shaoxing wine
  • Spring Onions

DIRECTIONS       

  1. On the thicker cuts of the chicken leg, make half slits to level the whole piece of meat. Season chicken with salt and place on a piece of cling wrap.
  2. Place 2 slices of ginger and 1 stalk of spring onion with each piece of chicken. Roll up and tie both ends of the plastic securely.
  3. Double wrap with aluminum foil and transfer to pressure cooker. Fill with water till the rolls are covered. Cover cooker with lid, lock and bring to cooking pressure on the 2nd green ring for 10mins. Remove from heat and release pressure.
  4. Allow chicken to cool completely before chilling overnight in fridge.
  5. Slice the chilled chicken rolls and arrange on serving plate.
  6. In a juicy cup blender, combine ingredients for granita and process until well blended.
  7. Spoon the blended mix on the chicken rolls and serve with wine soaked wolfberries.
Posted in

Deep Fried Prawns with Wasabi Mayo

< Back to Recipe Listings

Deep Fried Prawns with Wasabi Mayo

by Chef Eric Low

Start your meal with a perfectly crisp Deep Fried Prawns served with Wasabi Mayo for a little heat!

Cuisine : Asian  Course : Appetizer  Skill Level : Novice
Prep : 25 mins Cook : 10 mins Ready in : 35 mins  Serves : 1-2 Servings


INGREDIENTS             

  • 6 pcs Large size peeled Prawns
  • 1 tsp Shaoxing Huatiao Win
  • ¼ tsp Salt
  • ½ no Egg White
  • 1 tbsp Potato or Tapioca Starch
  • Extra Potato or Tapioca Starch for Dusting
  • Oil for Deep Frying

Wasabi Mayo

  • 2 tbsp Mayonnaise
  • ½ tsp Wasbi Paste
  • 1 tsp Condensed Milk


Garnish

  • 100g Shredded Lettuce
  • 40g Shredded Red Cabbage
  • 20g Diced Tomatoes
  • Extra Sesame Seeds for Sprinkling

DIRECTIONS

  1. Marinate Prawns with wine and salt. Mix in the egg white and potato starch. Set aside for 15minutes.
  2. Combine all ingredients for wasabi mayo, Set aside. Lace a serving plate with the shredded lettuce and cabbage.
  3. Heat oil in wok, dust prawns with extra potato starch. Deep fry prawns till crispy. Toss with wasabi mayo and transfer to serving plate. Sprinkle with diced tomatoes and sesame seeds, serve immediately.
Posted in

Soy Milk Chawanmushi

< Back to Recipe Listings

Soy Milk Chawanmushi

by Chef Eric Low

With just 4 simple steps, you can enjoy a healthy version of silky smooth Chawanmushi by incorporating soy milk!

Cuisine : Asian  Course : Appetizer  Skill Level : Novice
Prep : 10 mins Cook : 15 mins Ready in : 25 mins  Serves : 1-2 Servings


INGREDIENTS                                          

  • Custard
    • 4 medium Eggs, beaten, strained
    • 1 tbsp Kikkoman Soya Sauce
    • 10g Dashi Stock
    • 300ml Unsweetened Soymilk
  • Condiments
    • 4 slices Japanese Fish Cake
    • 1 pc Boneless Chicken Leg, cut into cubes, pre blanched
    • 4 pcs Shitake Mushrooms
    • 4 pcs Gingko Nuts

DIRECTIONS       

  1. Combine all ingredients for the custard and strain.
  2. Divide the condiments among the steaming cups.
  3. Pour custard over, cover tightly and steam for 15minutes over low fire. (85-95C)
  4. Serve the custard immediately.
Posted in

Tri-Colour Treasures (Hakka Yong Tau Fu)

< Back to Recipe Listings

Tri-Colour Treasures (Hakka Yong Tau Fu)

by Chef Julie

Learn to Hakka’s famous yong tau fu with Chef Julie’s recipe!

Cuisine : Asian  Course : Main  Skill Level : Novice
Prep : 10 mins Cook : 15 mins Ready in : 25 mins  Serves : 1-2 Servings


INGREDIENTS             

  • For the Vegetable
    • 1 Egg Plant/ Bringjal
    • 6 Red/ Green Chilli/ Lady Fingers
    • 1 Yellow/ Red/ Green Capsicum
  • For the Paste Filling
    • 100g Minced Pork
    • 100g Fish/ Squid Paste
    • ½ tsp Salt
    • ½ tsp Sugar
    • 1 tsp Potato Starch
    • A dash of White Pepper
    • A dash of Sesame Oil

DIRECTIONS FOR VEGETABLE  

  1. Butterfly the egg-plant.
  2. De-seed the chilli / lady’s fingers length-wise.
  3. Cut capsicum into 8pcs.
  4. Coat the inside of the vegetables with potato starch.

DIRECTIONS FOR PASTE FILLING         

  1. Mix in the seasonings and add in the minced meat fish pastes.
  2. Stir until mixture is sticky.
  3. Stuff the vegetable with the filling.
  4. Heat pan with some oil and pan fry wish filling facing down for 2 minutes.
  5. Add in 1tbsp water and cover the pan.
  6. Simmer for few minutes.
Posted in

HK Char Siew Chee Cheong Fun

< Back to Recipe Listings

HK Char Siew Chee Cheong Fun

by Julie Yee

You can now enjoy handmade, piping hot Char Siew Chee Cheong Fun from scratch with Chef Julie’s recipe!

Cuisine : Asian  Course : Appetizer  Skill Level : Novice
Prep : 20 mins Cook : 10 mins Ready in : 30 mins  Serves : 2-4 Servings


INGREDIENTS                                          

  • Group 1
    • 160g Rice Flour
    • 2 tbsp Tapioca Flour
    • 1 tbsp Wheat Starch (Tang Mien Fen)
    • 900g Water
    • 1 tbsp Shallot Oil/ Sesame Oil
    • 1 tsp Salt
  • Filling (Mixed Together)
    • 150g Char Siew (diced)/ Prawns (1/2)
    • 1 tsp Corn Flour
    • Pinch of Pepper
    • ½ tsp Sesame Oil
    • 1 stalk of Parsley
  • Gravy Sauce (Stir together)
    • 80ml Light Soya Sauce
    • 120ml Boiling Water
    • 1 tbsp Sugar
    • ½ tsp Chicken/ Dashi Granules

DIRECTIONS

  1. Mix Group 1 ingredients and strain through a sieve.
  2. Prepare a steamer.  Place a white wet cloth onto a rectangle tray (preferably with holes).
  3. Pour in a ladle of batter to form a thin layer on the cloth.
  4. Sprinkle some char siew / prawns onto it.  Steam with high heat for 3-5 minutes.
  5. Brush a little oil on clean table top / flat tray. Removethe cloth and invert the cooked chee cheong fun sheet on it.  Roll up carefully using a scrapper.
  6. Place on serving plate and pour gravy over it.  Sprinkle with shallot crisps and chopped spring onions.  Serve immediately.
Posted in

Kway Pie Tee

< Back to Recipe Listings

Kway Pie Tee

by Charlynn Gwee

Get your guests to fill in the Kway Pie Tee shells with chicken and pine nuts in a do-it-yourself Kway Pie Tee party!

Cuisine : Asian  Course : Appetizer Skill Level : Novice
Prep : 10 mins Cook : 15 mins Ready in : 25 mins  Serves : 12 Mini Shell


INGREDIENTS                                          

  • 2 tbsp Oil
  • 1 tsp Chopped Garlic
  • ½ tbsp Chopped Ginger
  • ½ Diced Onions
  • 250gm Boneless Chicken Leg/ Breast (Diced)
  • ½ small Red Bell Pepper (Diced)
  • 100gm Zucchini (Seeded, diced)
  • 2 tbsp Oyster Sauce
  • 1 tsp Coarse Ground Black Pepper
  • 30gm Pine Nuts (Toasted)
  • Coriander Leaves for Garnish
  • Pie Tee Shells

DIRECTIONS

  1. Heat oil in pan, sauté garlic, ginger and onions till fragrant. Add the chicken and cook for two minutes.
  2. Toss in the bell peppers and zucchini, pour in oyster sauce and sprinkle black pepper over the chicken. Cook for another two minutes.
  3. Add in the pine nuts to the chicken, mix well and fill into pie tee cups as required. Garnish with some coriander leaves.
Posted in

Sukiyaki

< Back to Recipe Listings

Sukiyaki

by Autumn Brown

Loaded with vegetables, mushrooms and well-marbled beef in a sweet and savoury Kanto-Style soy sauce broth with Kansai-Style condiments! This is the dish to make for a heart-warming family gathering.

Cuisine : Asian  Course : Main  Skill Level : Novice
Prep : 10 mins Cook : 15 mins Ready in : 25 mins  Serves : 1-2 Servings


INGREDIENTS             

  • Well-marbled beef sliced for sukiyaki (3mm thick)
  • Preferably a good quality ribeye , short rib or chuckroll
  • Japanese Leak
  • Napa Cabbage
  • Carrot
  • Enoki Mushrooms
  • Fresh Shiitake Mushrooms
  • Firm Tofu
  • Konnyaku Noodles
  • Udon Noodles
  • Freshest Pasteurised Eggs (Optional)
  • Sukiyaki Sauce Kanto-Style, Eastern Japan
    • 1 part Sake
    • 1 part Mirin
    • 1 part Soy Sauce
    • 1 part Kombu Stock
    • ¼ part Brown Sugar
  • Sukiyaki Condiments Kansai-Style, Western Japan
    • Sake
    • Soy Sauce
    • Brown Sugar

DIRECTIONS

Kanto Style

  1. To make Kanto-style sukiyaki sauce, combine all ingredients inside Bruno Nabe Pot and bring to a boil for around 5 minutes to reduce the mixture slightly.
  2. Arrange Japanese cabbage, leek, tofu, mushrooms and simmer for about 3 minutes, then add the thinly sliced beef and udon. Simmer the ingredients for another 3-5 minutes until all ingredients are well-cooked.
  3. To enjoy Kanto-style sukiyaki, dip cooked vegetables and beef in beaten pasteurized egg.
  4. Add more sukiyaki sauce and repeat step 2 to continue cooking.

Kansai Style     

  1. To make Kansai-Style sukiyaki, preheat Bruno Nabe Pot on high.
  2. Place a piece of beef fat, move it around to render its fat. If you don’t have any beef fat, add 1 tsp of oil and spread it around.
  3. Add some brown sugar, and sear sliced beef in the pot. Drizzle sake and soy sauce. Let it sizzle, then flip the beef to cook the other side briefly. Do enjoy the beef by dripping in pasteurized eggs.
  4. In the same pot, arrange cabbage, leef, tofu, mushrooms, konnyaku noodles and sliced beef. Sprinkle brown sugar, drizzle soy sauce and sake. Allow ingredients to simmer and cook.
  5. To enjoy Kansai-style sukiyaki, dip cooked vegetables and beef in beaten pasteurized egg.
  6. Add the end when all ingredients are taken out of the pot, add cooked udon or rice to soak up the flavourful sauce. Add more brown sugar, soy sauce and sake if mixture is too dry.
Posted in

Salted Egg Yolk Cookies

< Back to Recipe Listings

Salted Egg Yolk Cookies

by Charlynn Gwee

Indulge in this melt-in-your-mouth, buttery and crumbly Salted Egg Cookies during your teatime!

Cuisine : Asian  Course : Dessert Skill Level : Novice
Prep : 15 mins Cook : 13-18 mins Ready in : 28-33 mins  Serves : 1-2 Servings


INGREDIENTS                                          

  • 125gm Plain Flour
  • 10gm Corn Flour
  • ½ gm Baking Powder
  • ½ gm Baking Soda
  • 10gm Milk Powder
  • 4 Salted Egg Yolk
  • 85gm Unsalted Butter
  • 2gm Salt
  • 40gm Caster Sugar
  • 1 Egg Yolk
  • Dash of Oil
  • Pinch of Salt
  • Black & White Sesame Seeds (Optional)


DIRECTIONS

  1. Preheat oven to 170C.
  2. Steam salted egg yolk, roughly chop and set it aside to cool.
  3. Cream butter, sugar and salt together till fluffy.
  4. Add in all sifted dry ingredients gradually.
  5. Gradually incorporate chopped egg yolk.
  6. Roll to 5mm thickness and cut out desired shape.
  7. Brush with egg wash and top with black and white sesame.
  8. Bake for 13-18 minutes.
Posted in

Olive Fried Rice

< Back to Recipe Listings

Olive Fried Rice

by Julie Yee

Savour this tasty Olive Fried Rice as you enjoy the health benefits of olives! It helps to boost your iron intake and is good for your heart.

Cuisine : Asian  Course : Main  Skill Level : Novice
Prep : 15 mins Cook : 20 mins Ready in : 35 mins  Serves : 1-2 Servings


INGREDIENTS             

  • ½ tbsp Chopped Garlic
  • ½ tbsp. Big Onions
  • ½ bowl Black Olive
  • ½ cup Capsicum
  • ½ cup Shitake Mushroom
  • 2 no Egg
  • ¼ cup Crabmeat
  • ¼ cup Minced Chicken
  • 1 no Shredded Eggs
  • 250gm Fried Rice *
  • Fried Rice
    • 250gm Cooked Rice
    • 2 tbsp Oil
    • ¾ tbsp. Fish Sauce
    • ½ tsp Sugar

DIRECTIONS

  1. To make the fried rice, heat the oil and cook the rice with fish sauce, sugar and ground pepper.
  2. Heat oil and add in onions and garlic.
  3. Stir in the pineapple cubes.
  4. Add in the fried rice, meat and vegetables.
  5. Add in the pineapple juice and fry under high fire for 2mins. Test the taste and adjust with fish sauce or soya sauce.
  6. If serving with a pineapple shell, place rice inside and cover with foil.
  7. Bake for 10mins at 160°C until hot and fragrant.
  8. Serve with shredded eggs on top.
Posted in