Caramel and Honey Nut Tart

< Back to Recipe Listings

Caramel and Honey Nut Tart

by Thripti Hinduja

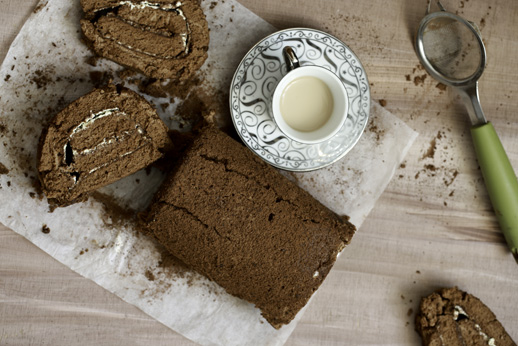
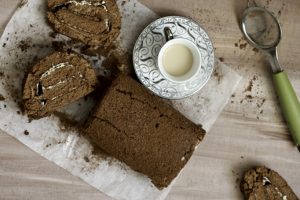
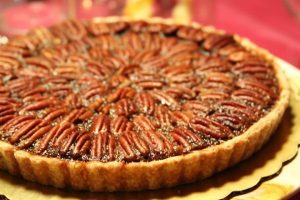
Enjoy the Caramel and Honey Nut tart with a rich caramel honey filling topped with chopped mixed nuts baked in a flaky pastry tart!

Cuisine : Baking Course : Dessert Skill Level : Novice
Prep : 20 mins Cook : 30 mins Ready in : 50 mins Serves : 4-6


INGREDIENTS:

  • 125g Flour
  • 35g Icing sugar
  • 60g Butter(cold)
  • Milk as required
  • 30g Sugar
  • 60g Honey
  • 20g Butter
  • 100g Fresh Cream
  • 140g Mixed nuts (chopped and roasted)

DIRECTIONS:

  1. Stir the flour and the icing sugar together.
  2. Chop up the butter and crumble it into the flour.
  3. Add enough of cold milk to form a dough.
  4. Cling wrap and refrigerate for 20 minutes.
  5. Roll out the dough on a floured surface and line a pie tin with it.
  6. Place a sheet of baking paper over the pastry and fill it with beans or any pie weight.
  7. Bake it in a preheated oven at 180 C for 20 minutes or until evenly browned. Remove the pie weights in between the baking.
  8. Place the sugar and honey in a pan and stir over low heat until the sugar melts. Bring to boil.
  9. Cook the mixture for 2 minutes.
  10. In separate pan heat butter with the cream and the salt until hot. Add it to the sugar mixture and simmer for 2-3 min.
  11. Mix in the nuts and spoon the mixture over the hot pastry.
  12. Return to the oven for 5 – 7 minutes remove and cool. Serve at room temperature.
Posted in

Mocha Roulade

< Back to Recipe Listings

Mocha Roulade

by Jehanne Ali

The Cooking Doctor shares her childhood favourite with us – make these for a perfect afternoon snack along with a cup of tea!

Cuisine : Baking Course : Dessert Skill Level : Novice
Prep : 30 mins Cook : 15 mins Ready in : 45 mins Serves : 4-6


INGREDIENTS:

  • 5 Large eggs, separated
  • 90g Sugar
  • 100g Cake flour
  • 20g Cocoa flour
  • 1 tsp Instant coffee granules
  • ¼ tsp Cream of tartar
  • 50ml Melted butter (or vegetable oil)
  • 50ml Hot milk
  • 1 tsp Vanilla paste
  • ½ tsp Salt

DIRECTIONS:

  1. Whisk the egg whites with cream of tartar and half of the sugar until pale and fluffy.
  2. In a separate bowl, whisk the egg yolks with remaining sugar and vanilla until homogenised.
  3. Mix the coffee granules with hot milk and melted butter.
  4. Sift in the cake flour along with salt and cocoa powder to the batter.
  5. Finally fold in the stiff egg whites.
  6. Pour the batter onto a greased and lined swiss roll pan and bake for 15 mins at 200°C.
  7. Once the cake is cooled, spread some whipping cream and melted chocolate on top.
  8. Roll tightly into a roulade.
Posted in

Matcha Creme Brulee

< Back to Recipe Listings

Matcha Creme Brulee

by Michele Ow

If you are fond of Matcha, you got to try this creamy Matcha Crème Brulee recipe by Chef Michele Ow!

Cuisine : Baking Course : Dessert Skill Level : Novice
Prep : 20 mins Cook : 20 mins Ready in : 160 mins Serves : 6


INGREDIENTS:

  • 2 cups Heavy cream
  • 1 Vanilla bean (or a dash of vanilla paste)
  • 1 cup Castor sugar
  • 1 tsp Matcha powder
  • 6 no Egg yolks

DIRECTIONS:

  1. Whisk eggs yolks with sugar until pale yellow.
  2. Add Matcha into the mixture.
  3. In a saucepan, scald heavy cream with vanilla bean; allow to cool slightly.
  4. Add cooled heavy cream in a thin stream into egg/sugar mix until incorporated.
  5. Pour into 6 ramekins.
  6. Put in a bain marie in oven @160’C for 20 mins.
  7. Allow to set in fridge for at least 2 hours.
  8. Pour vanilla sugar and torch before serving.
Posted in

Marbled Oreo Cheesecake

< Back to Recipe Listings

Marbled Oreo Cheesecake

by Julie Yee

If you love Oreos and cheesecake, than this is the perfect dessert for you! Chef Julie will be sharing the recipe for this ultimate Marbled Oreo Cheesecake

Cuisine : Baking Course : Dessert Skill Level : Novice
Prep : 60 mins Cook : 60 mins Ready in : 120 mins Serves : 12


INGREDIENTS:

  • For the Cheesecake Group 1
    • 400g Cream cheese
    • 150g Castor sugar
    • 1 tsp Lemon juice
    • 20g Plain flour
    • 1 tsp Vanilla essence
    • 4 nos. Egg yolk

    Group 2 (Fold in) 

    • 70g Dairy whipping cream (35%)
    • 3 nos. Egg white
    • 60g Castor sugar
    • 50g *Oreo cookies (¼ size)

    For the Crust

    • 200g Oreo cookies (crushed)
    • 70g Salted butter
    • 5 tsp Honey*

DIRECTIONS:

        For the Cheesecake

  1. Beat cream cheese and lemon juice at slow speed for 5 mins.

  2. Add in sugar slowly until all completed.

  3. Add flour in and mix well.

  4. Pour in the yolk slowly.

  5. Beat egg whites till soft peaks form.

  6. Fold in the whipped cream and egg whites into cream mixture.

  7. Bake in bain marie (hot water bath) at 150°C for about 30 mins then reduce to 130°C for another 30 mins. Leave cake in oven for 10 mins (with oven door open).

    For the Crust

  8. Melt butter and add in all the ingredients.

Posted in

Vanilla Sponge Cake

< Back to Recipe Listings

Vanilla Sponge Cake

by Philia Ng

Learn the best way to bake a classic vanilla sponge cake with Chef Philia’s simple yet delicious recipe!

Cuisine : Baking Course : Dessert Skill Level : Novice
Prep : 20 mins Cook : 35 mins Ready in : 55 mins Serves : 6-8


INGREDIENTS:

  • Group A
  • 225g Fresh eggs
  • 180g Castor sugar
  • Group B
  • 85g Melted butter
  • 180g Full cream milk
  • Group C
  • 195g Blue Jacket Plain Flour
  • 8g Baking powder

DIRECTIONS:

  1. Whisk Group A (Fresh Eggs & Castor Sugar) together until ribbon stage.
  2. Add in Group B(Melted Butter & Full Cream Milk) and alternate it with Group C (Blue Jacket Plain Flour & Baking Powder).
  3. Mix well and bake the cake in an 8 inch round pan for 35 mins at 175 degree Celsius non fan mode or until a skewer inserted is clean.
Posted in

Hello Kitty Pan with Red Bean Filling

< Back to Recipe Listings

Hello Kitty Pan with Red Bean Filling

by Trish Yee

This Hello Kitty-inspired Pan with Red Bean Filling is a great way to get the kids baking! These buns are soft, fluffy and the Azuki Bean Paste adds a sweet flavour. If you prefer a smoother Azuki filling, try mashing it with a fork before adding it into the buns!

Cuisine : Baking Course : Dessert Skill Level : Novice
Prep : 95 mins Cook : 8 mins Ready in : 103 mins Serves : 2-4


INGREDIENTS:

  • Basic Bread Dough
    • 200g Bread flour
    • 50g Cake flour
    • 110g Milk
    • 45g Sugar
    • 8g Milk powder
    • 7g Yeast
    • 1 Egg
    • 30g Olive oil
    • ¼ tsp Salt
    • 5g Bread improver

    Azuki Bean Paste

    • 1 cup Azuki beans
    • 5 cups Water
    • ¼ tsp Salt
    • ¼ tsp Sugar

DIRECTIONS:

          For the Basic Bread Dough

  1. Mix yeast and egg in a separate bowl. In a mixing bowl, add bread flour, sugar, milk powder, bread improver and salt. Add in eggs and yeast at the side.

  2. Using a kitchen machine, insert the dough attachment. Mix the mixture using low speed. Pour in milk and oil and beat for 6 mins till it forms into a ball.

  3. Cling wrap and set aside for 45 mins to proof.

  4. Divide the dough into 10 pieces and shape dough into balls. Slightly flatten and wrap it with fillings.

  5. Leave it aside to proof for 30 mins and bake for 8 mins at 200°C.

  6. Remove from oven and let it cool before decorating.

    For the Azuki Bean Paste

  7. Soak azuki beans overnight (8-12 hours). Rinse azuki beans and drain excess water in colander.

  8. Put washed azuki beans in the pot and pour water till 1-2 inch above azuki beans. Turn the heat on high.

  9. When boiling, turn off heat and cover with lid. Let it stand for 5 mins. Throw away water and put the azuki beans into a sieve.

  10. Put the azuki beans back in the pot. Add enough water just to cover the beans and turn the heat on high. Once boiling, turn down the heat to medium-low and keep it simmering.

  11. Once in a while push the azuki beans under the water with a slotted spoon. Water will evaporate – keep adding water to cover just above the beans. If you put too much water, the beans will move and break.

  12. Turn up the heat to high and add sugar in 3 separate times. Stir constantly.

  13. Pour into a container to cool down. Do not leave it in the pot. Cover with plastic wrap and keep in the fridge to store after it cools.


Posted in

Quiche Lorraine

< Back to Recipe Listings

Quiche Lorraine

by Philia Ng

Learn to make the all-time favourite Quiche Lorraine filled with bacon, egg and cream cheese! 

Cuisine : Baking Course : Appetizer Skill Level : Novice
Prep : 15 mins Cook : 10 mins Ready in : 25 mins Serves : 4-6


INGREDIENTS:

  • Group A
  • 170g Plain flour
  • 1 pinch of Salt
  • 85g Unsalted Butter
  • Group B
  • 1 Egg
  • 80g Bacon
  • 50g Chopped Onion
  • Salt and Pepper
  • 100g Egg
  • 75g Dairy Cream
  • 75g Milk
  • 70g Cream Cheese
  • Salt and Pepper
  • Shredded Cheese

DIRECTIONS:

  1. Rub group A (Plain flour, Salt, Unsalted Butter) together until resemble breadcrumbs.
  2. Add in group B (Egg) and mix well into a dough are form.
  3. Roll and line a 8 inch round tart case and chill until ready to use.
  4. Place the bacon, chopped onion and some salt and pepper in the chilled tart case.
  5. Mix the egg, dairy cream, milk, cream cheese, some salt and pepper and shredded cheese in a bowl. Pour the mixture in the tart case.
  6. Bake at 190 degree Celsius for 30mins fan mode until golden brown.
Posted in

Cake Puffs

< Back to Recipe Listings

Cake Puffs

by ToTT

Here’s how to make gooey, cheesy, garlicky pull-apart bread, one step at a time! Addictively buttery and cheesy with each piece and bursting with fresh herb and garlic flavours!

Cuisine : Baking Course : Appetizer Skill Level : Novice
Prep : 10 mins Cook : 20 mins Ready in : 30 mins Serves : 6


INGREDIENTS:

  • Japanese Vanilla Sponge Cake Group 1
    • 45g Full cream milk
    • 40g Melted unsalted butter or Sunflower oil
    • 15g Castor sugar
    • 50g Cake flour
    • 40g Egg yolk
    • 1 tsp Vanilla essence
    • Group 2
    • 90g Egg whites
    • 35g Castor sugar

    Cream Filling

    • 200g Dairy whipping cream

DIRECTIONS:

        Japanese Vanilla Sponge Cake

  1. Mix group 1 together.

  2. Whipped group 2 until stiff peak and fold in together with group 1.

  3. Spoon the batter into the silicon cavity until ¾ full.

  4. Bake at 180°C, non-fan mode for 10 mins.

    Cream Filling

  5. Whip dairy cream in a bowl until soft peaks form.

  6. Add in icing sugar and whip until stiff peaks form.

Posted in

Hokkaido Cake with Lemon Cream

< Back to Recipe Listings

Hokkaido Cake with Lemon Cream

by Philia Ng

These Hokkaido Cakes with Lemon Cream are light and fluffy – the lemon cream cheese filling adds a nice surprise when you bite into the centre of the cake! 

Cuisine : Baking Course : Dessert Skill Level : Novice
Prep : 45 mins Cook : 15 mins Ready in : 60 mins Serves : 12


INGREDIENTS:

  • Batter A
    • 90g Full cream milk
    • 80g Sunflower oil
    • 25g Castor sugar
    • 100g Cake flour
    • 80g Egg yolks
    • 2 tbsp Freshly grated lemon zest

    Batter B

    • 180g Egg whites
    • 55g Castor sugar

    For the Lemon Crème

    • 300g Dairy whipping cream
    • 35g Icing sugar
    • 2 tbsp Freshly grated lemon zest

    For the Lemon Crème Cheese Filling Batter A 

    • 125g Cream cheese
    • 25g Icing sugar
    • ½ tbsp Lemon juice
    • ½ tbsp Freshly grated Lemon Zest

    Batter B

    • 130g Dairy whipping cream

DIRECTIONS:

  1. Mix Batter A together and well combined.
  2. Whip Batter B and add in sugar gradually, continue whisking it until stiff stage.
  3. Fold in Batter B into Batter A gently and well combined.
  4. Scoop the batter into individual square case.
  5. Bake at 180ºC for 15mins, non-fan oven mode.

    For the Lemon Crème

  6. Whip dairy cream and icing sugar until soft peak.

  7. Add in lemon zest and whip it until stiff peak.

  8. Storage: This cream can be kept in air tight container in the fridge for 3 days.

    For the Lemon Crème Cheese Filling

  9. Whip cream cheese until soft, add in the icing sugar.


  10. Add in the lemon zest and juice and mix well.
  11. Whip Batter B until soft peak forms.


  12. Fold in together with Batter A.
  13. Pipe into the Hokkaido sponge.


Posted in

Lemon Butter Cookies

< Back to Recipe Listings

Lemon Butter Cookies

by Philia Ng

These lemon butter cookies are perfect as a mid-day snack! The tangy lemon flavour cuts through the butter nicely. They are also a cinch to make! 

Cuisine : Baking Course : Dessert Skill Level : Novice
Prep : 30 mins Cook : 15 mins Ready in : 45 mins Serves : 10-12


INGREDIENTS:

  • 330g Plain flour
  • 2 tsp Baking powder
  • 240g Unsalted butter
  • 180g Castor sugar
  • 1 tbsp Freshly grated lemon zest
  • 20g Egg yolk (around 1 egg)

DIRECTIONS:

  1. Cream the softened butter and sugar until light yellowish and fluffy.
  2. Add in the lemon zest and egg yolk and whip until combined.
  3. Add in the plain flour and baking powder into the mixture and mix well.
  4. Shape dough into small balls and place on the tray. Alternatively, you can roll out the dough and cut the shapes out accordingly.
  5. Bake for 180ºC, fan oven for 15 mins or until golden brown.
Posted in