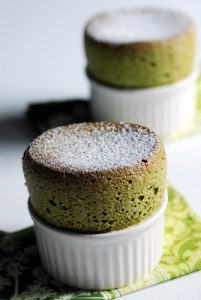
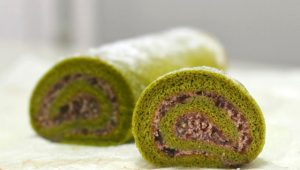
Green Tea Swiss Roll with Red Bean Paste Cream
This refreshing matcha sponge cake is layered with creamy red bean filling, perfect for when you’re craving a Japanese dessert!
Cuisine : Baking Course : Dessert Skill Level : Novice
Prep : 45 mins Cook : 10 mins Ready in : 55 mins Serves : 2-4
INGREDIENTS:
- 4 Egg Whites
- 4 Egg Yolks
- 60g Caster Sugar
- 40g Top Flour
- 5g Matcha (Green Tea) Powder
- 1/8 tsp Salt
- 1 tsp Vanilla Extract
- 60g Oil
- Butter for greasing pan
DIRECTIONS:
- Preheat oven to 200°C. Grease 28cm x 35cm pan with butter. Line pan with parchment paper.
- Whisk the egg whites on medium speed till thick and foamy. Gradually add caster sugar and keep whisking till egg whites are at firm peak stage
- Add yolks to whites, one at a time. Whisk gently until evenly mixed after each addition. Sift half the flour and matcha powder as well as the salt into the mixture. Mix with a whisk and when there are no more traces of flour, sift in remaining flour and mix again. Fold in vanilla extract and oil with a rubber spatula until just combined.
- Pour batter into cake pan. The batter will be quite thick so spread with spatula as evenly as possible, working it into the corners of pan. Twirl the pan until batter is level and tap the pan against the worktop a few times to get rid of air bubbles. Bake on middle shelf until the middle of the cake is springs back to the touch, 10-12 minutes. Remove from oven and unmould the cake onto a wire rack. Peel parchment paper from the sides of the cake. Leave until completely cool.
- To assemble, flip the cake onto a new sheet of parchment paper, face down. Peel the parchment paper off the bottom of the cake. Spread evenly with the red bean whipped cream or any other desired filling and roll the cake up, using the parchment paper to help. The cake would benefit from being wrapped in plastic then refrigerated for an hour or two to help it set before serving.