Dark Chocolate Tart

< Back to Recipe Listings

Dark Chocolate Tart

by Lin Weixian

Satisfy your deepest chocolate cravings with this Dark Chocolate Tart! The luxurious Dark Chocolate filling, velvety and smooth, goes perfectly well with the tart shell. Prepare to help yourself to second servings! 

Cuisine : Baking Course : Dessert Skill Level : Novice
Prep : 30 mins Cook : 20 mins Ready in : 50 mins Serves : 4-6


INGREDIENTS:

  • Kalingo Ganache
    • 200g Cream
    • 60g Sugar
    • 60g Glucose
    • 200g Valrhona Kalingo
    • 60g Unsalted butter, room temperature

    Tart Shell Dough

    • 160g Icing sugar
    • 200g Cake flour
    • 200g Bread flour
    • 160g Unsalted butter, cold
    • 90g Whole egg
    • 5g Vanilla extract (optional)

DIRECTIONS:

          For Kalingo Ganache

  1. Prepare the workstation.

  2. Scale the ingredients.

  3. Bring to boil cream, sugar and glucose.

  4. Finish off by adding butter and mix until fully incorporated.

  5. Set aside for later use.

    For tart shell dough

  6. Prepare the workstation.

  7. Scale the ingredients.

  8. Mix well icing sugar, cake flour and bread flour.

  9. Cut in cold butter to form mealy texture.

  10. finish off by adding eggs to form a dough.

  11. Set aside in the chiller till firm enough to be rolled out.

  12. Bake at 180°C till golden brown.

  13. Allow ganache to set in chiller before serving.

Posted in

Caramel Apple Upside Down Cake

< Back to Recipe Listings

Caramel Apple Upside Down Cake

by Susanne Despature

This sweet, autumn-perfect Caramel Apple Upside Down Cake is the perfect way to end a meal!

Cuisine : Baking Course : Dessert Skill Level : Novice
Prep : 25 mins Cook : 65 mins Ready in : 90 mins Serves : 8-10


INGREDIENTS:

  • 200 g Pâte sucrée (sweet pie crust), see recipe
  • 5-6 Apples (Pink Lady, Gala, Reinette)
  • Caramel: 150 g Sugar | 40 g Butter
  • Vanilla butter: 40 g Butter, soft | 40 g Fine Caster Sugar | 1/2 Vanilla Pod

DIRECTIONS:

  1. Preheat oven to 180°C. Insert a grill in the lower part of the oven.
  2. First prepare the caramel: in a large and heavy bottomed pan, heat the sugar on medium heat until it melts.
  3. Don’t stir, just swirl the pan slightly. As soon as the caramel has a nice amber color, remove the pan from fire and cover the bottom of the mould (20 cm) with caramel. Cut butter in pieces and add on top of the caramel – it will melt immediately.
  4. Prepare the apples: peel them, cut them in two and remove the core with a melon baller. With a small and sharp knife, make fine incisions in the rounded part of the apple half. Place this part into the caramel, fill the mould completely, because it will shrink during the cooking process!
  5. In a bowl, combine soft butter with sugar and vanilla seeds from vanilla pod. Mix with a spoon, then spoon equally over the apples.
  6. Bake in oven for about 45 minutes or until apples are tender and soaked with caramel – they change color and are now caramel brown. Let cool out for a moment.
  7. Roll out the pâte sucrée on a little bit of flour, 2 mm thick, slightly bigger then the mould. Cover the apples with the pastry and press with your fingers. With a small pairing knife, cut the borders of the dough.
  8. Bake in the middle of the preheated oven (180°C) for about 20 minutes or until golden brown.
  9. Place a big plate on top of the mould. Cover with a towel. Flip the mould over very quickly, so that the caramel will not spill out (it can be burning hot!!). Serve with some whipped cream with vanilla & sugar.
  10. Good to know: You can prepare the Tarte Tatin in advance: caramelize the apples, then cover with dough and place in fridge. Bake 1 hour before serving
Posted in

Smoked Salmon Tart

< Back to Recipe Listings

Smoked Salmon Tart

by Audra Morrice

This hearty smoked salmon tart is perfectly portable for Sunday picnics and weekday lunchboxes! The sour cream pastry adds a twist to regular shortcrust pastry and goes perfectly well with the smoked salmon in the tart! Serve this with a side salad and you’ll be good to go! 

Cuisine : Baking Course : Appetizer Skill Level : Novice
Prep : 15 mins Cook : 70 mins Ready in : 85 mins Serves : 6-8


INGREDIENTS:


  • For the Sour Cream Pastry
    • 170g Plain flour
    • 140g Butter
    • 1/3 cup (80ml) Sour cream
  • For the Filling
    • 100-150g Smoked salmon
    • 400ml Thickened cream
    • 3 Eggs
    • Pinch of Smoked salt (normal sea salt is fine)
    • Pinch of White pepper
    • 1 sprig Spring onion, finely chopped
    • 50g Feta cheese, crumbled

DIRECTIONS:

          For the Sour Cream Pastry

  1. Butter a 24cm loose base tart tin and dust lightly with flour.

  2. Place flour and butter in a food processor. Pulse until mixture resembles coarse breadcrumbs.

  3. With the motor running, add sour cream and blend until a dough forms.

  4. Remove dough, flatten into a disc and wrap with cling film. Rest in the refrigerator for at least 20-30 minutes.

  5. Preheat oven to 180 ºC.

  6. Roll out dough between 2 sheets of 6. Roll out dough between 2 sheets of greaseproof paper or plastic sheet until 2mm thick. Line the tart tin with the pastry, trimming off the edges.

  7. Line with foil or greaseproof paper, fill with dried pulses or baking beads and blind bake for 20-30 minutes until lightly golden. Remove filling and bake for a further 5-10 minutes. Remove from the oven and set aside to cool.

    For the Filling

  8. In a medium size bowl, whisk together the cream, eggs, salt, pepper.

  9. Place tart tin on a baking tray. Fill the tart case with the salmon, feta and spring onions, then pour in the cream and egg mixture. It might be easier to do this near or in the oven to avoid spillage.

  10. Bake for 30 minutes or until filling is cooked through and slightly wobbly.


Posted in

Oyster Kilpatrick

< Back to Recipe Listings

Oyster Kilpatrick

by Michele Ow

Enjoy oysters at home with this simple and traditional Oysters Kilpatrick recipe by Chef Michele Ow! 

Cuisine : European Course : Appetizer Skill Level : Novice
Prep : 5 mins Cook : 8 mins Ready in : 15 mins Serves : 12


INGREDIENTS:

  • 2 cups Rock Salt
  • 12 no. Oysters
  • Worcestershire Sauce
  • 4 no. Bacon Rashers
  • Parsley
  • Lemon Wedges

DIRECTIONS:

  1. Preheat grill on medium-high heat. Place rock salt, in a thick layer, on a baking tray or heatproof plate. Arrange oysters (in their half-shells) on rock salt.
  2. Sprinkle Worcestershire sauce over oysters. Top with bacon. Grill, on the salt, for 5 to 8 minutes or until bacon is crisp. Sprinkle with parsley. Serve with lemon.
Posted in

Japanese Roll Cakes

< Back to Recipe Listings

Japanese Roll Cakes

by Philia Ng

The fluffiness of Japanese Souffle Sponge and the aromatic Vanilla Bean Egg Custard Cream is the ideal tea time treat!

Cuisine : Baking Course : Dessert Skill Level : Novice
Prep : 60 mins Cook : 20 mins Ready in : 80 mins Serves : 6


INGREDIENTS:

    • 70g Fresh Milk
    • 80g Egg Yolks
    • 70g Sunflower Oil
    • 80g Cake Flour or Japanese silky soft flour
    • 22g Maple Syrup
    • 165g Egg Whites
    • 65g Castor Sugar

    Japanese Vanilla Bean Egg Custard Cream

    • 300g Fresh Milk
    • 1/2 tsp Fresh Vanilla Bean Pod
    • 50g Egg Yolks
    • 60g Castor sugar
    • 25g Cake Flour
    • 20g Unsalted Butter, softened
    • 100-150g Whipped Dairy Cream

DIRECTIONS:

  1. Mix fresh milk, egg yolks, sunflower oil, cake flour and maple syrup together.
  2. Whip egg whites and castor sugar till stiff peaks.
  3. Fold the two mixtures together.
  4. Pour it onto a well-lined baking tray.
  5. Bake at 190°C non-fan mode for 18 mins.

    For the Japanese Vanilla Bean Egg Custard Cream

  6. Mix egg yolks, castor sugar and cake flour together.

  7. Boil fresh milk and fresh vanilla bean pod and slowly pour into mixture.

  8. Bring the mixture back to the stove over a bain marie and cook until the mixture thickens.

  9. Sieve the mixture while its hot and add in unsalted butter. Leave it aside to cool.

  10. Add in whipped dairy cream and mix well and the cream is ready to be used.

Posted in

Chocolate Frangipane Tart

< Back to Recipe Listings

Chocolate Frangipane Tart

by Audra Morrice

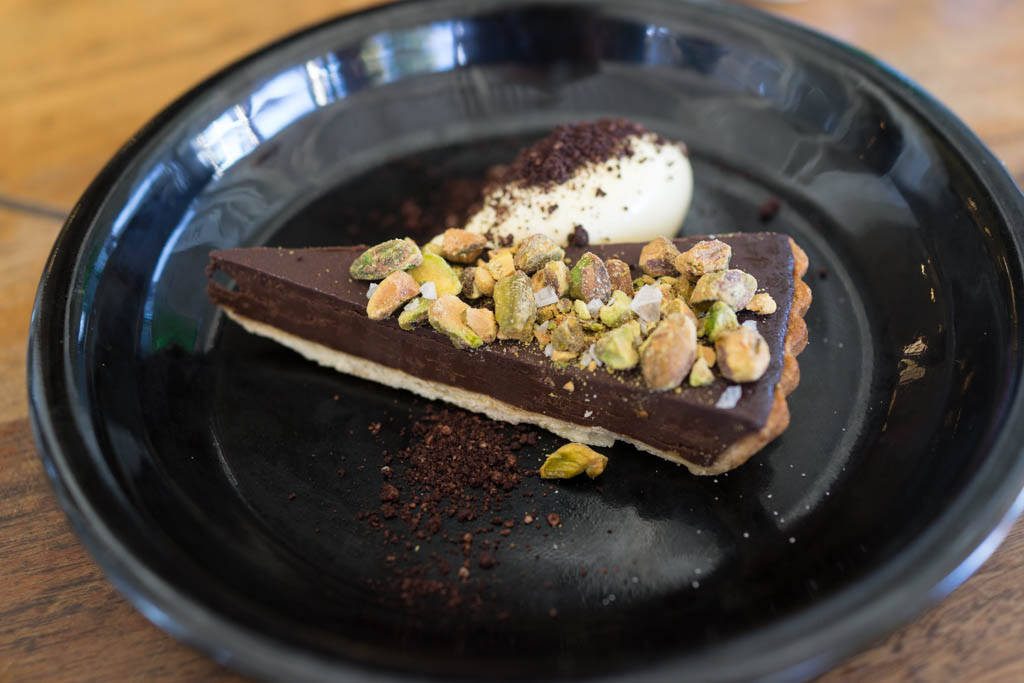
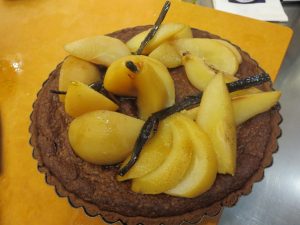
One of the stunning dishes that she produced on Masterchef Australia, Audra’s Chocolate Frangipane Tart is presented beautifully and tastes fantastic! The pears balance the richness of the chocolate, and the delicious shortcrust pastry adds a lovely layer of flavour and texture! 

Cuisine : Baking Course : Dessert Skill Level : Novice
Prep : 40 mins Cook : 60 mins Ready in : 140 mins Serves : 8-12


INGREDIENTS:

  • For the Chocolate Shortcrust Pastry
    • 170g Plain flour
    • 2 tbsp Cocoa powder
    • 1 heaped tbsp Icing sugar
    • 130g Unsalted butter, cold and diced
    • 1 Egg yolk

    For the Frangipane

    • 170g 70% dark chocolate, melted
    • 85g Unsalted butter, room temperature
    • 85g Caster sugar
    • 2 Eggs
    • 1 tsp Vanilla extract
    • 85g Almond meal
    • 1 tbsp Flour
    • 2 Ripe packham pears (or bosc, corella) – included in poached pears below

    For the Poached Pears

    • 5 Medium packham pears, skinned with a peeler, halved or left whole
    • 2½ cups Water
    • ½ cup Vino cotto (optional)
    • ½ cup Brown or raw sugar (less if you want it less sweet)
    • 1/8 cup Verjuice (or lemon juice)
    • 1 Vanilla bean, halved and seeds scraped Lemon peel
    • 4 strips Lemon peel
    • 1 Small cinnamon quill (optional)

DIRECTIONS:

         For the Chocolate Shortcrust Pastry

  1. Butter a 24cm loose base tart tin and dust lightly with flour.

  2. Place flour, cocoa powder and sugar in a food processor. Blend for 10 seconds. Add butter and pulse until mixture resembles coarse breadcrumbs

  3. With the motor running, add the egg yolk and just enough ice water until a dough forms.

  4. Remove dough, flatten into a disc and wrap with cling film. Rest in the refrigerator for at least 20-30 minutes.

  5. Preheat oven to 180ºC.

  6. Roll out the dough between 2 sheets of greaseproof paper or plastic sheet until 2mm thick. Line the tart tin with the pastry, trimming off the edges.

  7. Line with foil or greaseproof paper, fill with dried pulses or baking beads and blind bake for 20-30 minutes until lightly golden. Remove the filling and bake for a further 5-10 minutes. Remove from the oven and set aside to cool.

    For the Frangipane

  8. Melt chocolate over a ban marie or microwave on high in 10 second bursts, stirring in between. Set aside and allow to cool.

  9. In a medium size bowl, whisk butter and sugar until light and fluffy.

  10. Add eggs, one at a time, beating well after each addition.

  11. Add vanilla extract and chocolate, whisk well.

  12. Add almond meal and flour, mix well.

  13. Fill the tart shells with the frangipane mixture, smoothing out surface.

  14. Bake for 40 minutes or until cook through.

  15. Top with pears and serve with vanilla cream.

    For the Poached Pears

  16. Peel pears.

  17. Place water, vinocotto (if using), sugar, verjuice or lemon juice, vanilla bean, lemon peel and cinnamon in a small-medium saucepan. Bring to the boil.

  18. Add pears, ensuring all are submerged in the poaching liquid. Cover with a cartouche

  19. Lower the heat and simmer until the pears are tender. Remove pears and allow to cool.

  20. Reduce the poaching liquid further to a syrupy consistency and allow to cool.

  21. Halve some pears, place them on top of the tart and drizzle over some of the reduced poaching liquid just before serving. For smaller individual tarts, the pears can be sliced from the top stem to the bottom on a diagonal. Then twist slightly downwards to create a fan design.

    Tips

  22. Do not over process the dough or the pastry will be tough.

  23. Handle the pastry as little as possible to keep it short and crisp.

  24. Add as little water as possible to the dough to avoid too much shrinkage.

  25. Buttering the tin and dusting it lightly with flour will help avoid the pastry sticking to the tin.

  26. When melting the chocolate, ensure water does not fall into the chocolate or this will seize the chocolate.

Posted in

Herbed Garlic Bread

< Back to Recipe Listings

Herbed Garlic Bread

by Jehanne Ali

This homemade garlic bread recipe by Chef Jehanne Ali is a real treat! It’s simple to make and tastes amazingly good!

Cuisine : Baking Course : Appetizer Skill Level : Novice
Prep : 30 mins Cook : 40 mins Ready in : 75 mins Serves : 6


INGREDIENTS:

  • Brioche Dough
    • 500g Bread Flour
    • 50g Sugar
    • 60g Unsalted Butter
    • 1 no. Egg
    • 1 tsp Salt
    • 1 tsp Yeast
    • 125ml Water
    • 125ml Milk
    • Garlic Herb Butter
    • 125g Butter
    • 2-3 cloves Garlic
    • 1 tbsp Dried Herbs

DIRECTIONS:

         For the Brioche Dough

  1. Use the oil to grease the bowl.
  2. Knead all the ingredients using stand mixer for around 10 minutes. Let it rise in the bowl. Punch down the air and shape into desired size and buns.
  3. Preheat oven to 400°C on a convection oven and 425°C on a conventional oven.
  4. Transfer pans to oven and bake until brioche just begins to turn golden, about 15 minutes. Reduce temperature to 350°C on a convection oven and 375°C conventional oven and continue baking until deep golden brown and internal temperature reaches 205°C on an instant-read thermometer, 20 to 25 minutes more.
  5. Remove from oven and let brioche cool in pans for 5 minutes. Unmould onto a wire rack and let cool completely.

    For the Herbed Butter

  6. Mix all the ingredients together to form garlic herb butter, ideal as a spread.
Posted in

Green Tea Swiss Roll with Red Bean Paste Cream

< Back to Recipe Listings

Green Tea Swiss Roll with Red Bean Paste Cream

This refreshing matcha sponge cake is layered with creamy red bean filling, perfect for when you’re craving a Japanese dessert! 

Cuisine : Baking Course : Dessert Skill Level : Novice
Prep : 45 mins Cook : 10 mins Ready in : 55 mins Serves : 2-4


INGREDIENTS:

  • 4 Egg Whites
  • 4 Egg Yolks
  • 60g Caster Sugar
  • 40g Top Flour
  • 5g Matcha (Green Tea) Powder
  • 1/8 tsp Salt
  • 1 tsp Vanilla Extract
  • 60g Oil
  • Butter for greasing pan

DIRECTIONS:

  1. Preheat oven to 200°C. Grease 28cm x 35cm pan with butter. Line pan with parchment paper.
  2. Whisk the egg whites on medium speed till thick and foamy. Gradually add caster sugar and keep whisking till egg whites are at firm peak stage
  3. Add yolks to whites, one at a time. Whisk gently until evenly mixed after each addition. Sift half the flour and matcha powder as well as the salt into the mixture. Mix with a whisk and when there are no more traces of flour, sift in remaining flour and mix again. Fold in vanilla extract and oil with a rubber spatula until just combined.
  4. Pour batter into cake pan. The batter will be quite thick so spread with spatula as evenly as possible, working it into the corners of pan. Twirl the pan until batter is level and tap the pan against the worktop a few times to get rid of air bubbles. Bake on middle shelf until the middle of the cake is springs back to the touch, 10-12 minutes. Remove from oven and unmould the cake onto a wire rack. Peel parchment paper from the sides of the cake. Leave until completely cool.
  5. To assemble, flip the cake onto a new sheet of parchment paper, face down. Peel the parchment paper off the bottom of the cake. Spread evenly with the red bean whipped cream or any other desired filling and roll the cake up, using the parchment paper to help. The cake would benefit from being wrapped in plastic then refrigerated for an hour or two to help it set before serving.
Posted in

Chocolate Easter Nest

< Back to Recipe Listings

Chocolate Easter Nest

by ToTT

Brilliant to make with little children over the holidays, these pretty little easter nests are great fun to make with the kids and decorated with mini chocolate eggs. Make them this Easter! 

Cuisine : Baking Course : Dessert Skill Level : Novice
Prep : 20 mins Cook : 15 mins Ready in : 35 mins Serves : 12


INGREDIENTS:

  • Chocolate Biscuit
    • 110g Dark chocolate Coverture, 65% cocoa
    • 50g Butter
    • 40g Almond powder
    • 40g Rice flour
    • 2 Egg yolks
    • 2 Egg whites
    • Salt

    Decoration

    • 100g Dark or milk chocolate coverture
    • Sprinkles & Mini-sugar eggs

DIRECTIONS:

  1. Prepare chocolate biscuit: In a bowl on a double boiler, melt chocolate coverture drops with butter, stirring gently with a rubber spatula from time to time. Remove from heat when melted.
  2. Add egg yolks and stir.
  3. In a stand mixer or with an electric hand mixer, whisk egg white until foamy, add slowly sugar until you get stiff peaks.
  4. In a bowl, mix almonds, rice flour and a pinch of salt.
  5. Add ½ of the flour/almond mix to the chocolate batter and fold in gently.
  6. Add ½ of the stiff egg white into the chocolate batter, then the rest of the flour/almond and finish with the remaining egg white – fold in everything carefully, make sure that the ingredients are well mixed.
  7. Fill 12 donut silicon moulds with the batter, using a piping bag with round tip (10mm).
  8. Place in preheated oven at 180° C, fan forced. Bake 12-14 minutes, until the cake fills the mould and a toothpick comes out clean.
  9. Take out of the oven, remove the nests carefully from the rings and let cool out.
  10. Melt chocolate coverture on a double boiler, glaze nests with molten chocolate and sprinkle with edible pearls or grated coconut. Place some small sugar eggs in the middle of the nest.
Posted in

Lemon Blueberry Cream Scones

< Back to Recipe Listings

Lemon Blueberry Cream Scones

by Claire Marie Chang

These Lemon Blueberry Cream scones are tangy and loaded with fresh blueberries are soft and fluffy!

Cuisine : Baking Course : Dessert Skill Level : Novice
Prep : 20 mins Cook : 15 mins Ready in : 35 mins Serves : 6-8


INGREDIENTS:

  • 280 g Cake Flour
  • 1 tbsp / 15 g Baking Powder
  • 40 g White Caster Sugar
  • 1/4 tsp Sea Salt/Fine Salt
  • 70 g Unsalted Butter, Cold & Cubed
  • 80 g Fresh Blueberries
  • 215 g Whipping Cream, Cold
  • 15 g Lemon Juice
  • Zest of a lemon

DIRECTIONS:

  1. Preheat oven to 220°C / 200°C Fan
  2. Combine dry ingredients in a large mixing bowl.
  3. Rub butter into dry ingredients till it forms fine crumbs.
  4. Slowly add cream to form dough.
  5. Knead very lightly. Add blueberries into the dough. Do not over mix the dough.
  6. Flour your worktop.
  7. Roll the dough to 3cm thickness. Cut the dough into 2-3” rounds.
  8. Re roll remaining dough *Do note these won’t be as fluffy.
  9. Place them on baking paper lined trays. About 2” apart.
  10. Brush tops with egg wash.
  11. Bake for 12-15mins till the tops are golden brown.
  12. * Keep at room temperature for up to 3 days.
Posted in