Nougat Glacé with Passionfruit-Orange Sauce and Chocolate Stars


< Back to Recipe Listings

Nougat Glacé with Passionfruit-Orange Sauce and Chocolate Stars

by Susanne Despature


Nougat Glacé, a classic dessert using nuts, honey and meringue will be a great success on your festive table. Take it to a new level by adding homemade Passionfruit-Orange Sauce and Chocolate Stars.

Cuisine : Fusion Course : Dessert Skill Level : Novice
Prep : 25 mins Cook : 15 mins Ready in : 40 mins Serves : 4


INGREDIENTS:

  • Caramelized Almonds
    • 100g Almond Flakes
    • 100g Caster Sugar

    Orange & Passion Fruit Coulis

    • 2 Oranges (Juice)
    • 50g Caster Sugar
    • 2-3 pieces of Passion Fruits

    Parfait Grand Marnier Ice-Cream

    • 50g Candied Orange Peel (finely chopped)
    • 50g Crunchy Caramelized Almonds (finely chopped)
    • 50g Black Chocolate (Manjari Varlhona, chopped)
    • 100g Caster Sugar
    • 50g Freshly Squeezed Orange Juice
    • 2 tbsp Grand Marnier or Cointreau
    • 4 Egg Yolks
    • 250ml Whipping Cream (35%)


DIRECTIONS:

          For Caramelized Almonds

  1. In a medium sized sauce pan, melt sugar over medium heat without stirring (just swirl the pan) until you get a nice caramel coloured syrup.

  2. Remove from heat, add the almond flakes and stir well.

  3. Spread caramelized almonds on baking sheet, top with a second sheet and flatten with a rolling pin.

  4. Let cool out, then store in an airtight container.

    For Orange & Passion Fruit Coulis

  5. Combine orange juice and sugar in a small pan, spoon in the passion fruit and bring to a boil.

  6. Boil for 10 minutes, stirring from time to time, until the passion fruit seeds turn black and glossy.

  7. Set aside to cool.

    For Parfait Grand Marnier Ice-Cream

  8. Pour the cold cream in a very cold bowl (out of your freezer). Start on low speed, then, when the cream starts to thicken, whip on higher speed until it forms stiff peaks. Refrigerate.

  9. Combine chopped orange peel, crunchy almonds & chocolate chips.

  10. Put egg yolks in a large mixing bowl.

  11. In a small but high saucepan, combine sugar & orange juice. Boil over high heat to 105°C.

  12. Start to whisk the egg yolks (use a handmixer or even better a stand mixer) and pour the hot sugar syrup in a steady stream on the yolks. Whisk for another 2-5 minutes or until you get a very light and fluffy egg cream – it should have doubled in volume.

  13. Add the Grand Marnier and continue to beat the cream for another 2 minutes or until cold. When you take some cream on a spatula, it should form a “ribbon” when falling back into the bowl. (The consistency is essential: if your cream is too liquid, all the chopped ingredients will fall to the bottom of the ice cream!)

  14. Add all the chopped ingredients and with a rubber spatula, mix gently with the whipped cream.

  15. Fill a log shaped mould (covered with cling wrap) or some individual flexipan moulds with the cream. Set in the freezer for at least 1 night or more (can be prepared 1 week in advance). Serve with Orange & Passion Fruit Coulis.

Posted in

Roast Pork with Miso Dressing

< Back to Recipe Listings

Roast Pork with Miso Dressing

by Eric Low

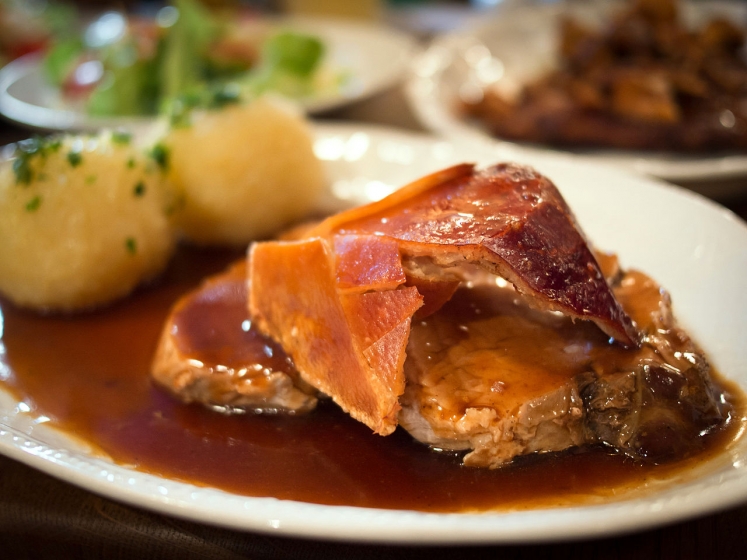
Prepare this delicious and flavorful Roast Pork with Miso Dressing by Chef Eric for your loved ones!

Cuisine : Fusion Course : Main Skill Level : Novice
Prep : 20 mins Cook : 40 mins Ready in : 60 mins Serves : 4


INGREDIENTS:

  • 500 g Pumpkins, washed, cut into slices
  • Salt
  • 4 pcs of Pork Fillet ~140g each
  • Oil for cooking
  • 1 tbsp Ginger Juice
  • 1 tbsp Dark Miso Paste
  • 2 tbsp Mirin
  • 4 tbsp Mirin
  • 1/2 no of Lemon Juice
  • 2 tbsp Dark Miso Paste
  • 1 tsp Chopped Ginger
  • 2 stalks Spring Onions, finely diced

DIRECTIONS:

  1. Preheat oven to 180C. Line baking tray with aluminium foil and season the pumpkins with some salt and drizzle it with some oil. Roast pumpkins in the oven for 30mins.
  2. Marinate pork with ginger juice, dark miso paste and mirin for at least 15mins.
  3. Combine ingredients for miso dressing.
  4. Heat frying pan with some oil. Pan-sear the pork fillets on all sides. Transfer to oven and bake @ 180C for 10mins. Allow pork to cool slightly before slicing.
  5. Arrange sliced pork on roasted pumpkins, spoon some dressing over and serve.
Posted in

Cold Angel Hair Pasta with Truffle, Hokkaido Scallops and Basil Caviar

< Back to Recipe Listings

Cold Angel Hair Pasta with Truffle, Hokkaido Scallops and Basil Caviar

by Felix Chong

Relish spoonful of this flavourful Cold Angel Hair Pasta with Truffle, perfectly seared Hokkaido Scallops with Basil Caviar.

Cuisine : Fusion Course : Appetizer Skill Level : Novice
Prep : 10 mins Cook : 5 mins Ready in : 15 mins Serves : 1-2


INGREDIENTS:

  • 50gm Angel hair pasta
  • 10ml White truffle oil
  • 1teasp Chives
  • 1teasp Basil caviar
  • 1teasp Seaweed powder
  • 15ml Japanese Shoyu
  • 1teasp Ikura
  • Dill
  • 1pc Hokkaido scallop size 21/25

DIRECTIONS:

  1. Prepare a pot of salted boiling water and a pot of ice water.
  2. Place the angel hair pasta into the boiling water and cook for 2 minutes to 2 minutes 30 seconds
  3. Strain the pasta and blanch into the ice cold water immediately to cool down the pasta for approximately 20 seconds.
  4. Drain off the pasta from the ice water.
  5. In another bowl, prepare the mixture of the truffle oil, chopped chives, seaweed powder & Japanese shoyu.
  6. Transfer the pasta into the mixture and mix well.
  7. Use long tweezers or a fork & twirl the pasta.
  8. For the scallop, slice diagonally into 4 pieces.
  9. Lay the scallops on top of the twirled pasta.
  10. Garnish with Ikura, basil caviar and dill.
  11. Optional: you may alburi the scallops too!
Posted in

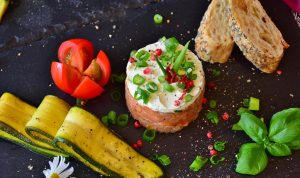
Layered Salmon Tartar with Kaffir Lime Zest & Salmon Roe on Cucumber Rose and Wasabi Cream

< Back to Recipe Listings

Layered Salmon Tartar with Kaffir Lime Zest & Salmon Roe on Cucumber Rose and Wasabi Cream

by Susanne Despature

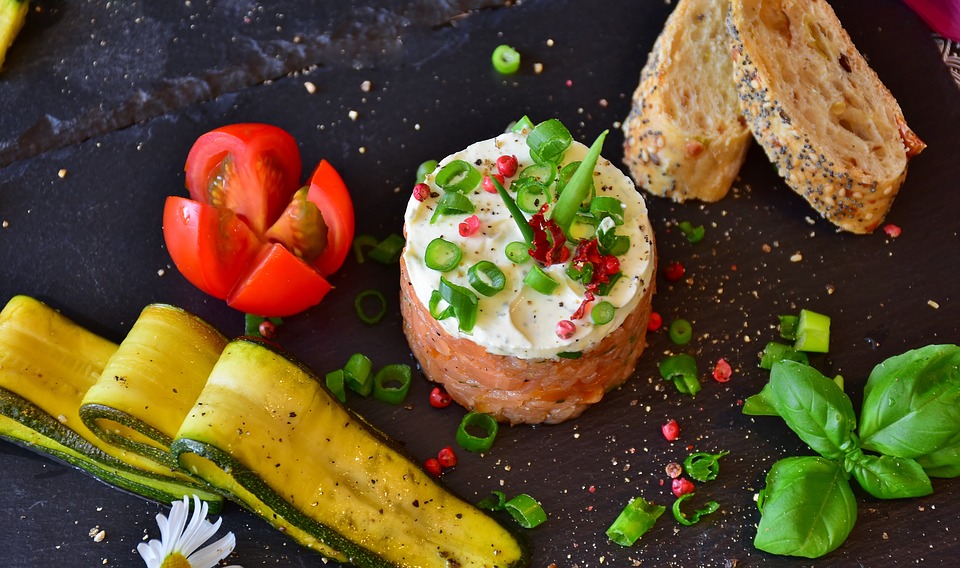
A mouthwatering spin to the traditional beef tartare. This recipe is easy on the palate but just as gratifying! Prepare in advance and keep them covered and refrigerated until you are ready to serve.

Cuisine : Fusion Course : Appetizer Skill Level : Novice
Prep : 35 mins Cook : 0 mins Ready in : 35 mins Serves : 4


INGREDIENTS:

  • For Salmon Tartar
    • 150g Smoked Salmon (sliced)
    • 250g Raw Salmon (sushi quality, without skin or fat), frozen for at least 1 day
    • 1-2 tbsp Olive Oil (Extra Virgin)
    • ½ zest of Kaffir Lime (finely grated)
    • ½ bunch of Spring Onion (finely chopped)
    • 3 Small Potatoes (Brastagi), cooked 1 day before (with skin, in salt water)
    • 25ml Cream (35% fat)
    • Salt, Pepper, Lime Juice

    Wasabi Cream

    • 50ml Cream (35% fat)
    • ¼ espresso spoon of Wasabi
    • ½ Lime (juice)
    • Salt and Pepper

    To Serve

    • 1 Japanese Cucumber
    • 40g Salmon Roe
    • Dill and Shiso Sprouts

DIRECTIONS:

          For Salmon Tartar

  1. Prepare a tray with 4 rings of 5 cm diameter and place it into the fridge.

  2. Peel the potatoes and cut in fine slice.

  3. Form 4 little roses with 4 stripes out of the smoked salmon slices. Place in a small container, cover and refrigerate.

  4. Chop the remaining smoked salmon finely and place in a bowl.

  5. Cut the slightly unfrozen Salmon in 4 x 4 mm cubes and add to the smoked salmon. Add finely chopped spring onion, kaffir lime zest and olive oil.

  6. Mix with a spoon, season to taste with salt, pepper and lime juice (not too much lime juice, it will blanch the salmon!)

  7. Cover the bottom of the rings with salmon tartar, cover with 2-3 slices of potatoes, drizzle a little bit of cream and sprinkle with some chopped spring onions.

  8. Repeat and finish with salmon tartar on top. Press with a spoon in order to compress the tartar (so it will stay in shape once you remove the ring!)

  9. Refrigerate.

    For Wasabi Cream

  10. Combine all the ingredients in a small bowl and mix – season to taste with salt & pepper.

  11. Refrigerate.

    To Serve

  12. Wash the cucumber, then slice it finely (I use a ceramic slicer to get ultra thin slices) and form a rose in the middle of each plate.

  13. Place a ring with tartar in the middle of the rose and remove the ring.

  14. Garnish with the smoked salmon rose, salmon roe and dill.

  15. Drizzle a little bit of wasabi cream around and decorate with salmon roe and shiso sprouts.

  16. Serve with freshly baked brioche or baguette.

Posted in

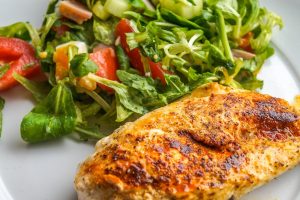
Filled Chicken Breast with Asian Pesto and Oven-Dried Cocktail Tomatoes, Quinoa and Parmesan Foam

< Back to Recipe Listings

Filled Chicken Breast with Asian Pesto and Oven-Dried Cocktail Tomatoes, Quinoa and Parmesan Foam

by Susanne Despature

Stuffed chicken breast with pesto with a twist using typical Asian ingredients and cherry tomatoes. Also learn the tricks behind a posh Parmesan Foam! The formal-looking vegetable cuts, Brunoise will enhance the quinoa’s (a grain-like crop) appearance and add flavour to this healthy and tasty side dish served with the succulent chicken breast.

Cuisine : Fusion Course : Main Skill Level : Novice
Prep : 15 mins Cook : 110 mins Ready in : 125 mins Serves : 4


INGREDIENTS:

  • Stuffed Chicken Breasts
    • Italian Basil (leaves coarsely chopped)
    • 50g Coriander (leaves coarsely chopped)
    • 20g-30g White Almonds (or pin nuts), chopped
    • 2 cloves of Garlic (chopped)
    • 5cm Young Ginger (peeled and chopped)
    • ½ tsp Coarse Salt
    • 2-3 tbsp Olive Oil
    • 50g Freshly Grated Parmesan Cheese

    Semi-Dried Cherry Tomatoes

    • 3 x 4 Cherry Tomatoes (on vine)
    • 2 tbsp Olive Oil
    • Salt, Pepper, Thyme, Icing Sugar

    Quinoa

    • 120g Quinoa
    • 250ml Chicken Stock
    • 50g Pitted and Diced Black Olives
    • 50g Diced Sundried Tomatoes

    Parmesan Foam

    • 70g Freshly Grated Parmesan
    • 40g Unsalted Butter
    • 200ml Milk
    • 15 cl Chicken Stock
    • Salt and Pepper
    • White Truffle Oil

DIRECTIONS:

          For Stuffed Chicken Breast

  1. Slice the chicken breast open, in order to get a bigger surface – cover it with cling wrap and pound it until very thin (take a heavy pan to flatten it).

  2. Spread 1 tablespoon of Asian Pesto on the chicken breast; add sundried tomatoes.

  3. Roll up and secure with slices of raw ham (if you don’t intend to cook the chicken rolls at this moment, refrigerate until use. Take them out at least 30 minutes before frying them in the pan!)

  4. Preheat the oven at 80°C – put a plate on the griddle.

  5. Heat butter in a heavy bottomed frying pan – when it’s hot, sear the chicken rolls all over until it has a golden brown crust (takes about 5 minutes).

  6. Put them in the oven on the plate and control the core temperature with a oven-proof thermometer: it has to reach 70°C (about 30 – 40 minutes, which leaves enough time to prepare the quinoa!)

    For Cherry Tomatoes

  7. Place the cherry tomatoes on their vine(always 3 together) in a ovenproof dish.

  8. Drizzle some olive oil over the tomatoes, sprinkle with salt, pepper & thyme, then dust with icing sugar.

  9. Dry out in the oven for 1 hour at about 100°C.

  10. To serve, slice the chicken rolls in 5-6 pieces and serve with semi-dried Cherry tomatoes, Quinoa and Parmesan foam.

    For Quinoa   

  11. Pour the quinoa in a bowl and add water.

  12. Rinse it (it comes naturally with a bitter coating called saponin, which must be rinsed off) by stirring the quinoa with your hand – pour off the rinsing water using a fine mesh strainer. Place it in a cooking pot and add the chicken stock.

  13. Bring to a boil, cover with a lid and turn the heat down to simmer for about 15 minutes. Check if the quinoa is cooked – fluff it gently with a fork and add diced black olives and sun dried tomatoes (with some of its oil).

    For Parmesan Foam

  14. In a small sauce pan, combine milk and chicken stock and bring to a boil.

  15. Remove from heat, than add grated parmesan and butter (cut in small pieces).

  16. Use a hand mixer and froth to create some foam – season to taste with salt and pepper, add some drops of white truffle oil. Serve immediately.

Posted in

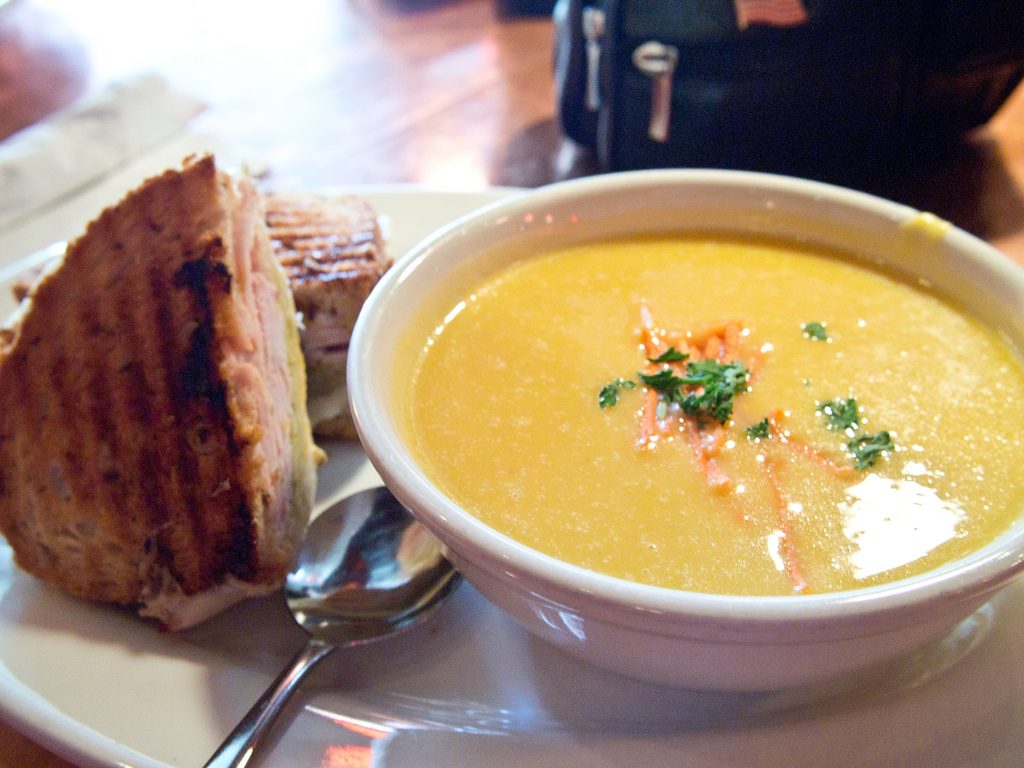
Spicy Butternut Soup With Coconut Cream & Lemongrass

< Back to Recipe Listings

Spicy Butternut Soup With Coconut Cream & Lemongrass

by Susanne Despature

This delectable, spicy and warm soup is a perfect start to a meal. The addition of coconut cream complements the butternut and the soup is instantly creamy and lucious, adding depth to the taste and pleasing to the tongue.

Cuisine : Fusion Course : Appetizer Skill Level : Novice
Prep : 10 mins Cook : 35 mins Ready in : 45 mins Serves : 6


INGREDIENTS:

  • 500g Pumpkin, peeled and diced (butternut)
  • 3-4 Tomatoes, peeled and diced (or ½ can of diced tomatoes)
  • 1 Big Onion (diced)
  • 1 tbsp Grape Seed Oil
  • 300-400ml Chicken Stock
  • 125ml Coconut Milk
  • 2 cloves of Garlic (chopped)
  • 1 stalk of Lemongrass (root end trimmed & outer layers discarded, finely chopped)
  • Chopped Young Ginger
  • 1 tbsp Paprika Powder
  • ½ tsp Freshly Grated Nutmeg
  • 1 pinch of Chilli Pod (chopped)
  • ¼ Salt and Pepper
  • Coriander Oil, Coriander Leaves, and Coconut (for decoration)

DIRECTIONS:

  1. In a large pot over medium high heat, fry the diced onions until translucent and soft (about 3 minutes). Add the pumpkin, lemongrass, garlic and ginger and continue to fry for 1-2 more minutes. Add paprika powder and chopped chilli, give a stir, than add the tomatoes, chicken stock and some of the coconut milk. The liquid should just cover the pumpkin.
  2. Cover, then cook over low heat for about 20 minutes or until the pumpkin is tender.
  3. Place in a blender and puree until smooth. Pass trough a fine sieve to discard the lemongrass and to get a perfect velvety consistency. Add more coconut milk or chicken stock if the soup is too thick.
  4. Bring to a boil, season to taste with salt & pepper. Ladle some soup in 6 bowls and serve with a drizzle of coconut milk, coriander oil and some coriander leaves.
Posted in

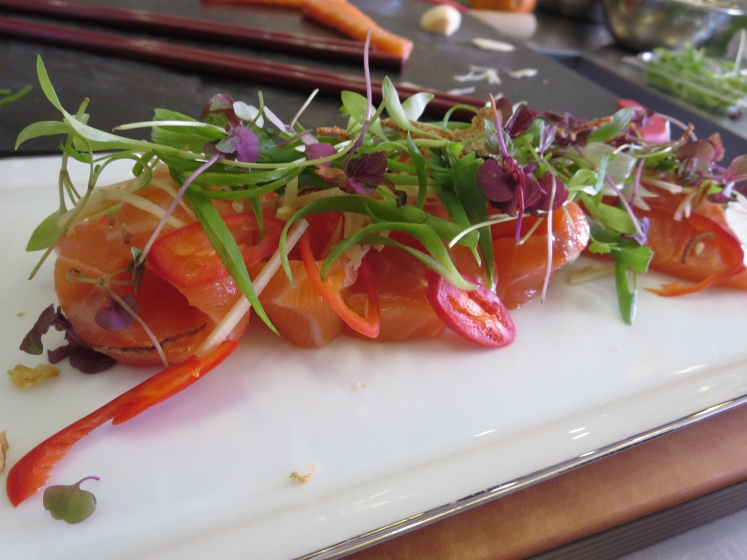
Raw Salmon with Micro Herbs

< Back to Recipe Listings

Raw Salmon with Micro Herbs

by Audra Morrice

Chef Audra Morrice adds a twist of flavour to an Aussie favourite using the freshest salmon and a tangy, tasty Szechuan dressing! This serves 4 perfectly as a starter or part of a shared meal. Enjoy! 

Cuisine : Fusion Course : Appetizer Skill Level : Novice
Prep : 15 mins Cook : 0 mins Ready in : 15 mins Serves : 4


INGREDIENTS:

    • 600g Fresh atlantic/Tasmanian salmon fillet (skin on) (sashimi grade or good quality fresh salmon)
    • 2 tbsp Micro herbs (shiso, coriander, watercress)
    • 1 Large red chili, de-seeded, finely julienned
    • 1 Knob young ginger, skinned, finely julienned
    • 1 sprig Spring onion, washed, root discarded and finely sliced on the diagonal
    • Crispy shallots

    Szechuan Dressing

    • 1 tsp Dou ban jiang (Chilli broad bean paste)
    • 1 tbsp Black vinegar
    • 1 tbsp Dark soy
    • ¼ tsp Sugar

DIRECTIONS:

  1. Using a sharp knife, barrel out the fish from the middle around towards the skin, ensuring the blood lines are left on the skin. Repeat on the belly side of the salmon.
  2. Slice each piece of fish about ½ cm thick, place on a serving plate.
  3. Mix the dressing ingredients together in a small bowl, taste and adjust accordingly.
  4. Just before serving, sprinkle the dressing over the fish slices and top with the herbs, chili, ginger and spring onion.
Posted in

Spicy Roast Chicken

< Back to Recipe Listings

Spicy Roast Chicken

by Mimi Wahadi

Spice up your Roast Chicken recipe with candlenut powder, dried chilli paste and lemongrass!

Cuisine : Fusion Course : Main Skill Level : Novice
Prep : 30 mins Cook : 30 mins Ready in : 60 mins Serves : 4


INGREDIENTS:

  • 1/2 no of 2 pieces of Chicken (Group 1)
  • 200 ml Coconut cream (Group 1)
  • 2 tbsp Roasted Coconut (Kerisik) (Group 1)
  • 1 tbsp Coriander Powder (Group 1)
  • 1 tbsp Fennel Powder (Group 1)
  • 1 stalk Lemongrass – crushed (Group 1)
  • 2 tbsp Lime Juice (Group 1)
  • 1 tsp Salt (Group 1)
  • 50 gm Gula Melaka – chop finely (Group 1)
  • 4 tbsp Dried Chili Paste (Group 2)
  • 2 Red Chili (Group 2)
  • 1 tbsp Candlenut Powder (Group 2)
  • 5 Shallots (Group 2)
  • 4 Whole almond (Group 2)

DIRECTIONS:

  1. Preheat oven to 200°C.
  2. Rub the chicken parts with Group 1 (roasted coconut, coriander powder, fennel powder, salt, gula melaka) and Group 2
  3. Heat up the oil and saute crushed lemongrass
  4. Add coconut milk and simmer till gravy is thick.
  5. Remove chicken and place it onto a baking tray lined with aluminium foil
  6. Roast chicken for approximately 20-30 mins
  7. Pour in the lime juice and garnish with coriander leaves when serving. 
Posted in

Seafood Laksa Aglio Olio

< Back to Recipe Listings

Seafood Laksa Aglio Olio

by Mimi Wahadi

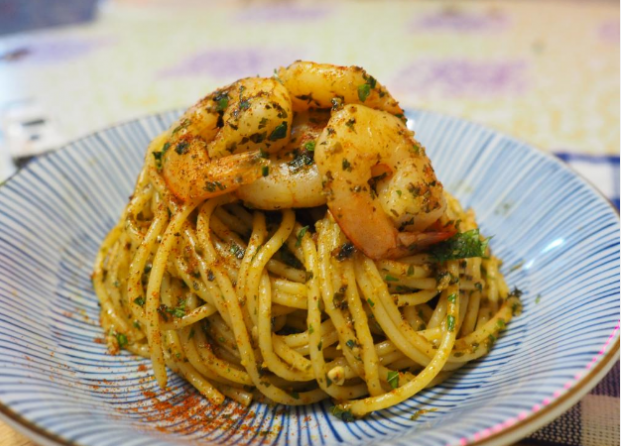
This delicious Seafood Laksa Aglio Olio is spicy, rich, amped with prawns, squid and clams!

Cuisine : Asian Course : Main Skill Level : Novice
Prep : 15 mins Cook : 20 mins Ready in : 35 mins Serves : 2


INGREDIENTS:

  • 200g All-purpose flour (Homemade Pasta)
  • 2 Large eggs (Homemade Pasta)
  • SPICE PASTE: * – Grounded ingredients
  • 20g * Fresh turmeric, skinned
  • 15g * Galangal (Blue Ginger)
  • 20g * Fresh red chili
  • 1 stalk * Lemongrass, sliced
  • 100g * Red onion
  • 20g * Belacan
  • 30g * Candlenut
  • 50g * Dried chili paste
  • 50g * Dried prawn
  • 150g Coconut milk
  • 100ml Coconut water
  • 100ml Water
  • Laksa leaves for garnish
  • Sliced fish cakes for garnish
  • Tau Pok for garnish

DIRECTIONS:

Homemade Pasta

  1. In a stand mixer attached with a dough hook, combine all ingredients and mix.
  2. Beat until dough become light yellow, smooth and soft.
  3. Dust with semolina flour.
  4. Using a pasta machine, flatten and cut dough accordingly.

Sauce

  1. Combine all ingredients in the food processor and pulse.
  2. Meanwhile, heat up oil in a frying pan. Sauté the paste over low heat until fragrant and dry. Add some laksa leaves.
  3. Add water to the pot and let it simmer. Add coconut milk and coconut water.
  4. Season with salt and sugar to taste.
  5. Add in seafood. Simmer on a medium low heat.
  6. While the laksa gravy is simmering, boil water in a pot to blanch the pasta until Al dente for approximately 4-5 mins.
Posted in

Hainanese Beef Steak

< Back to Recipe Listings

Hainanese Beef Steak

by Eric Low

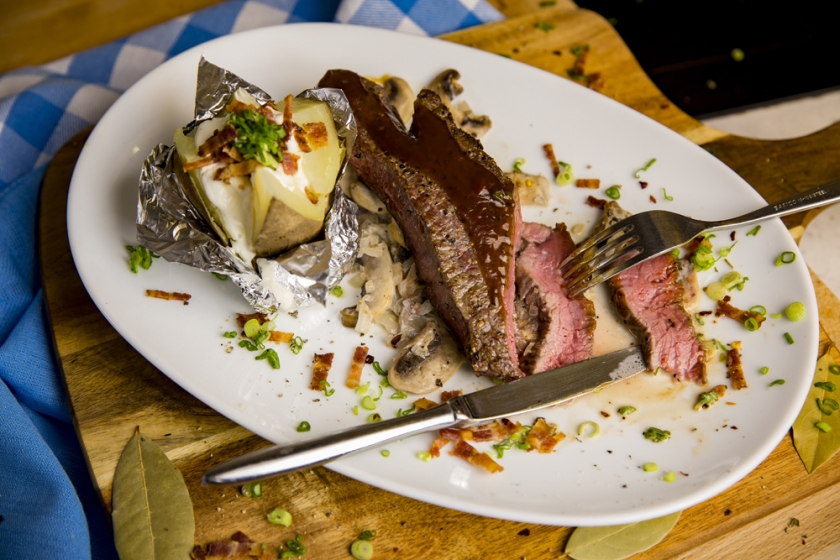
Chef Eric Low shares with us a Hainanese version of a classic beef steak! Try this at home today for a twist to your regular steak. 

Cuisine : Fusion Course : Main Skill Level : Novice
Prep : 20 mins Cook : 50 mins Ready in : 70 mins Serves : 4


INGREDIENTS:

  • 4 large Idaho Potatoes
  • 4 stalks Spring Onions, finely diced
  • 8 slices Streaky Bacon
  • 4 tbsp Sour Cream


Sauce

  • 3 tbsp Ketchup
  • 3 tbsp HP Sauce
  • 2 tbsp Worcestershire Sauce
  • 1 tbsp Sugar
  • 1 tsp Sesame Oil
  • 100ml Water

Steak

  • 4 pcs Sirloin Steaks, about 180g – 200g each
  • Salt
  • Coarse Ground Black Pepper
  • Garnish
  • 1 tbsp Butter
  • 20g Chopped Onions
  • 10g Chopped Garlic
  • 250g Fresh Button Mushrooms, sliced
  • 50ml Whipping Cream
  • Salt and Pepper to taste

DIRECTIONS:

  1. Preheat oven to 180°C. Wrap the washed potatoes in foil and set them onto the Nordic Ware Potato Baker. Place the potatoes into the oven for 45 mins. Insert a toothpick and if it goes through, the potatoes are cooked.
  2. Arrange bacon on baking tray and bake alongside with the potatoes for 20 mins till crispy. Cool, chop up the bacon and set aside.
  3. Season steaks with salt and a generous amount of black pepper. Set aside.
  4. In a pan, melt butter and cook the onions till fragrant. Add mushrooms and pour in whipping cream. Season with salt and pepper and cook briefly for a minute. Set aside.
  5. On a heated frying pan, grill the steaks on both sides till medium. About 2-3 mins for each side.
  6. Combine ingredients for sauce in a mixing bowl, pour it into the frying pan used to cook the steak to deglaze the pan. Bring sauce to boil, set aside. Make a cross over each potato and push up from the bottom with fingers to create a bloom.
  7. To serve, divide the mushrooms among four plates, place a piece of steak on each plate. Serve the potatoes on the side with the condiments and spoon the sauce over the steaks before serve.
Posted in