Classic French Opera Cake

< Back to Recipe Listings

Classic French Opera Cake

by Lin Weixian

If you’ve never tried this Classic French Opera Cake, you’re in for a treat! This decadent layered coffee cake is made with Biscuit Jaconde, soaked with coffee syrup followed by a layer of coffee buttercream!

Cuisine : Baking  Course : Dessert  Skill Level : Novice
Prep : 55 mins Cook : 15 mins Ready in : 1 hr 10 mins  Serves : 1-2 Servings


INGREDIENTS             

  • Biscuit Jaconde
    • 340gm Almond Flour
    • 340gm Sifted Icing Sugar
    • 460gm Eggs
    • 105gm Sifted Cake Flour
    • 240gm Egg Whites
    • 70gm Sugar
  • Coffee Ganache
    • 40gm Sugar
    • 40gm Glucose
    • 5gm Nescafe
    • 130gm Cream
    • 130gm Dark Chocolate
    • 40gm Unsalted Butter
  • Coffee Buttercream
    • 140gm Egg Yolks
    • 220gm Sugar
    • 70gm Water
    • 350gm Unsalted Butter, softened
    • Coffee Essence as needed
  • Coffee Syrup
    • 300gm Sugar Syrup
    • 300gm Water
    • 25gm Nescafe
  • Dark Chocolate Coating
    • 70gm Dark Chocolate
    • 225gm Dark Chocolate Compound
    • 60gm Water
    • 60gm Sugar
    • 115gm Cream
    • 20gm Glucose

DIRECTIONS FOR BISCUIT JACONDE

  1. Whisk up almond flour, sifted icing sugar, eggs to ribbon stage.
  2. Fold sifted cake flour into the egg mixture and set aside.
  3. Prepare common meringue and whip till soft peak.
  4. Add one third of the common meringue to the first mixture and mix well.
  5. Fold this mixture into the rest of the common meringue.
  6. Spread on a tray lined with parchment paper.
  7. Bake at 190°C for 6-8mins.
  8. Cool down on rack once out of the oven.

DIRECTIONS FOR COFFEE GANACHE

  1. Bring to boil the sugar, glucose, Nescafe and cream.
  2. Add bit-by-bit into the dark chocolate.
  3. Create a proper emulsification and finish it off with butter.
  4. Set aside for later use.

DIRECTIONS FOR COFFEE BUTTERCREAM

  1. Whisk up yolks to ribbon stage.
  2. Cook sugar and water to 118 °C.
  3. Add into whipped yolk and whisk till cool.
  4. Switch to paddle and gradually add butter till fully combined.
  5. Add coffee essence as needed.
  6. Set aside for later use.

DIRECTIONS FOR COFFEE SYRUP

  1. Warm the water to melt the Nescafe.
  2. Add sugar syrup and set is aside for later use.

DIRECTIONS FOR DARK CHOCOLATE COATING

  1. Combine dark chocolate and dark chocolate compound in a bowl.
  2. Bring to boil water, sugar, cream and glucose.
  3. Pour into bowl containing chocolate and blend till fully combined.
  4. Set aside for later use.

ASSEMBLING

  1. Coat a thin layer of chocolate on one sheet of jaconde.
  2. Place the coated side of the jaconde on a tray lined with parchment paper.
  3. Soak with 200gm of coffee syrup and spread 500gm of coffee buttercream on top.
  4. Cover with second sheet of jaconde. Soak with 200gm of coffee syrup and spread all the coffee ganache on top.
  5. Cover with the last sheet of jaconde. Soak with the remaining coffee syrup and spread a thin layer of coffee buttercream before setting it in the chiller until ready to be coated.
Posted in

Ogura Zebra Chiffon Cake

< Back to Recipe Listings

Ogura Zebra Chiffon Cake

by Julie Yee

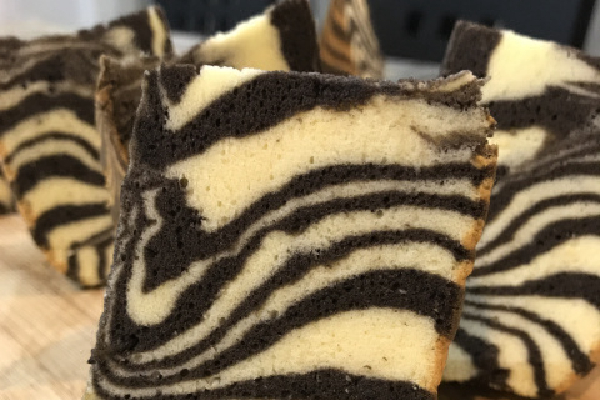
This light and fluffy Ogura Zebra Chiffon Cake is as delicious as it looks! A basic chiffon cake recipe now tastes better with swirled decadent chocolate paste.

Cuisine : Baking Course : Dessert  Skill Level : Novice
Prep : 15 mins Cook : 55 mins Ready in : 1 hr 10 mins  Serves : 1 Chiffon Cake


INGREDIENTS             

  • Group 1
    • 100g Egg Yolk
    • 1 Egg
    • 50g Oil
    • 60g Fresh Milk
    • A pinch of Salt
    • 70g Cake Flour
  • Group 2
    • 250g Egg White
    • 80g Fine Sugar
    • 1 tsp Lemon Juice
  • Chocolate Paste Mixture
    • 1 tbsp Cocoa Powder
    • 1 tbsp Chocolate Milk/ Milk
    • ½ tsp Chocolate Paste/ Emulco

DIRECTIONS       

  1. Whisk eggs, oil, milk for 3mins.
  2. Add in sifted flour and mixed till well-combined. Put aside.
  3. Whisk egg white with fine sugar till medium peak.
  4. Fold a big scoop of the meringue to the egg yolk batter and mix well.
  5. Pour the batter back to the meringue bowl and fold gradually till just combined.
  6. Divide the mixture into 2 portions. Stir in the Cocoa paste mixture into 1 portion.
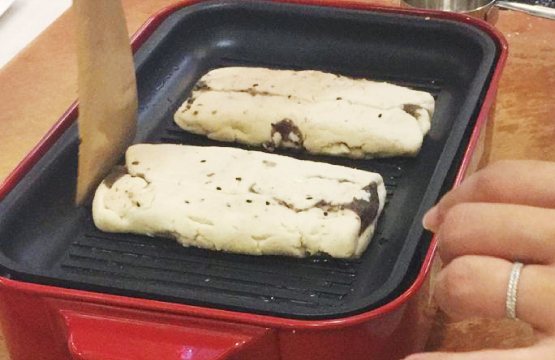
  7. Pour mixture into the centre of the tin alternately (see demo).
  8. Bake at 170C for 15mins then lower to 150c bake for 4omins or till cooked.
Posted in

Chocolate Eclair

< Back to Recipe Listings

Chocolate Eclair

by Charlynn Gwee

Enjoy French Classic, Chocolate Éclair, a perfectly light choux pastry filled with creamy crème patisserie and coated with luscious dark chocolate ganache!

Cuisine : Baking Course : Dessert  Skill Level : Novice
Prep : 30 mins Cook : 15 mins Ready in : 45 mins  Serves : 10 Servings


INGREDIENTS             

  • Choux Pastry
    • 132g Water
    • 132g Milk
    • 132g Butter
    • 12g Sugar
    • 2g Salt
    • 172g Plain Flour
    • 268g Eggs
  • Crème Pastisserie
    • 140g Milk
    • Vanilla Extract
    • 32g Egg Yolks
    • 40g Sugar
    • 14g Cake Flour
  • Chocolate Ganache
    • 100g Heavy Cream
    • 100g Dark Chocolate

DIRECTIONS FOR CHOUX PASTRY

  1. Bring water, milk, butter, sugar and salt to a boil.
  2. Whisk in plain flour and dry the dough till it pulls away from the sides of the pot.
  3. Transfer mixture to a stand mixer and gradually incorporated eggs
  4. Transfer mixture to a piping bag.
  5. Pipe mixture and steam bake at 200C for 15 mins.

DIRECTIONS FOR CRÈME PASTISSERIE

  1. Bring milk and vanilla to a boil.
  2. Whisk egg yolks and sugar till light and add in cake flour.
  3. Gradually pour in the boiled mixture with the mixer still running.
  4. Once incorporated, transfer mixture back to the pot and continue stirring till thicken.

DIRECTIONS FOR CHOCOLATE GANACHE

  1. Heat up cream and melt chocolate together.
Posted in

Strawberry Shortcake Cups

< Back to Recipe Listings

Strawberry Shortcake Cups

by Claire Marie Chang

Sink your teeth into beautiful layers of lady finger biscuits, vanilla Chantilly cream and fresh strawberries! These Strawberry Shortcake Cups are to die for.

Cuisine : Baking Course : Dessert  Skill Level : Novice
Prep : 45 mins Cook : 0 mins Ready in : 45 mins  Serves : 5-8 dessert shot cups


INGREDIENTS             

  • Vanilla Chantilly Cream
    • 150g Dairy Whipping Cream 35% fat
    • 10g Icing Sugar or Caster Sugar (Optional)
    • 1/8 1 ¼ tsp Vanilla Extract or Vanilla Bean Paste
  • Trifle Base
    • 8 pcs Lady Finger Biscuits
    • 100ml Milk or Full Cream
    • OR
    • Vanilla Sponge Cake
    • Strawberries, chopped into small cubes
    • Jelly/ Piping Glaze

DIRECTIONS FOR VANILLA CHANTILLY CREAM

  1. In a cold greaseproof mixing bowl, combine whipping cream, sugar and vanilla.
  2. Using the whisk attachment, whip on medium speed (Kitchenaid speed 6) till soft firm peaks form.
  3. Using a spatula, transfer the whipped cream into piping bag with piping tip. Keep in the fridge immediately if not using immediately.

DIRECTIONS FOR ASSEMBLING THE TRIFLE

  1. Gently soak your sponge fingers in the milk briefly to moisten the sponge.
  2. Cut each up into 4-5 pcs each depending on your dessert shot cup shape/size.
  3. Place 2-3 pcs of soaked lady finger biscuits into each dessert cup.
  4. Pipe 1 layer of Vanilla Chantilly Cream. Top with chopped strawberries.
  5. Place remaining ladyfinger biscuits on top. Pipe 1 layer of Vanilla Chantilly Cream.
  6. Top with diced strawberries mixed with some jelly glaze.

** Keep refrigerated if not consumed within 30 minutes. Eat within 3 days.

Posted in

Salted Earl Grey Chocolate Chip Cookies

< Back to Recipe Listings

Salted Earl Grey Chocolate Chip Cookies

by Claire Marie Chang

Indulge in these irresistible Salted Earl Grey Chocolate Chip Cookies that tastes amazing on its own and even better when paired with Earl Grey infused butter!

Cuisine : Baking Course : Dessert Skill Level : Novice
Prep : 40 mins Cook : 10 mins Ready in : 50 mins Serves : 25 medium cookies or 17 large cookies


INGREDIENTS

  • 110g Infused Earl Grey Butter, Melted*Recipe Below
  • 160g Brown Sugar (Light/Dark)
  • 50g White Sugar
  • ½ tsp Vanilla Bean Extract/Paste
  • 1 Egg (60-65g)
  • 210g Plain Flour
  • ½ tsp Baking Soda
  • ½ + 1/8 tsp Baking Powder
  • ¾ tsp Sea Salt
  • 1 Earl Grey Tea Bag (Fine type)
  • 170g Semi-Sweet Chocolate Chips or Chopped Chocolate of your choice
  • Tea Infused Butter
    • 250g Unsalted Butter
    • 8 tea bags Earl Grey Tea of your choice


DIRECTIONS FOR COOKIES

Preheat oven to 180°C

  1. Combine cooled melted butter, sugar, vanilla paste, and earl grey tea. Mix till well combined.
  2. Add egg and mix till well combined.
  3. Mix in sifted dry ingredients till 80% combined.
  4. Mix in Chocolate till combined.
  5. If the cookie dough is very soft, refrigerate for 10-15minutes till slightly firm.
  6. Portion in 30g balls (Medium) or 45g balls (Large).
  7. Sprinkle with sea salt before baking.
  8. Bake for 9 minutes for Medium/ 11 minutes for Large.

* Eat within 3 days. Cookie dough can be frozen up to 1 month.

DIRECTIONS FOR TEA INFUSED BUTTER

  1. Over low heat, melt butter till fully melted.
  2. Remove from heat. Add tea bags to infuse for 15 minutes.
  3. Sieve to remove the tea leaves. Cool.

* Excess infused butter can be frozen to keep its fragrance.

Posted in

Hainanese Breaded Pork Chop with Signature Sauce

< Back to Recipe Listings

Hainanese Breaded Pork Chop with Signature Sauce

by Julie Yee

Have a taste of famous Hainanese Bread Pork Chop with Chef Julie’s recipe.

Cuisine : Asian  Course : Main Skill Level : Novice
Prep : 2hr 15 mins  Cook : 15 mins Ready in : 2 hr 30 mins  Serves : 1-2 Servings


INGREDIENTS

  • 20pcs Cream Crackers
  • 2 no Eggs
  • 1 tbsp Minced Garlic
  • 1 no Big onion
  • 2 no Tomato
  • 3 rings Pineapples Rings (cut)
  • 600gm Pork Collar
  • Marinade
    • ½ tsp Baking Soda
    • 1 tsp Five Spice Powder
    • ½ tbsp. Fine Sugar
    • 1 tbsp Minced Garlic
    • 1 tbsp Fermented Bean Paste
    • 1 tsp Sesame Oil
    • 1 tbsp Light Soya Sauce
    • 1 tbsp Corn Flour
  • Gravy
    • 5 tbsp Tomato Ketchup
    • 1 tbsp HP Sauce
    • 1 tbsp Worcestershire Sauce
    • 1 tbsp Sugar
    • 1 tbsp Hua Tiao Wine
    • 1 cup Water
    • ½ tbsp. Corn Flour (dilute with 2 tbsp water)

DIRECTIONS

  1. Butterfly the Pork Collar into about 1/2cm slices and flatten them slightly.
  2. Marinate the pork with the marinate ingredients for minimum 2hrs or overnight.
  3. Blend the cream crackers.
  4. Coat the pork slices with the beaten eggs and coat with the cream crackers.
  5. Fry pork slices until is golden brown and drain dry.
  6. Heat oil and add the garlic.
  7. Add in the red onions and add in the tomato and pineapples slices.
  8. Pour in the gravy seasonings.
  9. Thicken gravy with the corn flour mixture.
  10. Pour sauce onto the fried pork.
  11. Serve with mixed vegetables and fries.
Posted in

Berries Panna Cotta

< Back to Recipe Listings

Berries Panna Cotta

by Philia Ng

Delight yourself with a luxurious Berries Panna Cotta to end your week!

Cuisine : Dessert Course : Baking  Skill Level : Novice
Prep : 15 mins Cook : 5 mins Ready in : 1 hr 15 mins  Serves : 1-2 Servings


INGREDIENTS             

  • Group 1
    • ½ Vanilla Pod
    • 25g Sugar
    • 200ml Fresh Cream
  • Group 2
    • 2 tbsp Water
    • 1g Gelatin Powder

DIRECTIONS

  1. Combine Group 2 together.
  2. Cook Group 1 until sugar is melted, add in Group 2 and mix until the batter is smooth and sugar has melted.
  3. Strain the mixture and pour into dessert cups to set.
Posted in

Grilled Mochi Pancake: Red Bean Mochi Pancake

< Back to Recipe Listings

Grilled Mochi Pancake: Red Bean Mochi Pancake

by Autumn Brown

Enjoy Japanese-inspired Grilled Mochi with Bruno! Learn to make Red Bean Mochi Pancake from scratch with Chef Autumn Brown.

Cuisine : Baking Course : Dessert Skill Level : Novice
Prep : 1 hr 30 mins Cook : 10-15 mins Ready in : 1 hr 45 mins  Serves : 1-2 Servings


INGREDIENTS

  • Mochi Pancake
    • 150g Glutinous Rice Flour
    • 150g Hot Water
    • 2 tbsp Oil
    • 40g Caster Sugar
  • Red Bean Paste
    • 200g Red Beans, soaked in water overnight
    • 150g Caster Sugar
    • 1-2 tsp Fresh Ginger Juice
      • May use store bought red bean paste as substitute too

DIRECTIONS

  1. Bring soaked red beans to a boil, then simmer for 1-2 hours. Until beans turn mushy when pressed with fingers.
  2. Drain the beans and mash with a fork or blender.
  3. Return mashed beans to pot, add sugar and ginger juice. Cook the mixture down to spreadable paste consistency; stirring constantly to ensure the bottom of pot does not burn.
  4. To make mochi pancake, add oil and sugar to water and bring to a boil. Make a well in the center of glutinous rice flour and pour the hot water mixture in.
  5. Mix vigourously with a pair of chopsticks or wooden spoon until dough is formed.
  6. When dough is cool enough to touch but still fairly hot. Fold and knead until the surface is smooth. Add a little more water or glutinous rice flour if it is too dry or wet.
  7. Set aside to rest for about 5 minutes, covered in cling film or a damp cloth.
  8. Divide dough into 6 portions and roll them out to around 5mm thick. Spread desired amount of red bean paste on one side and fold the other side over and seal by pressing the edges.
  9. Using the Bruno Grill Plate attachment, turn the heat to medium-high and coat hotplate with a bit of oil. Slowly grill pancakes until golden brown and on both sides.
  10. Cut into bite sized pieces and enjoy with Chinese tea.
Posted in

Grilled Mochi Pancake: Leek & Shiitake Pancake

< Back to Recipe Listings

Grilled Mochi Pancake: Leek & Shiitake Pancake

by Autumn Brown

With Bruno Compact Hot Plate, you can now make Japanese-inspired Leek & Shiitake Grilled Mochi Pancake!

Cuisine : Baking Course : Appetizer Skill Level : Novice
Prep : 1 hr 30 mins Cook : 10-15 mins Ready in : 1 hr 45 mins  Serves : 1-2 Servings


INGREDIENTS:

  • Mochi Pancake
    • 150g Glutinous Rice Flour
    • 150g Hot Water
    • 2 tbsp Oil
    • 40g Caster Sugar*
      • Substitute with 5g salt + a pinch of caster sugar for savoury Mochi
  • Leek & Mushroom Mixture
    • 1 pc Leek, chiffonade
    • 1 pc Red Chili, deseeded and diced
    • 3-5 pcs Fresh Shiitake Mushrooms
    • 1 tsp Sesame Seed Oil
    • Salt to taste
    • White Pepper to taste

DIRECTIONS:

  1. Stir fry leek, chili and mushrooms quickly and set aside to cool.
  2. To make mocha pancake, add oil, salt and sugar to water and bring to a boil. Make a well in the center of glutinous rice flour and pour the hot water mixture in.
  3. Mix immediately with a pair of chopsticks or wooden spoon until dough is formed.
  4. When dough is cool enough to touch but still fairly hot, add in cooled leek mixture. Fold and knead until the surface is smooth. Add a little more water or glutinous rice flour if it is too dry or wet.
  5. Set aside to rest for about 5 minutes, covered in cling film or a damp cloth.
  6. Divide dough into 6 portions and roll them out to around 8mm thick.
  7. Using the Bruno Grill Plate attachment, turn the heat to medium-high and coat hotplate with a bit of oil. Slowly grill pancakes until golden brown and on both sides.
  8. Cut into bite sized strips. Serve with some sweet sauce and chili sauce for dipping.
Posted in

White Chocolate Heart Tarts

< Back to Recipe Listings

White Chocolate Heart Tarts

by ToTT

Say it with tarts this Valentine’s Day! These no-bake heart-shaped tarts look impressive but take no time at all to make!

Cuisine : European Course : Baking Skill Level : Novice
Prep : 20 mins Cook : 0 mins Ready in : 20-30 mins Serves : 6 Pieces


INGREDIENTS:

  • 200g Digestive Biscuits
  • 60g Butter, melted
  • ½ cup Thickened Cream
  • 80g White Chocolate, melted and cooled
  • A handful of fresh Raspberries

DIRECTIONS 

  1. Place food processor and process till finely chopped.
  2. Add melted butter and combined till mixture till combined.
  3. Pour mixture into Nordic Ware Mini Heart Baking Cake Pan evenly. Using the back of a metal teaspoon, press mixture over base and sides. Refrigerate for 30 minutes or until firm.
  4. Whisk cream until soft peaks form and add melted white chocolate. Fold until combined.
  5. Pour the mixture into the cake pan evenly.
  6. Garnish with fresh raspberries.
Posted in