Berries Panna Cotta

< Back to Recipe Listings

Berries Panna Cotta

by Philia Ng

Delight yourself with a luxurious Berries Panna Cotta to end your week!

Cuisine : Dessert Course : Baking  Skill Level : Novice
Prep : 15 mins Cook : 5 mins Ready in : 1 hr 15 mins  Serves : 1-2 Servings


INGREDIENTS             

  • Group 1
    • ½ Vanilla Pod
    • 25g Sugar
    • 200ml Fresh Cream
  • Group 2
    • 2 tbsp Water
    • 1g Gelatin Powder

DIRECTIONS

  1. Combine Group 2 together.
  2. Cook Group 1 until sugar is melted, add in Group 2 and mix until the batter is smooth and sugar has melted.
  3. Strain the mixture and pour into dessert cups to set.
Posted in

Grilled Mochi Pancake: Red Bean Mochi Pancake

< Back to Recipe Listings

Grilled Mochi Pancake: Red Bean Mochi Pancake

by Autumn Brown

Enjoy Japanese-inspired Grilled Mochi with Bruno! Learn to make Red Bean Mochi Pancake from scratch with Chef Autumn Brown.

Cuisine : Baking Course : Dessert Skill Level : Novice
Prep : 1 hr 30 mins Cook : 10-15 mins Ready in : 1 hr 45 mins  Serves : 1-2 Servings


INGREDIENTS

  • Mochi Pancake
    • 150g Glutinous Rice Flour
    • 150g Hot Water
    • 2 tbsp Oil
    • 40g Caster Sugar
  • Red Bean Paste
    • 200g Red Beans, soaked in water overnight
    • 150g Caster Sugar
    • 1-2 tsp Fresh Ginger Juice
      • May use store bought red bean paste as substitute too

DIRECTIONS

  1. Bring soaked red beans to a boil, then simmer for 1-2 hours. Until beans turn mushy when pressed with fingers.
  2. Drain the beans and mash with a fork or blender.
  3. Return mashed beans to pot, add sugar and ginger juice. Cook the mixture down to spreadable paste consistency; stirring constantly to ensure the bottom of pot does not burn.
  4. To make mochi pancake, add oil and sugar to water and bring to a boil. Make a well in the center of glutinous rice flour and pour the hot water mixture in.
  5. Mix vigourously with a pair of chopsticks or wooden spoon until dough is formed.
  6. When dough is cool enough to touch but still fairly hot. Fold and knead until the surface is smooth. Add a little more water or glutinous rice flour if it is too dry or wet.
  7. Set aside to rest for about 5 minutes, covered in cling film or a damp cloth.
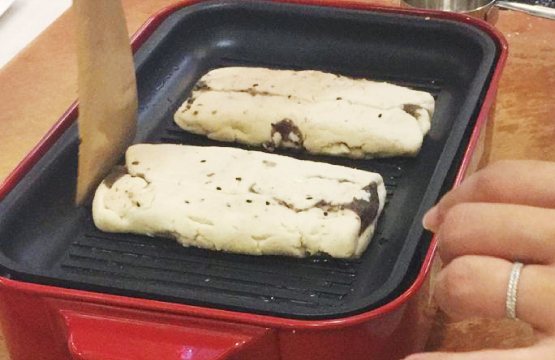
  8. Divide dough into 6 portions and roll them out to around 5mm thick. Spread desired amount of red bean paste on one side and fold the other side over and seal by pressing the edges.
  9. Using the Bruno Grill Plate attachment, turn the heat to medium-high and coat hotplate with a bit of oil. Slowly grill pancakes until golden brown and on both sides.
  10. Cut into bite sized pieces and enjoy with Chinese tea.
Posted in

Grilled Mochi Pancake: Leek & Shiitake Pancake

< Back to Recipe Listings

Grilled Mochi Pancake: Leek & Shiitake Pancake

by Autumn Brown

With Bruno Compact Hot Plate, you can now make Japanese-inspired Leek & Shiitake Grilled Mochi Pancake!

Cuisine : Baking Course : Appetizer Skill Level : Novice
Prep : 1 hr 30 mins Cook : 10-15 mins Ready in : 1 hr 45 mins  Serves : 1-2 Servings


INGREDIENTS:

  • Mochi Pancake
    • 150g Glutinous Rice Flour
    • 150g Hot Water
    • 2 tbsp Oil
    • 40g Caster Sugar*
      • Substitute with 5g salt + a pinch of caster sugar for savoury Mochi
  • Leek & Mushroom Mixture
    • 1 pc Leek, chiffonade
    • 1 pc Red Chili, deseeded and diced
    • 3-5 pcs Fresh Shiitake Mushrooms
    • 1 tsp Sesame Seed Oil
    • Salt to taste
    • White Pepper to taste

DIRECTIONS:

  1. Stir fry leek, chili and mushrooms quickly and set aside to cool.
  2. To make mocha pancake, add oil, salt and sugar to water and bring to a boil. Make a well in the center of glutinous rice flour and pour the hot water mixture in.
  3. Mix immediately with a pair of chopsticks or wooden spoon until dough is formed.
  4. When dough is cool enough to touch but still fairly hot, add in cooled leek mixture. Fold and knead until the surface is smooth. Add a little more water or glutinous rice flour if it is too dry or wet.
  5. Set aside to rest for about 5 minutes, covered in cling film or a damp cloth.
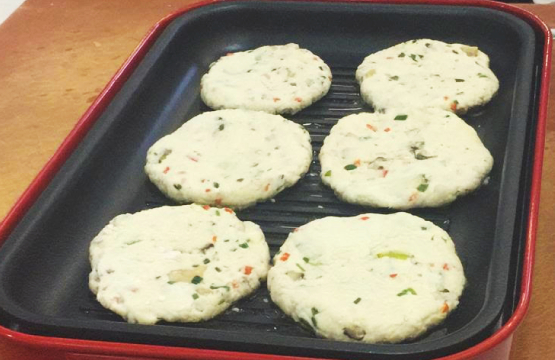
  6. Divide dough into 6 portions and roll them out to around 8mm thick.
  7. Using the Bruno Grill Plate attachment, turn the heat to medium-high and coat hotplate with a bit of oil. Slowly grill pancakes until golden brown and on both sides.
  8. Cut into bite sized strips. Serve with some sweet sauce and chili sauce for dipping.
Posted in

White Chocolate Heart Tarts

< Back to Recipe Listings

White Chocolate Heart Tarts

by ToTT

Say it with tarts this Valentine’s Day! These no-bake heart-shaped tarts look impressive but take no time at all to make!

Cuisine : European Course : Baking Skill Level : Novice
Prep : 20 mins Cook : 0 mins Ready in : 20-30 mins Serves : 6 Pieces


INGREDIENTS:

  • 200g Digestive Biscuits
  • 60g Butter, melted
  • ½ cup Thickened Cream
  • 80g White Chocolate, melted and cooled
  • A handful of fresh Raspberries

DIRECTIONS 

  1. Place food processor and process till finely chopped.
  2. Add melted butter and combined till mixture till combined.
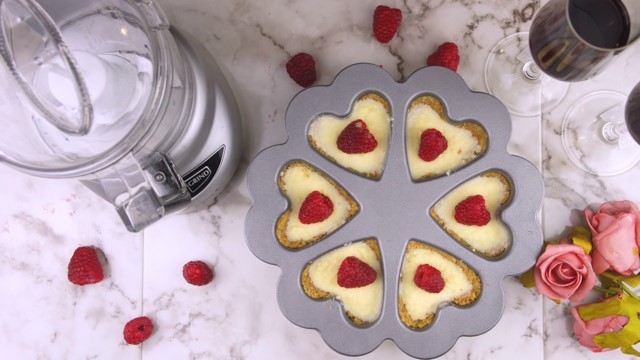
  3. Pour mixture into Nordic Ware Mini Heart Baking Cake Pan evenly. Using the back of a metal teaspoon, press mixture over base and sides. Refrigerate for 30 minutes or until firm.
  4. Whisk cream until soft peaks form and add melted white chocolate. Fold until combined.
  5. Pour the mixture into the cake pan evenly.
  6. Garnish with fresh raspberries.
Posted in

Nian Gao Puffs

< Back to Recipe Listings

Nian Gao Puffs

by ToTT

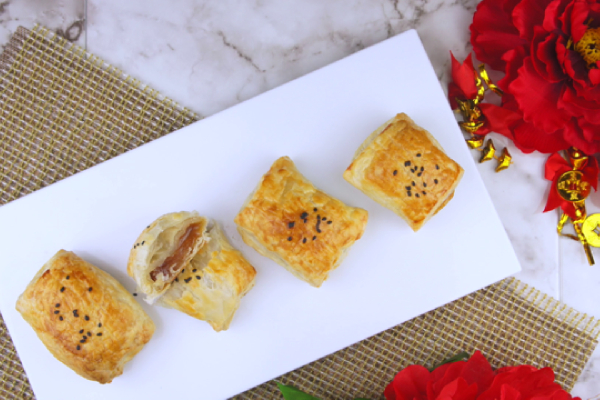
Looking for an ultra-easy yet delicious snack to serve up this Lunar New Year? These Nian Gao Puffs will seal the deal! Sweet and chewy Nian Gao wrapped in crispy puff pastry, what’s not to love?

Cuisine : Asian Course : Baking Skill Level : Novice
Prep : 5 mins Cook : 20-25 mins Ready in : 25-30 mins Serves : 14 Pieces


INGREDIENTS:

  • Sheets of Puff Pastry
  • Nian Gao, sliced into ~5cm
  • Black Sesame Seeds
  • 1 Egg

DIRECTIONS 

  1. Preheat oven to 190C.
  2. Slice puff pastry into desired size, ensuring there is at least 2cm extra at each side to wrap the nian gao.
  3. Lay the nian gao on top of the puff pastry, wrap into desired shape and seal the edges.
  4. Add 1 tsp of water into cracked egg and whisk lightly.
  5. Using a pastry brush, apply egg wash all over pastry.
  6. Sprinkle some black sesame seeds and bake for 20-25 mins, or until golden brown.
Posted in

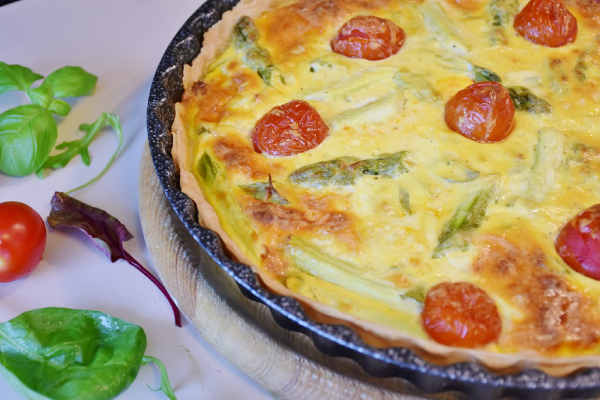
Mushroom and Spinach Quiche

< Back to Recipe Listings

Mushroom and Spinach Quiche

by Charlynn Gwee

Indulge in this flavourful, cheesy Mushroom and Spinach Quiche for a savoury breakfast delight!

Cuisine : Baking  Course : Appetizer Skill Level : Novice
Prep : 15 mins  Cook : 30 mins Ready in : 45 mins  Serves : 4-6 Servings


INGREDIENTS:

  • Fillings
    • 6 rashes Bacon, Diced
    • 1 Medium size Yellow Onion, Diced
    • 300g Button Mushroom
    • 100g Wilted Spinach
    • 50g Shredded Cheese
  • Cream Salad
    • 175g Heavy Cream
    • 4 Eggs + 2 Egg Yolks
    • Salt
    • Pepper
    • 1 tbsp Freshly chopped Thyme Leaves
    • Puff Pastry

DIRECTIONS:

  1. Thaw puff pastry.
  2. Preheat oven to 200℃.
  3. Whisk up all ingredients in the cream sauce and set aside.
  4. Fry up diced bacon till crispy and golden brown, set aside.
  5. Sauté onion & mushroom in remaining bacon fat till caramelized.
  6. Line baking mould with puff pastry Layer in bacon, mushroom, handful of cheese and spinach and fill the tart with cream sauce till full.
  7. Bake on bottom heat for 20 mins followed by top heat for another 10 mins.
  8. It’s ready when the shells are golden brown and eggs are firm.
Posted in

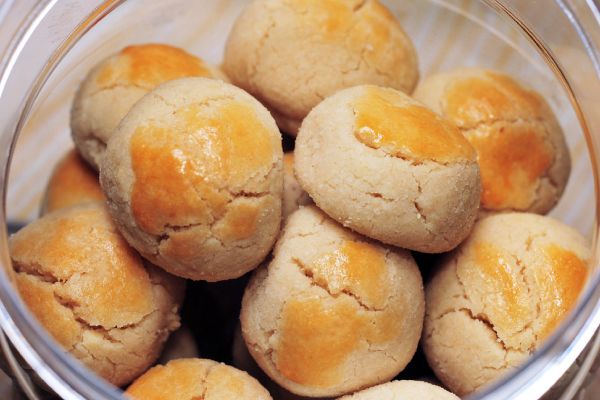
Peanut Ball Cookies

< Back to Recipe Listings

Peanut Ball Cookies

by Julie Yee

This Chinese New Year, bake these savoury-sweet Peanut Ball Cookies for your guests.

Cuisine : Baking Course : Dessert Skill Level : Novice
Prep : 15 mins Cook : 15 mins Ready in : 30 mins  Serves : 25 pieces


INGREDIENTS:

  • Group 1
    • 100g Ground Peanut
    • 80g Icing Sugar
    • 120g Plain Flour
    • ½ tbsp. Milk Powder
    • ½ tsp Vanilla Powder
    • 2/3 tsp Double Action Baking Powder
  • Group 2
    • 1 ½ tbsp. Creamy Peanut Butter
    • 80g Peanut Oil

DIRECTIONS:

  1. Mix Group 1 all the ingredients evenly.
  2. Add in Group 2 & mix till a smooth paste is formed.
  3. Mould it into balls of 5gm each. Place on a greased tray.
  4. Egg wash & place ½ a peanut on top.
  5. Bake at 170ºC for approx. 20 minutes.
Posted in

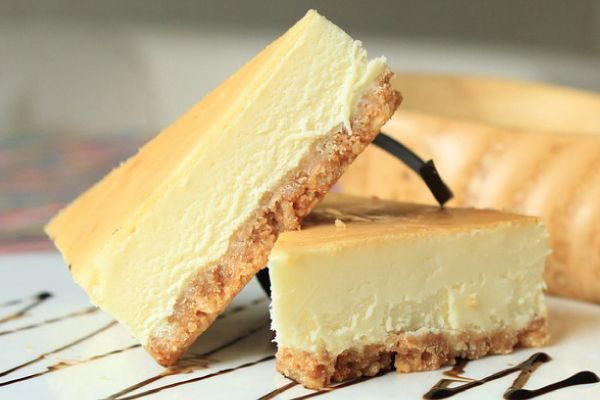
Baked New York Cheesecake

< Back to Recipe Listings

Baked New York Cheesecake

by Michele Ow

What a delicious way to end a meal! A classic, creamy Baked New York Cheesecake with simple crust and sour cream topping.

Cuisine: Baking Course : Dessert Skill Level : Novice
Prep : 30 mins Cook : 45 mins Ready in : 3 hr 15 mins Serves : 7” round springform pan


INGREDIENTS:

  • Crust
    • 60g Butter melted, plus extra for tin
    • 90g Digestive biscuit, made into fine crumbs
    • Optional:
    • 1 tbsp sugar, or ½ lemon’s zest or 1-2 tbsp cocoa powder or cinnamon powder / sugar
  • Cheesecake Filling
    • 400g Cream cheese
    • 120g Caster sugar
    • 2 tbsp Plain flour
    • Splash Vanilla extract
    • Finely grated zest of 1 lemon
    • 2 tsp Lemon juice
    • 2 Large eggs
    • 120ml Sour cream or yogurt
  • Sour Cream Topping
    • 50ml Carton soured cream
    • 1 tbsp Icing sugar

DIRECTIONS:

  1. Preheat the oven to 160C. Line the base of the cake tin with parchment paper. For the crust, melt the butter in a medium pan. Stir in the biscuit crumbs and sugar so the mixture is evenly moistened. Press the mixture into the bottom of the pan and bake for 10 minutes. Cool on a wire rack while preparing the filling.
  2. Increase the oven temperature to 200C. In a table top mixer fitted with the paddle attachment, beat the soft cheese at medium-low speed until creamy. With the mixer on low, gradually add the sugar, then the flour and a pinch of salt, scraping down the sides of the bowl and the paddle twice.
  3. Continue by adding the vanilla, lemon zest and juice. Whisk in the eggs, one at a time, scraping the bowl and whisk at least twice. Stir the sour cream or yogurt. Whisk to blend, but don’t over-beat. The batter should be smooth, light and somewhat airy.
  4. Pour the filling into the tray – the top should be as smooth as possible. Bake for 10 minutes. Reduce oven temperature to 90C and bake for 25 minutes more. If you gently shake the tin, the filling should have a slight wobble. Turn off the oven and open the oven door for a cheesecake that’s creamy in the centre, or leave it closed if you prefer a drier texture. Let cool in the oven for 1-2 hours. The cheesecake may get a slight crack on top as it cools.
  5. Combine 50ml sour cream with the icing sugar for the topping. Spread over the cheesecake right to the edges. Cover loosely with foil and refrigerate until cooled.
  6. Run a round-bladed knife around the sides of the tin to loosen any stuck edges. Unlock the side, slide the cheesecake off the bottom of the tin onto a plate, then slide the parchment paper out from underneath.
Posted in

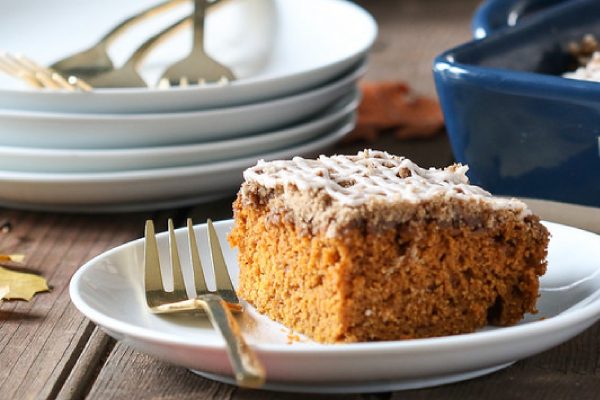
Almonds Coffee Cake

< Back to Recipe Listings

Almonds Coffee Cake

by Trish Yee

Conclude Sunday Brunch with this crumbly, sweet and luxurious Almonds Coffee cake over a cup of coffee!

Cuisine : Baking Course : Dessert Skill Level : Novice
Prep : 30 mins Cook : 40 mins Ready in : 1 hr 10 mins Serves : 6-8 Servings


INGREDIENTS             

  • 225gm Butter
  • 160gm White Sugar
  • 50gm Brown Sugar
  • 3 no Large Eggs
  • 1 tsp Vanilla Essence or Coffee Emulco
  • 1 tsp Almond Essence
  • 100gm Plain Flour
  • 50gm Almond Flour
  • 1 tsp Baking Powder
  • 1 tsp Coffee Powder mix with 1/2 tsp Hot Water
  • Crumble Topping
    • 10gm Instant Coffee Granules
    • 100gm Cold Butter
    • 120gm Flour
    • 40gm Almond Flour
    • 80gm Brown Sugar

DIRECTIONS

  1. Preheat the oven to 150C and grease a baking tin and line with baking paper.
  2. Prepare the crumble toppings by rubbing the mixture all together till it resembles breadcrumbs. Keep in the fridge till ready to use.
  3. Cream the butter with sugar and brown sugar until light and fluffy.
  4. Add in the eggs gradually till the butter fully incorporates with the eggs. Add in the essence and coffee mixture.
  5. Sift the flour, almond flour and baking powder together.
  6. Add the flour into the mixing bowl and mix well.
  7. Pour into the cake tin and scatter the crumble all over the cake surface.
  8. Cover the cake tin with aluminum foil and bake for 40 minutes.
Posted in

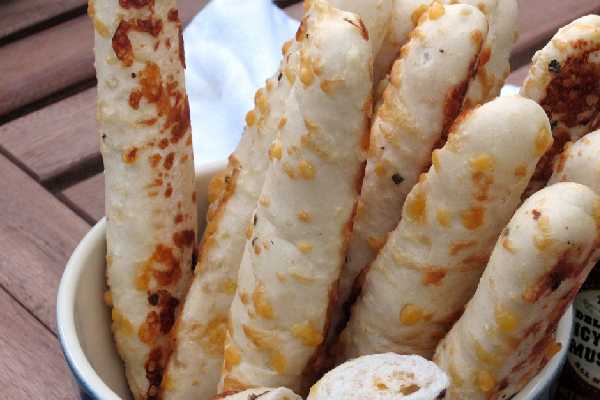
Cheesy Seaweed Bread Sticks

< Back to Recipe Listings

Cheesy Seaweed Bread Sticks

by Julie Yee

Serve these crisp Cheesy Seaweed Bread Sticks alongside with a salad, a big bowl of soup or just enjoy it the way it is!

Cuisine : Baking Course : Dessert Skill Level : Novice
Prep : 15 mins Cook : 15 mins Ready in : 30 mins  Serves : 25 pieces


INGREDIENTS             

  • 250gm Plain Flour
  • 20gm Parmesan Cheese
  • 2gm Black Pepper/ Seaweeds
  • 2gm Herbs (any)
  • 25gm Egg White
  • 1/2 tsp Salt
  • 1/2 tsp Instant Yeast
  • 125gm Water
  • 1 no Egg – for glazing

DIRECTIONS

  1. Place all ingredients into kneading bowl. Knead until dough is formed.
  2. Add butter and continue to knead until the dough can be stretched. Perform ‘window panel test’ by holding a dough of a golf ball size between your fingers and gently spreading your fingers and thumb apart thus stretching the dough into a thin translucent membrane like a windowpane. Cover and leave the dough aside to rest for about 30 minutes.
  3. Turn dough out onto a well-floured work surface. Flatten the air and roll the dough out thinly into 1/2 cm thick. Cut into 1cm long strips.
  4. Divide dough into 4 long logs and twist it and place in the aluminum foils.
  5. Leave to proof till 60%. Glaze the dough with eggs.
  6. Bake at 180C for 12-15 minutes.
Posted in