Ever had a savoury Crème Brulee? This luxurious and decadent velvety Foie Gras Crème Brulee shows the perfect combination of sweet and savoury!
Cuisine : European Course : Appetizer Skill Level : Novice
Prep : 15 mins Cook : 55 mins Ready in : 1 hr 10 mins Serves : 10 Portions
INGREDIENTS
Goose Liver Custard
- 200 Duck Consomme (Chicken Stock)
- 250g Foie Gras Parfait (can use Raw Foie Gras)
- 300g Cream
- 150g Milk
- 4g Iota
- Seasoning
For Crème Brulee (Eggless)
- 900g Crème Brulee mix
- 4g Iota Carrageenan
Crème Brulee Mix
- 600ml Whole Milk
- 300ml Cream, liquid 35%
- 2 Cinnamon Sticks
- 2 strips Lemon Zest
- 2 strips Orange Zest
- 3g Star Anise
- 1g Fennel Seeds
- 2 Vanilla Pods
- 225g Sugar
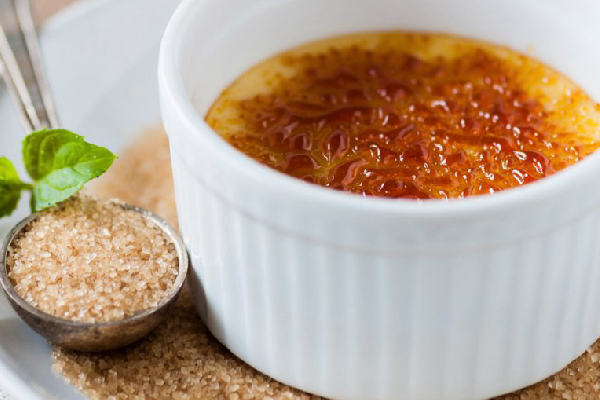
- Brown Sugar
DIRECTIONS FOR GOOSE LIVER CUSTARD
- Place all the ingredients together except the Iota. Preheat to 80degrees and add the Iota. Strain and keep refrigerated.
- If no Iota, add all the ingredients together and place into a vacuum bag. Place the bag into a thermo circulator by 64degrees. Blend and strain. Give the mixture into small bowls (fill first with the duck confit, ginko beans, truffle salsa), set on a tray with a bit of water. Bake in the oven for 8-15minutes, depending on size of the baking glass.
DIRECTIONS FOR CRÈME BRULEE
- Combine the milk, cream, vanilla pods (cut in half and scraped out), sugar and spices into a pot – preheat to a boil, set aside to infuse the milk with all flavouring compounds.
- Once cooled down, strain thru a fine chinois into another pot, add the Iota and preheat to 90degrees. Blend well (hand blender).
- Fill into desired bowls – bake it in the oven at 150C for 45mins.
- Add the brown sugar and burn with a blow torch.