Strawberry Mille-Feuille

< Back to Recipe Listings

Strawberry Mille-Feuille

by Thripti Hinduja

This dish, ‘Strawberry Mille-Feuille’ literally translates to a thousand layers. This refers to the paper-thin layers of the delicate puff pastry. Using puff pastry that is readily available in local stores, you will create a feather-light dessert with a vanilla-infused custard cream, and complemented with fresh strawberry slices.

Cuisine : Baking Course : Dessert Skill Level : Novice
Prep : 75  mins Cook : 30 mins Ready in : 105 mins Serves : 6


INGREDIENTS:

  • 375g Milk
  • 75g Sugar
  • 25g Corn Flour
  • 1 tbsp Vanilla Bean Paste
  • 35g Butter
  • 5 Egg Yolks
  • 12 Strawberries (each sliced into 4)

DIRECTIONS:

         For Puff Pastry

  1. Cut each sheet into 8 equal pieces.

  2. Lay them on a greased baking sheet. Dock them with a fork. Place another baking sheet over them and bake at 190°C for 10 minutes.

  3. Remove the top baking sheet, reduce the heat to 180°C and bake until golden brown (about 5 to 10 minutes). Allow to cool.

    For Custard Filling

  4. Heat the milk in a sauce pan.

  5. At the same time, whisk the egg yolks and sugar together till creamy. Whisk in the corn flour and the vanilla bean paste.

  6. Drizzle in the warm milk, whisking all the time.

  7. Pour it back into the sauce pan and cook until the custard bubbles and thickens.

  8. Take it off the heat and add in the butter.

  9. Cool completely. Refrigerate for an hour.

    For Assembly

  10. Pipe the custard on a piece of puff pastry (with a star shaped nozzle if desired).

  11. Place sliced strawberries over.

  12. Put another puff pastry layer on top and repeat the layering.

  13. Place the third puff pastry over and refrigerate for one hour.

  14. Dust with icing sugar before serving.


Posted in

Cappuccino Brownie Cake Slice

< Back to Recipe Listings

Cappuccino Brownie Cake Slice

by Julie Yee

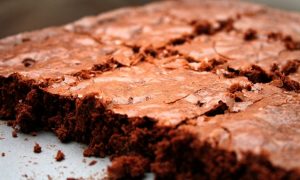
Tempt your taste buds with this deliciously rich and fudgy Cappuccino Brownie Cake Slice by Chef Julie Yee!

Cuisine : Baking Course : Dessert Skill Level : Novice
Prep : 15 mins Cook : 30 mins Ready in : 105 mins Serves : 10-12


INGREDIENTS:

  • 120 gm Pure Salted Butter (Group 1)
  • 90 gm Dark Chocolate (Group 1)
  • 250 gm Fine Sugar (Group 1)
  • 3 Eggs (Group 1)
  • 1 teasp Vanilla Paste (Group 1)
  • 120 gm Plain Flour (Group 2)
  • 1 tbsp Nescafe Coffee Powder (Group 2)

DIRECTIONS:

  1. Tray Preparation: 8inch square tray – Lined with Parchment paper with side 5cm paper.
  2. Oven Preparation: Preheat top & Bottom heat 170C for 20mins.
  3. Melt Group 1 butter and chocolate.
  4. Whisk in the sugar.
  5. Add in the eggs one at a time.
  6. Followed by flour and coffee powder in Group 2.
  7. Pour batter into the pan.
  8. Bake at 170C for about 30mins till top is set and the toothpick comes out with a few moist crumbs attached. Rest in the pan for 1hr.
  9. Optional – Pour ganache on top is desired or Drizzle 1tbsp of rum on top if you like.
Posted in

Cinnamon Spiced Cookies

< Back to Recipe Listings

Cinnamon Spiced Cookies

by Thripti Hinduja

Enjoy the pleasure of a subtle cinnamon flavour in your cookies. These cookies are easy to prepare and are best served with a glass of milk while having afternoon tea with your friends!

Cuisine : Baking Course : Dessert Skill Level : Novice
Prep : 30 mins Cook : 15 mins Ready in : 45 mins Serves : 3


INGREDIENTS:

    • 115g Flour
    • 20g Cinnamon Sugar
    • 1 tsp Vanilla
    • ½ tsp Grated Lemon Zest
    • 80g Cold Butter (chopped)

    Sugar Glaze

    • 100g Icing Sugar
    • ½ tsp Lemon Juice
    • Water
    • Food Paste Colours
    • 2 tsp Cinnamon

DIRECTIONS:

  1. Put all the ingredients into a bowl and rub in the butter. Make a dough. Cover it in plastic wrap and refrigerate for about 20 minutes.
  2. Dust your work surface with flour and roll out the cookie dough.
  3. Cut out the dough with cookie cutters of your choice.
  4. Place them on a baking tray lined with baking paper and bake them at 180°C for 12 minutes or unit evenly browned.
  5. Slide the cookies on a cooling rack and cool completely.

    For Icing

  6. Put the icing sugar in a bowl.

  7. Stir in the lemon juice and some water a few drops at a time until you get a spreadable consistency. If the mixture becomes too thin simply add in a little icing sugar until it thickens.

  8. Color the icing if desired, spread or pipe it over the cookies and allow to set for about 15 minutes.

Posted in

Red Velvet Cupcake with Cream Cheese Frosting

< Back to Recipe Listings

Red Velvet Cupcake with Cream Cheese Frosting

by Mimi Wahadi

Fluffy and moist, this buttery red velvet cupcake topped with tangy cream cheese frosting is simply magical.

Cuisine : Baking Course : Dessert Skill Level : Novice
Prep : 20  mins Cook : 45 mins Ready in : 65 mins Serves : 4-6


INGREDIENTS:

  • 45 g Cake flour
  • 1 g Baking soda
  • 45 g Caster sugar
  • 2 g Cocoa powder
  • 5 g Salt
  • 50 g Melted Butter
  • 35 g Buttermilk
  • 20 g Egg
  • 5 g Red food coloring
  • 5 g White vinegar
  • 125 g Cream Cheese
  • 35 g Icing Sugar (Sifted)
  • 25 g Whipping Cream

DIRECTIONS:

  1. Pre heat the oven to 175°C.
  2. Combine all dry ingredients (Cake flour, Baking Soda, Caster Sugar, Cocoa Powder, Salt) .
  3. Combine buttermilk egg, red food coloring and white vinegar in a bowl.
  4. Add the wet ingredients into the dry ingredients, followed by melted butter.
  5. Stir and till combine.DO NOT OVERMIX!
  6. Line the cupcake mould and fill each with 50gm of batter.
  7. Bake for 15-20 mins depending on oven.
  8. To make the Cream Cheese Frosting, combine Cream Cheese, Icing Sugar (Sifted) and Whipping Cream and whisk till light and fluffy.
Posted in

Vacherin Glacé With Exotic Fruit Salad and Raspberry Coulis


< Back to Recipe Listings

Vacherin Glacé With Exotic Fruit Salad and Raspberry Coulis

by Susanne Despature


This heavenly dessert will surely thrill your sweet tooth! A cake made with meringue and whipped cream with exotic fruit salad and raspberry coulis; looks good, tastes even better!

Cuisine : European Course : Dessert Skill Level : Novice
Prep : 20 mins Cook : 60 mins Ready in : 80 mins Serves : 4


INGREDIENTS:

  • Meringue Shells
    • 100g Egg White
    • 1 pinch of Cream of Tartar
    • 100g Caster Sugar
    • 100g Icing Sugar
    • 20g Almonds (finely sliced)

    Garniture

    • 100g Frozen Raspberry Puree
    • 2-3 tbsp of Sugar Syrup
    • 150ml Whipped Cream (35% fat)
    • Fresh Fruits: Mango, Starfruit, Strawberry, Raspberry, Blueberry
    • Mint Leaves
    • 250g Vanilla Ice Cream (for homemade icecream: see recipe below)

    Homemade Vanilla Ice Cream

    • 40 cl of Milk
    • 20 cl of Cream (35%)
    • 2 tbsp Milk Powder
    • 1 pod of Vanilla
    • 120g Sugar
    • 6 Egg Yolks


DIRECTIONS:

          For Meringue Shells

  1. Preheat the oven to 120°C. Put two baking trays together and line with baking paper.

  2. Place egg whites and cream of tartar into a large bowl of a stand mixer. Begin beating the eggs on low speed. What you’re doing here is unraveling the egg white’s proteins (these are what will capture the air bubbles you whisk in), they’re bundled up and you need to gently unwind them. A light touch does this far better than scrambling them on high speed.

  3. Once the egg whites are very foamy, begin sprinkling in the caster sugar as you beat. Increase the speed to medium, then high, and beat the meringue to stiff glossy peaks – it’s firm to the touch (takes about 5 min). Add the sieved icing sugar and fold in carefully by hand, with a rubber spatula.

  4. Transfer the meringue (which has a firm texture and shouldn’t be runny!) into a large piping bag with a round tip (10-15 mm) and pipe round shapes, the size of a mandarin. Garnish the domes with some almond slices and bake in the fan forced oven on the double tray for about 60 minutes.

  5. Take tray out from the oven and remove meringue shells from baking paper – with a spoon, empty the shells from the bottom (because of the double tray, the bottom is not very dry and easily removable!)

  6. Place shells again on the tray, so it can dry out completely for another 10-20 minutes. Allow to cool on a wire rack and store in an airtight box when cool (you can preserve them for 1-2 weeks!)

  7. Mix unfrozen raspberry puree with some sugar syrup and some drops of lemon juice.

  8. Wash and cut the fruits in order to prepare a fruit salad.

  9. Fill the meringue shells with vanilla ice cream (you can prepare this in advance and store in the freezer, in an airtight box)

  10. To serve, put a little bit of raspberry coulis on each plate. Fill some ice cream in each meringue shell and place on plate. Garnish with some fruits and whipped cream, decorate with mint leaves.

    For Homemade Vanilla Ice Cream

  11. In a pan, bring the milk and cream to a boil, add the milk powder and mix well, remove the pan from the fire. Open the vanilla pod and add the seeds & pod – cover the pan and let the vanilla infuse for 15 minutes or more.

  12. In a bowl, combine sugar and egg yolks and whisk until the mixture is light and foamy.

  13. Bring the vanilla milk to a boil, remove the pod and pour it over the egg mixture, stirring constantly. Pour everything back into the pan and cook the cream until it reaches 82°C.

  14. As you whisk — you must whisk constantly to keep the eggs from scrambling — you’ll see that the cream will start out light and foamy, then the bubbles will get bigger, and then, as it gets closer to 82°C, it will start to thicken and the whisk will leave tracks. Heads up at this point — the tracks mean the cream is almost ready. Don’t stop whisking or checking the temperature, and have patience — depending on how much heat you’re giving the cream, getting to temp can take as long as 10 minutes.

  15. As soon as it reaches 82°C, remove the cream from the heat and strain it into a bowl. Let the cream stand, stirring occasionally, until it cools to 40°C, about 10 minutes (it will thicken even more). You can put the bowl on an ice bath to drop the temperature faster. Cover with cling wrap and let maturate for one night, than put it into the ice machine.

Posted in

Mini Raspberry Chocolate Tea Cake

< Back to Recipe Listings

Mini Raspberry Chocolate Tea Cake

by Mimi Wahadi

These delicate mini Raspberry Chocolate Tea Cake are perfect as a tea-time snack. Enjoy it with a cup of your favourite tea for a delightful afternoon tea party!

Cuisine : Baking Course : Dessert Skill Level : Novice
Prep : 30 mins Cook : 15 mins Ready in : 45 mins Serves : 6-8


INGREDIENTS:

  • 50 gm Unsalted butter (Group A)
  • 65 gm Castor sugar (Group A)
  • 55 gm Eggs (around 1 egg) (Group B)
  • 1 tsp Vanilla essence (Group B)
  • 12 gm Cocoa powder (Group C)
  • 50 gm Cake flour (Group C)
  • 1/4 tsp Baking powder (Group C)
  • 1/8 tsp Baking soda (Group C)
  • 65 gm Plain yogurt (Group D)
  • Chantilly Cream: 100 gm Dairy Whipping Cream | 20 gm Icing Sugar | 1 tsp Vanilla Essence

DIRECTIONS:

  1. Cream Group A (Unsalted Butter & Castor Sugar) until fluffy and light.
  2. in the Group B (Eggs & Vanilla Essence) gradually and mix well.
  3. Add in the Group C (Cocoa Powder, Cake Flour, Baking Powder & Baking Soda) and mix well.
  4. Lastly, add in Group D (Plain Yogurt) and mix well.
  5. Fill the batter to ¾ full in cupcake cases/ petite cakes tray and bake at 180 degree Celsius for 15 minutes.
  6. Chantilly Cream:
  7. Whip the dairy cream until soft peak.
  8. Add in the icing sugar and vanilla essence and whip until stiff peak.
  9. Chill in the fridge until ready to use.
Posted in

Croissant

< Back to Recipe Listings

Croissant

by Jehanne Ali

Home-made, freshly baked buttery croissants are a real triumph. Follow our step-by-step recipe by Chef Jehanne Ali for the classic French Croissants.

Cuisine : Baking Course : Dessert Skill Level : Novice
Prep : 240 mins Cook : 30 mins Ready in : 270 mins Serves : 6-8


INGREDIENTS:

  • 500 gm Strong bread flour
  • 2 tsp Yeast
  • 1 headed tsp Salt
  • 80 gm Sugar
  • 80 gm Butter
  • 200 ml Water
  • 250 gm Butter (preferably European brand—and more particularly Normandy origin)

DIRECTIONS:

  1. Mix all the ingredients under ‘dough’ until stiff but elastic dough is formed. Keep dough to rise for about an hour until almost doubles in bulk.
  2. Shape into a rectangle and keep in the fridge ideally overnight, this is called retard process to stop the yeast from being too activated.
  3. If you are pressed for time, place dough in the fridge until it resembles the firmness of lamination butter.
  4. Ideally the dough and lamination butter should be of same firm consistency to avoid spillage during lamination process.
  5. Bring out the dough from the fridge. Shape into a rectangle.
  6. Place butter half way through the dough and cover with the other part of the dough. You should get a layer of dough-butter-dough. Seal the edges.
  7. Do a double turn followed by single fold turn. The other option is to do a 1-fold turn for 3 times.
  8. Keep the dough rested in the fridge between turns if the dough is too soft.
  9. Cut the dough into 2 sections.
  10. Take a section and roll to rectangle of at least 18 x 9 inches.
  11. Cut into triangles of at least 10 cm base. Stretch the dough and shape into croissant.
  12. Leave to rise for another hour.
  13. Brush the top with egg wash and bake at preheated oven of 200°C for 10 minutes, reduce heat to 180C and bake for another 15-20 minutes until golden.
Posted in

Double Cheese Chiffon Cake

< Back to Recipe Listings

Double Cheese Chiffon Cake

by Julie Yee

Have a fantastic tea time with this light and airy Double Cheese Chiffon Cake by Chef Julie Yee.

Cuisine : Baking Course : Dessert Skill Level : Novice
Prep : 20 mins Cook : 50 mins Ready in : 130 mins Serves : 6-8


INGREDIENTS:

  • 5 Egg yolk
  • 90 gm Fresh milk
  • 80 gm Cream cheese
  • 40 gm Butter
  • 90 gm Cake flour (sifted)
  • 1/4 tsp Baking powder (optional)
  • 1/2 tsp Fine salt
  • 1 tbsp Parmesan cheese
  • Meringue Batter: 180 gm Egg Whites | 100 gm Castor Sugar | 1 tsp Corn Flour / Lemon Juice

DIRECTIONS:

  1. Yolk Mixture:
  2. Use a hand whisk to combine egg yolks, corn oil & sugar together
  3. Pour the liquid mixture & mix well.
  4. Add in sifted flour & mix till smooth. Leave aside.
  5. Egg White Mixture:
  6. Whisk the egg white lightly.
  7. Add in the cream of tartar & sugar gently & whisk till stiff.
  8. Fold the Yolk mixture into it. Use a spatula to air out bubbles at side.
  9. Bake at low shelf – 165°C for 45mins – 50mins till golden brown.
  10. Turn cake tin upside down & cool for 1hr.
Posted in

Pots au Chocolat

< Back to Recipe Listings

Pots au Chocolat

by Thripti Hinduja

This rich and lip-smacking Pots au Chocolat is baked in a water bath to achieve its characteristic texture and flavour. This dessert is perfect for chocolate lovers!

Cuisine : European Course : Dessert Skill Level : Novice
Prep : 255 mins Cook : 20 mins Ready in : 275 mins Serves : 4


INGREDIENTS:

  • 100g Milk
  • 100g Cream
  • 90g Chocolate
  • 2 Egg Yolks
  • 30g Sugar

DIRECTIONS:

  1. Heat the milk and the cream together.
  2. Cream the egg yolks and the sugar together until creamy.
  3. Once the cream is hot, pour half of it over the chocolate and whisk the other half into the eggs.
  4. Stir the chocolate until it is completely melted.
  5. Mix the egg mixture and the chocolate mixture together.
  6. Pour the mixture into ramekins.
  7. Bake in a water bath at 180°C for 20 minutes or until the mixture is set on the sides and is still slightly wobbly in the center.
  8. *Tip: Refrigerate for at least 4 hours before serving. Can be made one day in advance.
Posted in

Oreo Yogurt Butter Cake

< Back to Recipe Listings

Oreo Yogurt Butter Cake

by ToTT

The hunt for the perfect butter cake recipe is over! Try this Oreo Yogurt Butter Cake by Chef Julie that is moist and highly enjoyable.

Cuisine : Baking Course : Dessert Skill Level : Novice
Prep : 15 mins Cook : 50 mins Ready in : 65 mins Serves : 6-8


INGREDIENTS:

  • 220 gm Plain Flour
  • 11/2 teasp Baking Powder
  • 1/2 teasp Baking Soda
  • 1/2 teasp Salt
  • 100 gm Salted Butter
  • 170 gm Fine Sugar
  • 2 no Egg
  • 240 ml Non-fat Yogurt
  • 1 teasp Vanilla Paste
  • 60 gm Oreo Cookies

DIRECTIONS:

  1. Preheat oven 180°C.
  2. Line 2 x 7”loaf tin or 8” round pan.3
  3. Sift all the flours (Group 1).
  4. Cream butter and sugar till light.
  5. Add the beaten eggs slowly
  6. Fold in gently 1/3 flour until combined. Followed by ½ portion yogurt. Repeat again and finished off with the flour.
  7. Lastly, add in the crushed Oreo cookies.
  8. Pour batter into greased pan and arrange Oreo on top.
  9. Bake for 40-50mins for 8” round pan or 30mins for the loaf tin.
Posted in