Essential Bakeware – A Beginner’s Guide
Baking is a specialized skill in the kitchen. It encompasses cooking and science with precision being the key aspect. Having the correct bakeware will not only be appreciated by experienced bakers but make baking easier for beginners as well. Manufacturers are constantly coming up with new designs featuring the latest technology which can bring convenience and novelty to your kitchen. However, any baker would agree that starting with the basic tools is important as you get to learn skills that technology sometimes cannot 1) Multi-purpose mixing bowl
1) Multi-purpose mixing bowl
A mixing bowl usually features a non-slip base so that you do not have to constantly grip the bowl when mixing the ingredients. The bowl is also thicker than a normal bowl to accommodate the whisking and hand mixers’ beating. If the mixing bowl is oven-safe, baking cakes in it is possible as well.
2) Measuring kit
Measuring Cups: A point to note is that measuring liquid and weighing dry items require different measuring cups. Try to get a liquid measuring cup made of heat-resistant material as you might need to measure hot liquids at times.
Measuring spoons: For measuring small amounts like baking soda or salt.
Kitchen Scale: For measuring larger amounts of dry ingredients like flour.
Baking thermometer: Accurate temperature is also crucial especially for pies and cakes which is why having a baking thermometer is useful. This thermometer measures the core temperature of the baked goods rather than assuming from the temperature of the oven.
3) Hand mixer
This handy equipment can mix cake mixtures, whip heavy cream, beat eggs and much more. Unlike stand-mixers, you can mix your ingredients immediately in the bowl that other ingredients are already in without transferring it to the designated mix bowl. For greater convenience, get a hand mixer with a beater and kneader attachments so that kneading dough for bread or pizza will be a breeze.
4) Hand tools
Spatulas: A must for mixing or scraping the sides of the mixing bowl and frosting cakes. Materials for spatulas can range from plastic, metal to silicone.
Wooden spoon: Another indispensable item for stirring hot mixtures or scraping non-stick surfaces. A new alternative would be silicone spoons which can do the same thing but require less maintenance.
Cookie cutters: These are handy for cutting cookie dough, cutting cakes for serving or decorating pie crusts.
Rolling pin: A necessary hand tool for rolling out pie or cookie dough evenly. Try to get a simple one without the handles to prevent your knuckles getting imprinted in the dough when the dough is much bigger than the length of the rolling pin.
Flour sifter: This is a crucial tool if you want an airy texture to your cakes. The sifter prevents clumping of the dry ingredients and ensures equal distribution of all the ingredients. Sifting can also be a form of decoration; such as when dusting icing sugar, cocoa powder or cinnamon sugar mixes over cakes and cupcakes.
Oven Mitt: Usually made from thick cloth material but newer ranges are made of silicone which is much more heat resistant.
5) Baking pans
For starters, have at least two round cake pans for baking a double-layer cake and standard 14”×16” aluminium tray for baking cookies. Also have a square cake pan for baking brownies and a rectangular one for sheet cakes. Loaf pans are not necessary unless you intend to bake bread often. A muffin pan can also double for making cupcakes.
For cake pans, there are mainly 3 kinds of tins; the standard pan, loose-bottom pan and the springform pan. Loose-bottom pans are usually for cakes that do not come in halves, thus requiring a deeper tin. The loose bottom is for easier release as you can push the cake upwards and out of the tin. Springform pans on the other hand, have a spring-loaded clip at the side of the tin which expands the tin for easier release of cakes that are delicate like cheesecakes.
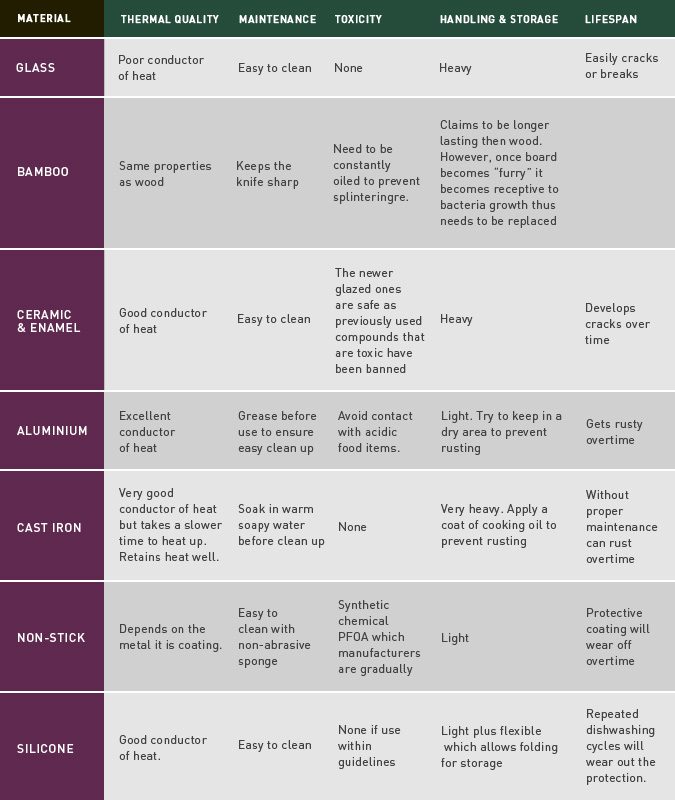
The table below shows a breakdown of the features of the different materials:
6) Cooling rack
To cool your baked goods properly, air must circulate under and over it. This prevents over-cooking the end product while it is resting outside the oven and producing dry baked goods. Cooling racks are usually made from metal.
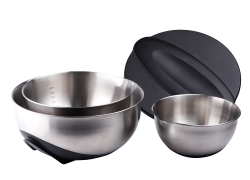
Tilt and Mix Bowls with Lid, Set of 3
From cake batter and cookie dough to tossed salads, pancake and waffle mixes, and more, this set of three mixing bowls offers the home cook a professional way to prepare ingredients. The set includes bowls in 1-liter, 1-3/5-liter, and 3-liter capacities, each of which features gleaming stainless-steel construction that work well for both wet and dry ingredients. Custom-designed by DKB Household and celebrity-chef Jamie Oliver, the three-piece set of dishwasher-safe bowls measures approximately 12 by 11-2/5 by 5-2/5 inches and nest neatly together for compact storage.
Features:
- Durable stainless steel bowl with anti-slip rubber detail on base
- 45 degree flat spot on base for comfortable use while whisking
- Etched measuring levels for easy measuring
- Pouring spout
- 1 litre, 1.6 litre & 3 litre capacity
- Dishwasher safe
Measuring Spoons
The Jamie Oliver Measuring Spoons features six handy measuring spoons that stack neatly together for compact storage. Measurements range from a pinch/0.6ml to 1 tbsp/15ml. Designed by DKB household and Jamie Oliver. DKB household is known for innovation and quality and Jamie Oliver is one of the world’s best-loved chefs.
Features:
- Set of 6 measuring spoons
- Clips to keep spoons together in the kitchen drawer
- Spoon 1: 1 tablespoon (15ml)
- Spoon 2: ½ teaspoon (2.5ml)
- Spoon 3: 1 dessertspoon (10ml)
- Spoon 4: ¼ teaspoon (1.25ml)
- Spoon 5: 1 teaspoon (5ml)
- Spoon 6: “a pinch” (0.6ml)
- Quick and easy measuring tool
- Dishwasher safe for easy cleaning
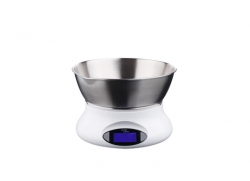
Electronic Wet ‘N’ Dry Kitchen Scale
Weigh ingredients with ease with the Jamie Oliver Electronic Add n Weigh Platform Scale. This digital scale is great because you can weigh different ingredients in the same bowl thanks to its add n weigh function. Capable of measuring up to 3.25kg with easy to read and large digital display. The unit is easy to use and has a compact design, so when you’re all done cooking it packs away for easy storage.
Features:
- Liquid measuring function
- Add ‘n’ weigh capability
- Select metric or imperial measurements
- Large, easy to read digital display
- Stainless steel weighing platform for use without bowl
- Stainless steel bowl with pouring lip
- Bowl fits snugly over base for easy storage
- Maximum weight 5kg/11lbs
- Dishwasher-safe bowl for easy cleaning
- Requires 2 x AAA batteries (not included)
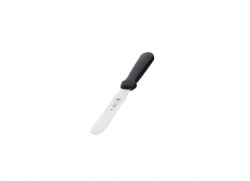
Baker’s Offset Spatula
This Baker’s Offset Spatula from Atlantic Chef makes it so much easier to apply a smooth frosting to the sides and top of a cake, with an even layer of filling. The long, flexible blade with its rounded end ensures maximum control.
Features:
- Perfect tool for applying frosting to the sides and top of a cake
- Offset spatula blade gives a better control and ample clearance to frost all sides of cake
- Constructed from heavy duty stainless steel
- Comfortable plastic grip handle
- Available in other sizes
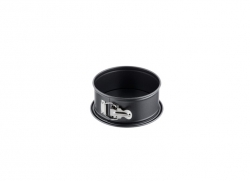
PRO FORM Leak-Proof Springform Pan
This Pro Form 7 inch Leak-Proof Springform Pan from Nordic Ware is a wonderful addition to any kitchen. With its non-stick coating, it allows for easy-release and effortless clean up. Designed for cheesecakes and other desserts, the smooth locking mechanism and tight seal make this pan simple to use. Reliable and long lasting.
Features:
- 7 Inch Leak-Proof Springform Pan
- 7-cup capacity
- Leak-proof tight seal prevents messy spills
- Non-stick coating for easy food release and cleanup
- Hand wash with mild detergent
- Smooth locking mechanism