Sausage Frittata with Roasted Garlic Mayonnaise

< Back to Recipe Listings

Sausage Frittata with Roasted Garlic Mayonnaise

by Eric Low

Everyone likes sausages and eggs. With Sausage Frittata, an egg-based dish, you get the combination of the two, which is easy to make yet rich in flavour.  Add Roasted Garlic Mayonnaise and you will have the perfect meal for gatherings or a late-night supper!

Cuisine : Mediterranean Course : Appetizer Skill Level : Novice
Prep : 15 mins Cook : 30 mins Ready in : 45 mins Serves : 2


INGREDIENTS:

  • 6 Eggs (lightly beaten)
  • 2 tbsp Concentrated Chicken Stock
  • 2 tbsp Oil
  • 1 Onion (sliced)
  • 2 Bockwurst Sausages (sliced)
  • Oil (for cooking)

Roasted Garlic Puree

  • 6 Whole Garlic Bulbs (break into cloves, unpeeled)
  • 500ml Olive Oil
  • 1 tbsp Coarse Salt
  • 1 tsp Coarse Black Pepper

Aioli

  • 1 tbsp Roasted Garlic Puree
  • 200g Mayonnaise
  • 2 tbsp Chopped Parsley

DIRECTIONS:

          Sausage Frittata

  1. Combine beaten eggs in bowl with concentrated chicken stock. Heat 2tbsps of oil and sauté onions. Mix the sautéed onions and sausages. Add to the beaten egg mixture.

  2. Heat oil in pan and add egg mixture. Scramble till almost set and allow the bottom of the frittata to brown slightly.

  3. Cover pan with a plate of a slightly bigger size. Flip over and slide the frittata back into the pan. Cook for another 5-10minutes on low heat and serve frittata with the pre made garlic mayonnaise.

    Roasted Garlic Puree

  4. Preheat oven to 160°C. Toss garlic cloves with oil, salt and pepper. Roast in oven for ½ hour. Allow to cool.

  5. Peel the garlic cloves and puree the roasted garlic with olive oil into a paste. Store in an air tight jar and cover the top of the paste with a layer of olive oil. Chill when not in use.

  6. Mix the roasted garlic puree with the mayonnaise and chopped parsley. Serve as a dip or spread for sandwiches.

Posted in

Paella Valencia

< Back to Recipe Listings

Paella Valencia

by Eric Low

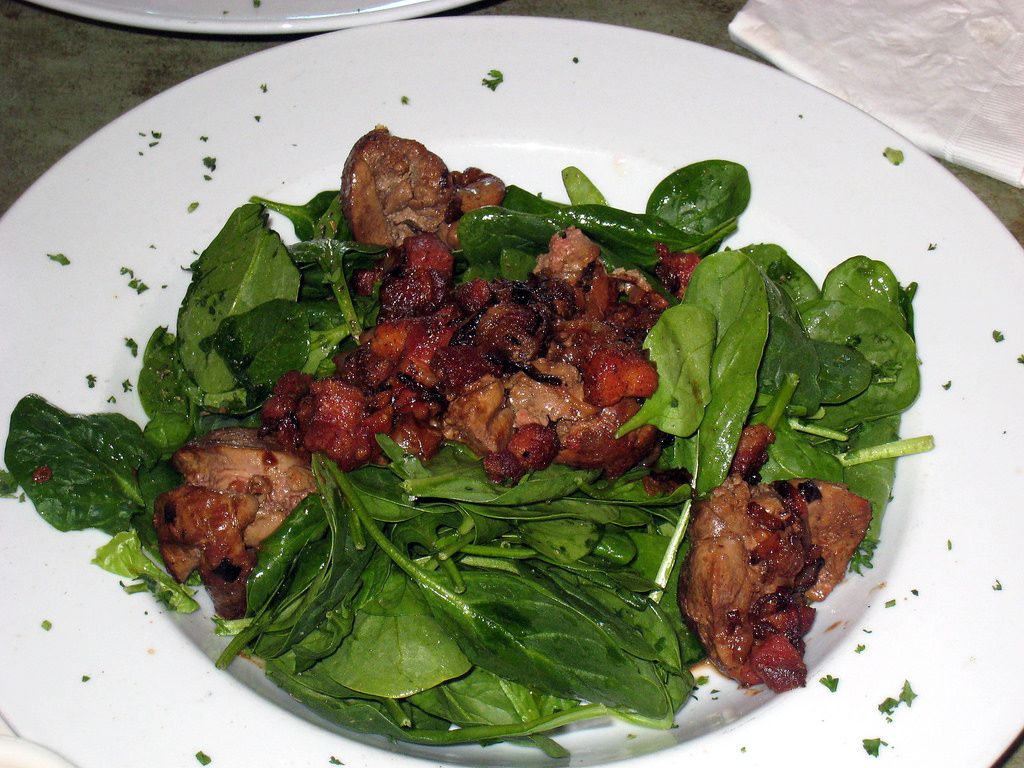
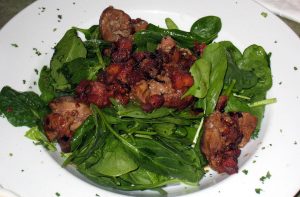
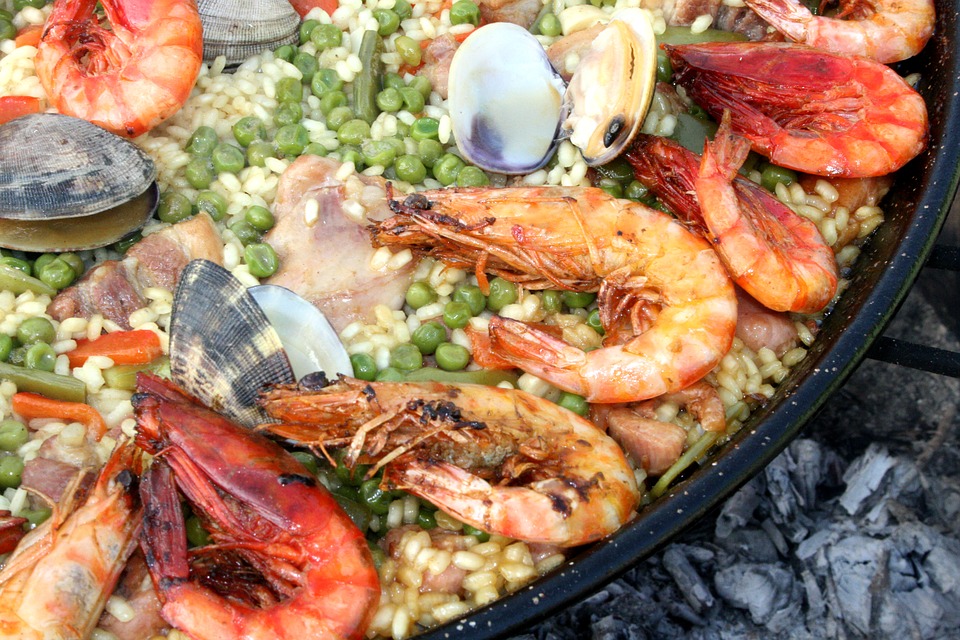
This version of Paella Valencia, a Spanish rice dish, comes cooked with seafood and chicken. Fry the rice correctly and balance different flavours from ingredients such as seafood, veggies and spices to get impressive results.

Cuisine : Mediterranean Course : Main Skill Level : Novice
Prep : 10 mins Cook : 45 mins Ready in : 55 mins Serves : 4


INGREDIENTS:

Sofrito

  • 6 tbsp Extra Virgin Olive Oil
  • ½ White Onion (chopped)
  • 2 Tomatoes (diced)
  • 1 tsp Chopped Garlic

Paella

  • 1 cup of Short Grain Rice (~150g), washed and drained
  • 1½ cup of Water (~270ml)
  • 3 tbsp Concentrated Chicken Stock
  • ½ tbsp Paprika Powder
  • ½ tsp Saffron Threads (optional)
  • 100g Red and Yellow Peppers (sliced)
  • 100g Frozen Clam Meat
  • 150g Peeled Shrimp
  • 150g Fish Fillets
  • 2 bunches of Flat Leaf Parsley (chopped)
  • Lemon Wedges

DIRECTIONS:

  1. Heat oil in full metal braising pot, sauté onions, tomatoes and garlic for 10-15 minutes until soft and aromatic.
  2. Combine Maggi Chicken Stock with water. Add spices to the sofrito mixture, cook for 2 minutes. Preheat oven to 200°C.
  3. Mix in the rice and pour in chicken stock, bring stock to the boil and add the bell peppers.
  4. Transfer paella to oven and bake for 20-30minutes. Add clam meat, shrimps and fish fillet in last 15 minutes of baking. Sprinkle with chopped parsley and garnish with lemon wedges before serve.
Posted in

Chicken Liver Salad with Quail Egg, Croutons and Red Wine & Shallot Dressing

< Back to Recipe Listings

Chicken Liver Salad with Quail Egg, Croutons and Red Wine & Shallot Dressing

by Susanne Despature

Chicken Liver Salad with quail eggs and croutons is perfect for the warm Singapore weather, as it won’t require you slaving over the stove. Wash your salad greens, cook the greens and make a rich red wine and shallot dressing. Serve the salad base with a fragrant fried chicken liver as an elegant appetizer.

Cuisine : European Course : Appetizer Skill Level : Novice
Prep : 15 mins Cook : 15 mins Ready in : 30 mins Serves : 6


INGREDIENTS:

    • 300g Chicken Liver (trimmed, sinew removed, chopped in bite-sized pieces)
    • 2 tbsp Clarified Butter (butter without buttermilk)
    • Salt and Pepper
    • 100g Streaky Bacon (chopped in fine pieces)
    • 100g Toast Bread (white, cut into 1cm cubes)
    • 1 clove of Garlic (cut in half with skin on)
    • 1 tbsp Clarified Butter
    • 8 Quail Eggs (boiled, peeled, cut in half)
    • Salt, Pepper, Balsamic Vinegar Cream
    • 200g Mixed Salad with Rocket, Oak Salad Leaves, Baby Spinach
    • 2-3 sprigs of Spring Onion

    Red Wine & Garlic Dressing

    • 6 tbsp Extra Virgin Olive Oil
    • 2 tbsp Raspberry Vinegar (or Red Wine Vinegar)
    • 1 tbsp Balsamic Vinegar
    • 1 clove of Garlic (peeled and chopped finely)
    • 1 tsp Dijon Mustard
    • ½ tsp Concentrated Chicken Stock
    • Salt and Pepper

DIRECTIONS:

          For Salad & Dressing

  1. Wash salad leaves and toss them. Place the leaves, in the middle of plates.

  2. Combine all the ingredients for dressing in a medium bowl and whisk. Set aside.

    For Bread Crouton

  3. In a coated pan, heat up 1 tbsp of butter, add the bread croutons and the garlic, then fry over medium heat until golden brown and crisp.

  4. Put in a bowl, set aside.

    For Streaky Bacon

  5. In the same pan, still hot, add the bacon and fry until crisp and golden – drain on kitchen paper, set aside.

    For Chicken Liver

  6. In the same pan, add 2 tbsp of butter. Season the chicken liver to taste with salt and pepper, then pan fry over high heat on all sides, for 1-2 minutes or until light brown, but still pink inside (if overcooked, the taste isn’t the same!)

  7. Remove from pan on a warm plate.

    To Serve

  8. Sprinkle some chopped spring onion over the salad leaves, then garnish with bread crumbs, crispy streaky bacon and chicken liver.

  9. Pour the dressing over the salad and serve with baguette.

    *Tip: How to boil the perfect quail egg

  10. Fill a small saucepan two thirds full with water and bring to the boil. Place quail eggs into pan. Do not overcrowd the pan.

  11. Boil for 2.5 to 3 minutes depending on your preference.

  12. Remove with a slotted spoon and cool down under cold running water or in a bowl filled with ice water.

  13. Peel very carefully in a bowl with water.


Posted in

Lemon Thyme Marinated Lamb Rack with Finely Chopped Ratatouille & Traditional Gratin Dauphinois

< Back to Recipe Listings

Lemon Thyme Marinated Lamb Rack with Finely Chopped Ratatouille & Traditional Gratin Dauphinois

by Susanne Despature

The slow oven cooking method ensures the tenderness of the lamb rack. Let the Lemon Thyme Marinated Lamb Rack tease your taste buds and serve with ratatouille in finely chopped texture and gratin dauphinois.

Cuisine : European Course : Main Skill Level : Novice
Prep : 200 mins Cook : 80 mins Ready in : 280 mins Serves : 4


INGREDIENTS:

Lamb Rack

  • 1 French Lamb Rack
  • 2 tbsp Olive Oil
  • Salt

Marinade

  • 2-3 cloves of Garlic (finely chopped)
  • 3 tbsp Olive Oil
  • 1 tbsp Dijon Mustard
  • 1 tbsp Lemon Thyme or Thyme (finely chopped)
  • ½ tbsp Tomato Paste
  • ½ tsp Cracked Pepper

Ratatouille

  • 2 cloves of Garlic (chopped)
  • 1 Onion (diced)
  • ½ can of Chopped Tomatoes
  • 2-3 tbsp Olive Oil
  • 1 Green Zucchini
  • 1 Small Red and Yellow Bell Pepper
  • 1 Small Eggplant
  • Salt, Pepper, and Basil

Potato Gratin

  • 5-6 Large Potatoes (peeled, finely sliced, not too starchy)
  • 20g Butter
  • 2-3 cloves of Garlic (finely chopped)
  • 200ml Milk
  • 100ml Cream
  • 2-3 twigs of Thyme (leaves only)
  • 50g Grated Parmesan
  • Salt, Pepper, and Nutmeg

DIRECTIONS:

          For Lamb Rack

  1. In a small bowl, combine all ingredients for marinade. Marinate lamb rack for 2-3 hours in a sealed plastic bag in fridge (or better over night). 2 hours before serving, take lamb rack out of the fridge and put at room temperature for 30 minutes.

  2. Heat oven to 80° C, place a plate on the griddle.

  3. Heat olive oil in frying pan until very hot. Fry lamb rack on all sides for 3-4 minutes or until golden brown, then place on hot plate in the oven. Don’t cover.

  4. Leave for about 1 hour 15mins in the oven until temperature at core is 65° C (meat will have a nice pink colour, not overcooked!)

    For Ratatouille

  5. Sweat the garlic and onion in 1 tablespoon of olive oil. Add chopped tomatoes and cook for 5 minutes.

  6. Finely dice bell pepper, eggplant and zucchini (1×1 cm) and sauté them one by one in a little olive oil until they are just cooked.

  7. Combine all the cooked vegetables with the tomato sauce, season with salt and pepper and the finely chopped basil leaves. Set aside.

  8. Reheat just before serving.

    To Serve

  9. Spoon some ratatouille on each plate. Cut lamb rack in cutlets and serve 2 cutlets / person. Serve with potato gratin and some fresh rosemary.

Posted in

Red Snapper Fillet on Sweet Potato Aïoli


< Back to Recipe Listings

Red Snapper Fillet on Sweet Potato Aïoli

by Susanne Despature


One of the excellent ways to consume lean protein and essential fatty acids is serving red snapper. Make this mouth-watering thick red snapper fillet, seared, on top of a bright orange sweet potato-puree with ginger, garlic and olive oil (like French “Aïoli” – a mayonnaise based on garlic and olive-oil). The bell peppers are slowly roasted in the oven for an hour, with Kaffir-lime leaves and olive oil to ensure flavoured goodness.

Cuisine : Fusion Course : Main Skill Level : Novice
Prep : 15 mins Cook : 90 mins Ready in : 105 mins Serves : 4


INGREDIENTS:

Slow Roasted Tomatoes and Bell Pepper

  • 8 Cocktail Tomatoes on Vine
  • 4 Red Mini-Bell Pepper
  • 4 Yellow Mini-Bell Pepper
  • Salt and Pepper
  • Icing Sugar
  • Olive Oil

Sweet Potato Aïoli

  • 200g Sweet Potato (Orange)
  • 1 tbsp Olive Oil
  • 6 cloves of Garlic (finely chopped)
  • 1 stalk of Lemongrass (cut in two, lengthwise)
  • 40g Fresh Ginger (peeled, finely chopped)
  • 20g Fresh Turmeric (peeled, finely chopped)
  • 2 sprigs of Chinese Chives
  • 1 Lime Juice
  • 20ml Olive Oil
  • Salt and Pepper

Red Snapper Fillet

  • 4 Fillets of Red Snapper (125g per portion)
  • 1 tbsp Olive Oil
  • 1 tbsp Lemongrass & Citrus Fruit Oil
  • Salt and Pepper


DIRECTIONS:

          For Slow Roasted Oven Tomatoes and Mini-Bell Pepper

  1. Wash and dry cocktail tomatoes and mini-bell pepper. Don’t remove tomatoes from vine, but leave always 2-3 tomatoes on a sprig.

  2. Arrange them in an ovenproof dish, sprinkle with olive oil, salt, pepper and dust with some icing sugar.

  3. Slowly roast them in the oven at 120° C for 1-2 hours, until they are tender and slightly reduced in size and shrivelled.

    For Sweet Potato Aïoli

  4. Peel the sweet potatoes, slice them finely – work fast, they will oxydate very quickly and the nice orange colour will turn into brown.

  5. Heat olive oil in a heavy bottomed pan, add chopped garlic, lemon grass, ginger, turmeric and sweet potatoes and sweat for about 20 minutes – add about 20 ml water during cooking time, to prevent from burning.

  6. When soft (check with a fork), take out the lemon grass stalk and mix sweet potatoes in a blender, adding lime juice, then olive oil little by little until consistency is very smooth and not too thick.

    For Red Mullet Fillet

  7. Heat olive oil in a non-sticking pan. Season red mullet filets with salt, then pan fry fillet, skin side down first until skin is crisp on medium to high heat for about 1 minute.

  8. Reduce heat, then turn fillet over and pan-fry other side until just cooked – depending on how thick the fillet is, this takes 2-3 minutes.

  9. Turn off heat; leave the fish in the hot pan for another minute or two.

    To Serve             

  10. Spoon some sweet potato aïoli onto serving plates, then top with red snapper fillet and garnish with lime basil and some finely chopp ed spring onion.

  11. Add the oven roasted vine tomatoes and mini-bell pepper on the side. Drizzle some lemon grass and citrus fruit oil over the dish and serve.

Posted in

Cappuccino with Black Truffle Brunoise and White Truffle Oil

< Back to Recipe Listings

Cappuccino with Black Truffle Brunoise and White Truffle Oil

by Susanne Despture

The aroma of a freshly brewed Cappuccino is irresistible to many. Imagine adding truffle oil which gives a smooth sensation and you wouldn’t want to wait to take a sip! Besides learning milk steaming and foaming techniques, you will also be exposed to basic knife skills which will help you make finely-sliced black truffle brunoise for an additional flavour.

Cuisine : European Course : Dessert Skill Level : Novice
Prep : 15 mins Cook : 30 mins Ready in : 45 mins Serves : 8


INGREDIENTS:

  • 300g White Beans (soaked overnight in cold water in fridge)
  • 300g Chicken Stock
  • 1 Small Onion (peeled and cut in two)
  • 1 Small Carrot (peeled and cut in two)
  • 100ml Truffle Juice
  • 200ml Cream
  • 90g Butter
  • 10g Chopped Truffles
  • 100ml Cream (whipped)
  • Salt and Pepper
  • Red Wine Vinegar
  • Fleur de Sel

DIRECTIONS:

  1. Place soaked beans in a pot with carrot & onion. Cover with chicken stock and cook until well done. Set 1 tbsp of cooked beans aside for garnish.
  2. Remove onion and carrot from beans. Puree beans in a blender with chicken stock and strain through a fine meshed sieve.
  3. Heat the beans puree slowly and add truffle juice & cream – season to taste with salt and pepper and some drops of red wine vinegar.
  4. Just before serving, bring bean soup to a boil and add the butter – stir until it melts. Add the whipped cream and mix with bean soup, so it gets a “cappuccino” texture: light and airy!
  5. Mix the remaining beans with the chopped truffles – add a little bit in each soup bowl, then top with foamed cream and garnish with sliced truffles. Serve immediately.
Posted in

Green Thai Asparagus and Asian Herbs Tartar

< Back to Recipe Listings

Green Thai Asparagus and Asian Herbs Tartar

by Susanne Despature

Gazpacho recipes can vary greatly in terms of ingredient composition, texture and viscosity. Have a healthier and refreshing version using fresh tomatoes, watermelon and lemongrass!

Cuisine : Fusion Course : Appetizer Skill Level : Novice
Prep : 30 mins Cook : 0 mins Ready in : 30 mins Serves : 4


INGREDIENTS:

  • 15 Thai Asparagus (blanched)
  • 1 Avocado (ripe)
  • 1 Lime Juice
  • 100g Yellow Cocktail Tomatoes
  • 100g Red Cocktail Tomatoes
  • ½ bunch of Spring Onions
  • 1 tsp Capers
  • 2 sprigs of Thai Basil
  • 2 sprigs of Mint
  • 3 sprigs of Coriander
  • 3 tbsp Olive Oil
  • 2 tbsp White Wine or Mango Vinegar
  • Salt and Pepper

Garnish

  • 50g Radish Sprouts
  • 50ml Tomato/Lemongrass Gazpacho

Tomato and Watermelon Gazpacho with Lemongrass

  • 3-4 Medium Ripe Tomatoes (or ½ can of chopped tomatoes)
  • 1 tbsp Tomato Puree
  • 1 Red Chilli (medium hot)
  • 1 Small Red Bell Pepper
  • 200g Watermelon
  • 1 stalk of Lemongrass (finely chopped)
  • 10cl Chicken Stock
  • White Balsamic Vinegar
  • Salt and Pepper

DIRECTIONS:

  1. Peel the avocado, dice flesh in 1 x 1 cm cubes and mix immediately with limejuice to prevent oxidation.
  2. Chop the blanched asparagus. Cut the cocktail tomatoes in 8, chop the spring onions, capers and herbs finely.
  3. Mix all ingredients in a bowl; season to taste with salt, pepper, vinegar and olive oil.

    To Serve

  4. Place a small ring cutter in the middle of a shallow serving bowl. Spoon some tartar mix into the ring and press with a spoon so it will not fall apart once you remove the ring.

  5. Place the Tomato/ Lemongrass Gazpacho into a squirt bottle, and then squeeze around Thai asparagus tartar.

  6. Garnish with radish sprouts and asparagus or chives.

    To Blanch Green Asparagus

  7. Wash and cut the lower part of the stem if necessary. In a medium size pot, bring water to a boil. Add 1 tablespoon of salt to 1 l of water. Prepare a bowl with ice water next to the pot.

  8. Cook asparagus for 1 minute, until bright green and still crunchy. Take them out with a slotted spoon and plunge them in prepared bowl with ice water, to stop cooking process immediately. Drain and use as indicated in recipe.

    To Prepare Tomato and Watermelon Gazpacho with Lemongrass

  9. Remove the skin and dice the watermelon flesh.

  10. Wash the tomatoes, bell pepper, and red chilli and remove the stem and seeds. Dice flesh in 2×2 cubes and combine with watermelon, chicken stock, tomato puree, chopped lemongrass, white balsamic vinegar and Tabasco in a blender.

  11. Blend for 2-3 minutes or until very smooth, then strain through a sieve, pressing with a soup ladle.

  12. Season to taste with salt, pepper, and then keep refrigerated in a squirt bottle.

Posted in

Mango and Raspberry Trifle with Light Mascarpone Cream and Coconut Macaroon

< Back to Recipe Listings

Mango and Raspberry Trifle with Light Mascarpone Cream and Coconut Macaroon

by Susanne Despature

Serve this layered dessert in individual glasses comparable to those served in professional restaurants. Enjoy the subtle sweetness of coconut meringue and the inviting scent of mango and raspberry trifle!

Cuisine : Baking Course : Dessert Skill Level : Novice
Prep : 200 mins Cook : 2 mins Ready in : 202 mins Serves : 4


INGREDIENTS:

Mango Coulis

  • 150g Mango and Passion Fruit Puree
  • Sugar Syrup
  • Lime Juice

Raspberry Coulis

  • 150g Raspberry Puree (frozen)
  • ¼ tsp Agar-Agar
  • Sugar Syrup
  • Lime Juice

Light Mascarpone Cream

  • 250g de Mascarpone (italian double cream)
  • 250g Plain Yoghurt (greek style)
  • 80g Icing Sugar
  • 1 zest of Kaffir Lime or Lime (finely grated)
  • 10cl Whipping Cream
  • 4 Coconut Macaroons
  • 6 Physalis

DIRECTIONS:

         For Mango and Raspberry Coulis

  1. Mix mango/passion fruit puree with a little bit of sugar and some drops of lime juice in a small bowl. Set aside.

  2. Bring raspberry puree, lemon juice and agar-agar to a boil in a small pan, boil for 1 minute. Pour into a small bowl, set aside.

    For Mascarpone Cream

  3. Add mascarpone in a medium bowl, soften a little bit with a rubber spatula, then add icing sugar & kaffir lime zest.

  4. Mix again, then add yoghurt and mix well until the preparation is very smooth.

  5. Fold the whipping cream carefully in and fill a piping bag with medium tip. Keep in fridge until use.

    To Serve      

  6. Put 4 nicely shaped glasses (20 cl) on a small tray. Cover the bottom of the glass with a little bit of mascarpone cream, cover with 2 tablespoons of mango coulis, then cover with coconut macaron.

  7. Start the same procedure again, but replace mango coulis with raspberry coulis. Cover with cling wrap and place in fridge for at least 3 hours or more.

  8. Decorate with physalis before serving.

Posted in

Poached Pears & Rich Valrhona Chocolate Cream with Cocoa Streusel

< Back to Recipe Listings

Poached Pears & Rich Valrhona Chocolate Cream with Cocoa Streusel

by Susanne Despature

Here’s how to make gooey, cheesy, garlicky pull-apart bread, one step at a time! Addictively buttery and cheesy with each piece and bursting with fresh herb and garlic flavours!

What is a feast without a gratifying dessert? Learn to create this sensual chocolate delicacy and complete your dessert masterpiece with a few pieces of poached pear.

Cuisine : European Course : Dessert Skill Level : Novice
Prep : 45 mins Cook : 15 mins Ready in : 60 mins Serves : 6


INGREDIENTS:


  • 2-3 Poached Pears
  • Chocolate Streusel

Chocolate Cream

  • 150g Whole Milk
  • 100g Cream (35% fat)
  • 2 Egg Yolk
  • 30g Fine Sugar
  • 60g Milk Chocolate Covertures Drops
  • 50g Dark Chocolate Covertures (70% cocoa)

Whipping Cream

  • 200g Cream (35% fat, very cold)
  • Physalis
  • Chocolate Streusel

DIRECTIONS:

  1. Prepare a tray with 12 nicely shaped glasses. Dice pears 2 x 2 cm and place some of it in each glass.
  2. In a medium bowl, combine sugar and egg yolks and whisk until the mixture is light and foamy.
  3. Prepare the 2 chocolates in another bowl and set aside.
  4. In a pan, bring milk and cream to a boil, stirring occasionally to prevent skin to form. Pour over the egg mixture, stirring constantly. Pour everything back into the pan and start to heat the mixture carefully over low to medium heat.
  5. As you stir with a rubber spatula or wooden spoon — you must stir constantly on the bottom of the pan, to keep the eggs from scrambling — you’ll see that the cream will start out light and foamy, then the bubbles will get bigger, and then, as it gets hotter, it will start to thicken and the stirring will leave tracks Heads up at this point — the tracks mean the cream is almost ready. Never let the cream boil (over 85 degrees or the eggs will scramble!)
  6. Pour the hot cream over the chocolates, count up to twenty, and then whisk energetically with small movements from the centre to the border until chocolate and cream are thoroughly mixed. Pour into a measuring jug.
  7. Pour carefully into the glasses, covering the pears, (half full, about 100 g / glass). Refrigerate. Add 1 teaspoon of chocolate streusel when cream is cold. Decorate with whipped cream before serving.

    Whipping Cream

  8. In a very cold bowl (let it stand for 30 minutes or more in the freezer), add the very cold cream and whip with an electric hand mixer to peaks.

  9. Start first on low speed, then, when the cream thickens, whip on high speed – add the vanilla sugar towards the end.

  10. Put the whipped cream into a piping bag (with a star tip) and decorate each coffee chocolate cream with a whipped cream rose. Dust slightly with cocoa powder and decorate with chocolate streusel & physalis.

Posted in

Roasted Lemon & Rosemary Marinated Spring Chicken

< Back to Recipe Listings

Roasted Lemon & Rosemary Marinated Spring Chicken

by Susanne Despature

There are countless of ways to cook a chicken but a Roasted Lemon & Rosemary marinated Spring Chicken dish must surely be one of the tastiest. Learn the traditional French way to make fantastically flavoured spring chicken with kaffir lime leaf, baby ovan potatoes and a garden vegetable filling.

Cuisine : European Course : Main Skill Level : Novice
Prep : 80 mins Cook : 55 mins Ready in : 135 mins Serves : 6


INGREDIENTS:


  • 2 Spring Chicken
  • 1 Kaffir Lime (finely grated)
  • 1 Lime (juice)
  • 2 cloves of Garlic (finely chopped)
  • 2-3 sprigs of Rosemary
  • 10-12 Double Kaffir-Lime Leaves (combava)
  • 3 tbsp Olive Oil
  • 6 Black Peppercorns (coarsely chopped)

Young Potatoes

  • 600g Mini Potatoes
  • 1 Garlic Bulb
  • Olive Oil
  • Rosemary
  • Fine Sea Salt (fleur de sel)

Spring Vegetables

  • 100g Baby Carrots
  • 50g Snow Peas
  • 1 Yellow Zucchini
  • 1 Broccoli (florets)
  • Salt and Butter

DIRECTIONS:

  1. Preheat oven to 210°C.
  2. Mix all ingredients for the marinade, then rub each part and the inside of the spring chicken with the mixture. Stuff the chicken with some sprigs of rosemary and the kaffir lime leaves. Leave to marinate for an hour or more.
  3. Put them (lying on their side) in an oven-safe dish, with cloves of garlic and washed (but not peeled) young potatoes around it. Drizzle with olive oil, fine sea salt and rosemary.
  4. Put the oven-safe dish in the oven and cook. After 15 minutes, take the oven-safe dish out, turn the cockerels on their other side and cook for another 10 to 15 minutes.
  5. Turn down the temperature to 160°C. and cook for 10 more minutes on their back and 5 more minutes on their belly.
  6. Switch off the oven and allow to rest 10 minutes.
  7. To check that the chicken are thoroughly cooked: with a small cutting knife, pierce one leg at the joint. The juices should run clear. Add salt and pepper to taste.

    For Spring Vegetables

  8. Wash all the vegetables and blanch them separately in boiling salt water. Keep them crunchy and cool them immediately in ice water to keep their genuine colour.

  9. Before serving, heat up the vegetable in a frying pan with a knob of butter.

  10. To finish, carve the spring chicken and serve with the potatoes and mixed vegetables.

Posted in