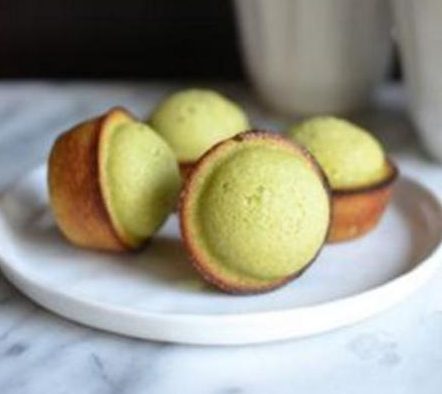
Banana & Raisin Cinnamon Muffins

< Back to Recipe Listings

Banana & Raisin Cinnamon Muffins

by McCormick

These tasty and healthy muffins are great for any party. Cinnamon is one of nature’s highest anti-oxidant value foods. It contains many active principles that are known to have antioxidants. For a perfectly-shaped muffin, fill the muffin tins 3/4 full. If muffin cups are filled more than 3/4 full, the muffins will have flat tops.

Cuisine : Baking Course : Dessert Skill Level : Novice
Prep : 10 mins Cook : 20 mins Ready in : 30 mins Serves : 8 muffins


INGREDIENTS:

Cream Mix

  • 250g Butter Cubes
  • 160g Sugar
  • 2 Large Eggs
  • 1 tsp Vanilla Essence
  • 480g Mashed Delmont Banana
  • ½ tsp Baking Soda
  • 120g Dairy Sterilized Cream

Dry Mix

  • 250g Self-Rising Flour
  • 60g Plain Flour
  • 1 tbsp McCormick® Cinnamon Powder
  • 20g Chocolate Powder
  • 1 cup Raisin

DIRECTIONS:

  1. Cream butter and sugar until light and fluffy, add eggs one add a time. Bind in mashed banana, baking soda, vanilla essence and dairy sterilized cream quickly.
  2. Fold in the Dry Mix ingredients to creamed banana batter mixture. Do not over mix.
  3. Spoon batter into muffin cups, filling three-quarters full. Bake in the preheat 180 degree until tops are golden and a toothpick inserted into centers comes out clean, approximately 15 to 16 minutes. Let cool in tin on a wire rack for 5 minutes. Turn out muffins onto rack. Serve warm or at room temperature.
  4. **Tip: Cinnamon is one of the nature’s highest anti-oxidant value foods. It contains many active principles that are known to have antioxidant, disease control properties.
Posted in

Vanilla Sugar Cookies

< Back to Recipe Listings

Vanilla Sugar Cookies

by McCormick

Have fun with the kids in the kitchen as you engage their help with this recipe. Spend some bonding time together and be rewarded with these amazing sweet treats!

Cuisine : Baking Course : Dessert Skill Level : Novice
Prep : 135 mins Cook : 8 mins Ready in : 143 mins Serves : 54 cookies


INGREDIENTS:

  • 2 ¾ cups Flour
  • 2 tsp McCormick® Cream of Tartar
  • ½ tsp Salt
  • 1 tsp Baking Soda
  • 1½ cup Sugar
  • 1 cup (or 2 sticks) Butter (softened)
  • 2 Eggs
  • 2 tsp McCormick® Pure Vanilla Extract or 2 tsp Premium Imitation Vanilla Extract
  • Additional Sugar or Colored Sugar (for rolling)

DIRECTIONS:

  1. Mix flour, cream of tartar, baking soda and salt in large bowl. Set aside. Beat sugar and butter in large bowl with electric mixer on medium speed until light and fluffy. Add eggs and vanilla; mix well. Gradually beat in flour mixture on low speed until well mixed.
  2. Refrigerate dough about 2 hours or until firm.
  3. Preheat oven to 400°F. Shape dough into 1-inch balls. Roll in additional sugar or Colored Sugar. Place 2 inches apart on baking sheets.
  4. Bake 6 to 8 minutes or until lightly browned. Cool on baking sheets 1 minute. Remove to wire racks; cool completely.
Posted in

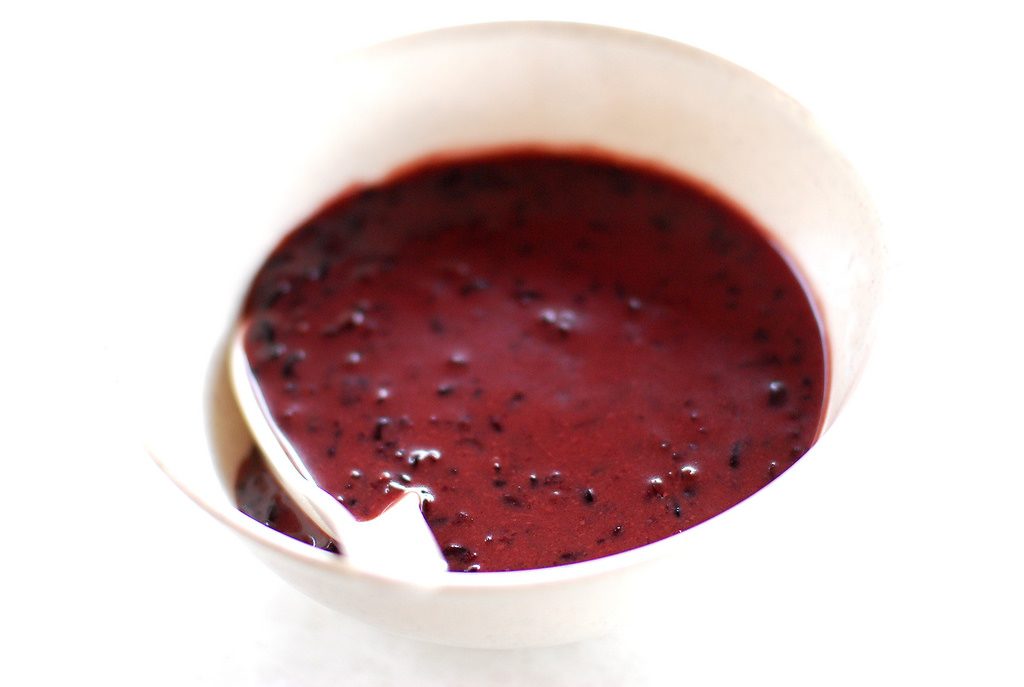
Black Glutinous Rice with Gula Melaka and Yam Coconut Ice Cream

< Back to Recipe Listings

Black Glutinous Rice with Gula Melaka and Yam Coconut Ice Cream

by Eric Low

This easy-to-make dessert combines glutinous rice, dried longan, pandan leaves and water. Gula Melaka can be added before serving to accommodate personal preference.

Cuisine : Asian Course : Dessert Skill Level : Novice
Prep : 10 mins Cook : 60 mins Ready in : 70 mins Serves : 2


INGREDIENTS:

  • 50g Black Glutinous Rice
  • 20g White Glutinous Rice
  • 1 piece of Dried Longan
  • 1 piece of Pandan Leaves (tied up)
  • 750ml Water (plus extra for standby)
  • 2 tbsp Gula Melaka

Assembly

  • Yam and Coconut Flavoured Ice Cream or Vanilla Ice Cream

DIRECTIONS:

  1. Combine the two kinds of glutinous rice with dried longan, pandan leaves and water. Bring to boil and simmer for 60 minutes. Add extra water if necessary.
  2. Add Gula Melaka and adjust to taste. Cool and chill the glutinous rice till ready to serve.
  3. Divide the glutinous rice to 4 portions. Serve with a scoop of ice cream.
Posted in

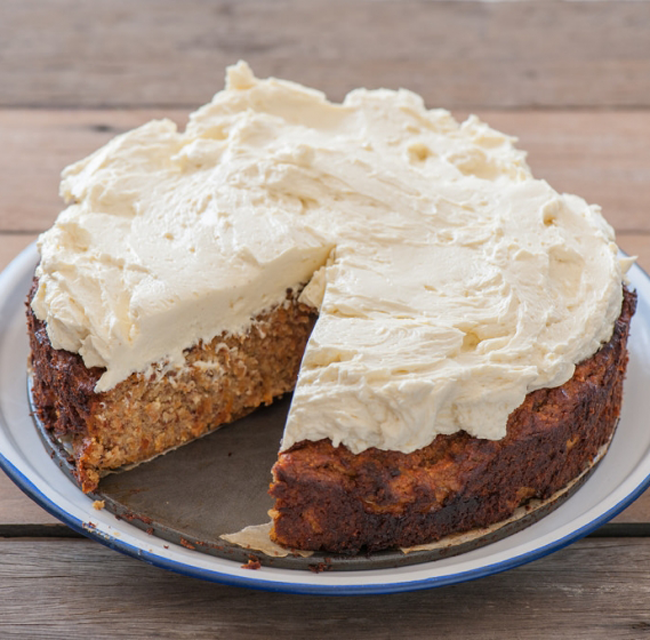
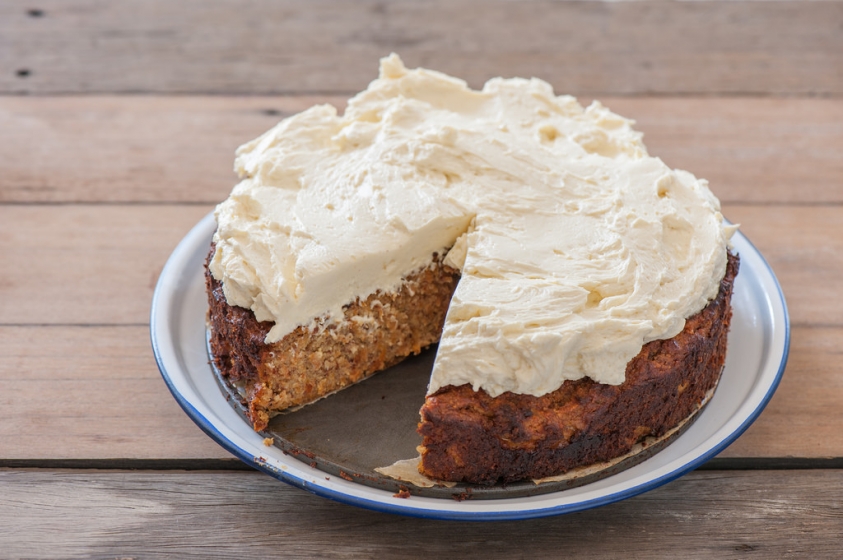
Cream Cheese Carrot Cake

< Back to Recipe Listings

Cream Cheese Carrot Cake

by Julie Yee

Enjoy a fluffy cream cheese frosting that makes the ultimate topper for a moist and classic carrot cake!

Cuisine : Baking Course : Dessert Skill Level : Novice
Prep : 80 mins Cook : 40 mins Ready in : 120 mins Serves : 30 Servings


INGREDIENTS:

Ingredients for Cake

  • 150g Fine Sugar (Group 1 – Cream together)
  • 200g Fine Sugar (Group 1 – Cream together)
  • 3 Egg (Group 1 – Cream together)
  • 200ml Corn Oil (Group 1 – Cream together)
  • 170g Cake Flour (Group 2 – Dry ingredients)
  • 1 1/2 tsp Baking Powder (Group 2 – Dry ingredients)
  • 3/4 tsp Baking Soda (Group 2 – Dry ingredients)
  • 1 1/2 tsp Cinnamon (Group 2 – Dry ingredients)
  • 1/2 tsp Vanilla Powder (Group 2 – Dry ingredients)
  • 200g Grated Carrot (Group 3)
  • 80g Walnut Chopped (Group 3)
  • 100g Pineapple Chopped (dehydrated) (Group 3)

Ingredients for Cream Cheese Frosting

  • 75g Whipped Cream (35%)
  • 6oz Cream Cheese (softened)
  • 6 tbsp Creamy Salted Butter
  • 3 cups Icing Sugar
  • 1 tbsp Lemon Juice

DIRECTIONS:

  1. For the cake, follow steps 2 to 6.
  2. Use 10″ x 10″ tray.
  3. Whisk Group 1 until combined.
  4. Add group 2 dry ingredients. 
  5. Add in the grated carrot, walnut, pineapple, raisins.
  6. Bake at 180ºC for 30mins – 40mins till cooked. Cool in tin for 1hr.
  7. For the cream cheese frosting, follow steps 8 to 9.
  8. Cream all ingredients together except whipping cream.
  9. Fold in the whipped cream into Cheese mixture.
Posted in

Cappuccino with Black Truffle Brunoise and White Truffle Oil

< Back to Recipe Listings

Cappuccino with Black Truffle Brunoise and White Truffle Oil

by Susanne Despture

The aroma of a freshly brewed Cappuccino is irresistible to many. Imagine adding truffle oil which gives a smooth sensation and you wouldn’t want to wait to take a sip! Besides learning milk steaming and foaming techniques, you will also be exposed to basic knife skills which will help you make finely-sliced black truffle brunoise for an additional flavour.

Cuisine : European Course : Dessert Skill Level : Novice
Prep : 15 mins Cook : 30 mins Ready in : 45 mins Serves : 8


INGREDIENTS:

  • 300g White Beans (soaked overnight in cold water in fridge)
  • 300g Chicken Stock
  • 1 Small Onion (peeled and cut in two)
  • 1 Small Carrot (peeled and cut in two)
  • 100ml Truffle Juice
  • 200ml Cream
  • 90g Butter
  • 10g Chopped Truffles
  • 100ml Cream (whipped)
  • Salt and Pepper
  • Red Wine Vinegar
  • Fleur de Sel

DIRECTIONS:

  1. Place soaked beans in a pot with carrot & onion. Cover with chicken stock and cook until well done. Set 1 tbsp of cooked beans aside for garnish.
  2. Remove onion and carrot from beans. Puree beans in a blender with chicken stock and strain through a fine meshed sieve.
  3. Heat the beans puree slowly and add truffle juice & cream – season to taste with salt and pepper and some drops of red wine vinegar.
  4. Just before serving, bring bean soup to a boil and add the butter – stir until it melts. Add the whipped cream and mix with bean soup, so it gets a “cappuccino” texture: light and airy!
  5. Mix the remaining beans with the chopped truffles – add a little bit in each soup bowl, then top with foamed cream and garnish with sliced truffles. Serve immediately.
Posted in

Mango and Raspberry Trifle with Light Mascarpone Cream and Coconut Macaroon

< Back to Recipe Listings

Mango and Raspberry Trifle with Light Mascarpone Cream and Coconut Macaroon

by Susanne Despature

Serve this layered dessert in individual glasses comparable to those served in professional restaurants. Enjoy the subtle sweetness of coconut meringue and the inviting scent of mango and raspberry trifle!

Cuisine : Baking Course : Dessert Skill Level : Novice
Prep : 200 mins Cook : 2 mins Ready in : 202 mins Serves : 4


INGREDIENTS:

Mango Coulis

  • 150g Mango and Passion Fruit Puree
  • Sugar Syrup
  • Lime Juice

Raspberry Coulis

  • 150g Raspberry Puree (frozen)
  • ¼ tsp Agar-Agar
  • Sugar Syrup
  • Lime Juice

Light Mascarpone Cream

  • 250g de Mascarpone (italian double cream)
  • 250g Plain Yoghurt (greek style)
  • 80g Icing Sugar
  • 1 zest of Kaffir Lime or Lime (finely grated)
  • 10cl Whipping Cream
  • 4 Coconut Macaroons
  • 6 Physalis

DIRECTIONS:

         For Mango and Raspberry Coulis

  1. Mix mango/passion fruit puree with a little bit of sugar and some drops of lime juice in a small bowl. Set aside.

  2. Bring raspberry puree, lemon juice and agar-agar to a boil in a small pan, boil for 1 minute. Pour into a small bowl, set aside.

    For Mascarpone Cream

  3. Add mascarpone in a medium bowl, soften a little bit with a rubber spatula, then add icing sugar & kaffir lime zest.

  4. Mix again, then add yoghurt and mix well until the preparation is very smooth.

  5. Fold the whipping cream carefully in and fill a piping bag with medium tip. Keep in fridge until use.

    To Serve      

  6. Put 4 nicely shaped glasses (20 cl) on a small tray. Cover the bottom of the glass with a little bit of mascarpone cream, cover with 2 tablespoons of mango coulis, then cover with coconut macaron.

  7. Start the same procedure again, but replace mango coulis with raspberry coulis. Cover with cling wrap and place in fridge for at least 3 hours or more.

  8. Decorate with physalis before serving.

Posted in

Poached Pears & Rich Valrhona Chocolate Cream with Cocoa Streusel

< Back to Recipe Listings

Poached Pears & Rich Valrhona Chocolate Cream with Cocoa Streusel

by Susanne Despature

Here’s how to make gooey, cheesy, garlicky pull-apart bread, one step at a time! Addictively buttery and cheesy with each piece and bursting with fresh herb and garlic flavours!

What is a feast without a gratifying dessert? Learn to create this sensual chocolate delicacy and complete your dessert masterpiece with a few pieces of poached pear.

Cuisine : European Course : Dessert Skill Level : Novice
Prep : 45 mins Cook : 15 mins Ready in : 60 mins Serves : 6


INGREDIENTS:


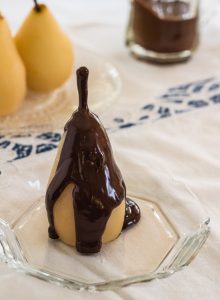
  • 2-3 Poached Pears
  • Chocolate Streusel

Chocolate Cream

  • 150g Whole Milk
  • 100g Cream (35% fat)
  • 2 Egg Yolk
  • 30g Fine Sugar
  • 60g Milk Chocolate Covertures Drops
  • 50g Dark Chocolate Covertures (70% cocoa)

Whipping Cream

  • 200g Cream (35% fat, very cold)
  • Physalis
  • Chocolate Streusel

DIRECTIONS:

  1. Prepare a tray with 12 nicely shaped glasses. Dice pears 2 x 2 cm and place some of it in each glass.
  2. In a medium bowl, combine sugar and egg yolks and whisk until the mixture is light and foamy.
  3. Prepare the 2 chocolates in another bowl and set aside.
  4. In a pan, bring milk and cream to a boil, stirring occasionally to prevent skin to form. Pour over the egg mixture, stirring constantly. Pour everything back into the pan and start to heat the mixture carefully over low to medium heat.
  5. As you stir with a rubber spatula or wooden spoon — you must stir constantly on the bottom of the pan, to keep the eggs from scrambling — you’ll see that the cream will start out light and foamy, then the bubbles will get bigger, and then, as it gets hotter, it will start to thicken and the stirring will leave tracks Heads up at this point — the tracks mean the cream is almost ready. Never let the cream boil (over 85 degrees or the eggs will scramble!)
  6. Pour the hot cream over the chocolates, count up to twenty, and then whisk energetically with small movements from the centre to the border until chocolate and cream are thoroughly mixed. Pour into a measuring jug.
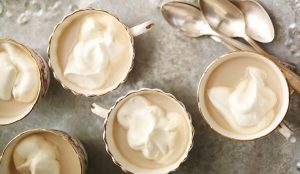
  7. Pour carefully into the glasses, covering the pears, (half full, about 100 g / glass). Refrigerate. Add 1 teaspoon of chocolate streusel when cream is cold. Decorate with whipped cream before serving.

    Whipping Cream

  8. In a very cold bowl (let it stand for 30 minutes or more in the freezer), add the very cold cream and whip with an electric hand mixer to peaks.

  9. Start first on low speed, then, when the cream thickens, whip on high speed – add the vanilla sugar towards the end.

  10. Put the whipped cream into a piping bag (with a star tip) and decorate each coffee chocolate cream with a whipped cream rose. Dust slightly with cocoa powder and decorate with chocolate streusel & physalis.

Posted in

Individual Tarte Tatin with Vanilla Chantilly

< Back to Recipe Listings

Individual Tarte Tatin with Vanilla Chantilly

By Susanne Despature

The beauty of Chantilly cream is that it can instantly elevate any dessert once you have learnt the tricks of whipping this satiny cream. Pick up the art of layering apple slices and recreate this classic French dessert, which pleases both the palate and the eyes.

Cuisine : Baking Course : Dessert Skill Level : Novice
Prep : 20 mins Cook : 70 mins Ready in : 90 mins Serves : 6


INGREDIENTS:

  • 250g Pâte Sucrée (sweet pie crust)
  • 3 Large Apples (Braeburn, Golden, Cox Orange, Reinette)

Caramel

  • 150g Sugar
  • 60g Butter

Vanilla Butter

  • 50g Butter (soft)
  • 50g Fine Caster Sugar
  • ½ Vanilla Pod

Basic Pate Sucrée

  • 125g Unsalted Butter
  • 80g Icing Sugar
  • 1 Vanilla Pod (pulp)
  • 40g White Almond Powder
  • 1 Egg
  • 200g Plain Flour
  • 1 pinch of Salt

DIRECTIONS:

          For Tarte Tatin

  1. Preheat the oven to 180°C. Insert a grill in the lower part of the oven.

  2. Prepare the caramel: In a large and heavy bottomed pan, heat the sugar on medium heat until it melts. Don’t stir, just swirl the pan slightly. As soon as the caramel has a nice amber color, remove the pan from fire and cover the bottom of 6 silicon moulds (12 cm) with caramel. Add 10 g butter in each mould.

  3. Prepare the apples: Peel them, cut them in two and remove the core with a melon baller. With a small and sharp knife, make fine incisions in the rounded part of the apple half. Place this part into the caramel, 1 half in each mould. The apple should be big enough to fill the mould completely, because it will shrink during the cooking process!

  4. In a bowl, mix soft butter with sugar and vanilla seeds from vanilla pod. Mix with a spoon, then spoon equally over the apples.

  5. Bake in oven for about 45 minutes or until apples are tender and soaked with caramel – they change colour and are now caramel brown. Let cool out for a moment.

  6. Roll out the pâte sucrée on a little bit of flour, 2 mm thick. Cut out rounds which are slightly bigger than the moulds. Cover the apples with the pastry and press slightly.

  7. Bake in the middle of the preheated oven (180°C) for about 20 minutes or until golden brown.

  8. Place a chopping board on top of the moulds. Cover with a towel. Flip the moulds over very quickly, so that the caramel will not spill out (it can be burning hot!!) Then place the individual Tarte Tatin on plates. Serve with some whipped cream with vanilla & sugar.

  9. *Tip: You can prepare the Tarte Tatin in advance: caramelize the apples, then cover with dough and place in fridge. Bake 1 hour before serving.

    For Basic Pate Sucrée

  10. Using an electric mixer, mix the butter and icing sugar until creamy – add the vanilla pulp, salt, almonds, mix again, than add the egg and mix well. Sift the flour into the butter/egg cream, then mix just until the dough comes together.

  11. Remove the dough from the mixer, pat into a rectangle and cover in cling wrap. Refrigerate for at least one night before using.

Posted in

Chocolate Pound Cake

< Back to Recipe Listings

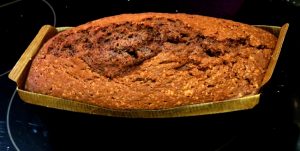
Chocolate Pound Cake

by Lin Weixian

Indulge in a slice of chocolatey goodness with this chocolate pound cake. Simple yet delicious, this recipe is perfect for beginners and anyone who wants to bake their cake and eat it too.

Cuisine : Baking Course : Dessert Skill Level : Novice
Prep : 10 mins Cook : 25 mins Ready in : 35 mins Serves : 6-8


INGREDIENTS:

  • 108g Cake flour
  • 18g Cocoa powder
  • 5g Baking powder
  • 90g Butter
  • 144g Sugar
  • 5g Salt
  • 100g Egg
  • 50g Sour Cream

DIRECTIONS:

  1. Sift the flour, baking powder, and cocoa powder together.
  2. Cream the butter until light and lump-free.
  3. Add the sugar and salt. Cream till light and fluffy.
  4. Add the dry ingredients and eggs into the butter mixture. Alternate between eggs and dry ingredients.
  5. Fold in the sour cream.
  6. Portion into greased loaf pan and bake at 180ºC till the cake bounce back when lightly pressed.
Posted in

Lychee & Rose Panna Cotta in Cups

< Back to Recipe Listings

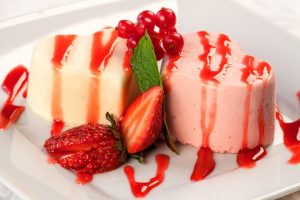
Lychee & Rose Panna cotta in Cups

by Mimi Wahadi

Create a show-stopping Lychee & Rose Panna Cotta perfect for any occasion. It is light, delicate and easy to prepare!

Cuisine : Baking Course : Dessert Skill Level : Novice
Prep : 10 mins Cook : 15 mins Ready in : 145 mins Serves : 2-4


INGREDIENTS:

  • 250g Whipping Cream
  • 85g Milk
  • 40g Sugar
  • 7g Gelatin Powder (dissolve in 40 gm of water to bloom)
  • 2tbsp Rose Tea/Rose Buds
  • 100g Lychee, chopped

DIRECTIONS:

  1. In a bowl, bloom the gelatin.
  2. In a pot, gently heat up the sugar, milk and part of the whipping cream with the rose buds/tea to infuse.
  3. Add gelatin and stir till dissolve to a gentle boil.
  4. Add the remaining cream and sieve mixture.
  5. Cool over ice bath.
  6. Pour into cups and place in chiller to set.
  7. When set, decorate with chopped lychee and some rose buds.
Posted in