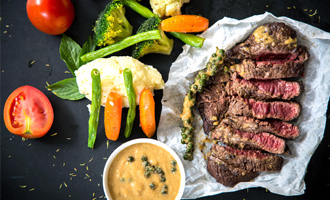
Cooking the Perfect Steak!

There’s nothing more impressive than being able to cook a mouth-watering and juicy steak for your sweet valentine! Cooking an elegant piece of beef steak can be quite daunting for a beginner, especially when just a difference of a minute can determine whether your meat will come out rare, medium-rare or well-done.
Fret not, we’ve got you covered with this guide! So beat the queues this coming Valentine’s Day with a romantic home-cooked dinner with your special someone.

1. Selecting the Prize
With many different parts, it can be challenging trying to recall the differences between each type of cut. As a general guideline, you should keep these pointers in mind no matter what you are buying:
- The meat should be in good colour (not pale) and appear moist but not wet.
- The edges of the meat should be evenly cut instead of ragged.
- If it’s pre-packaged, avoid those with tears or with liquids at the bottom of the tray.
- It should also feel firm and cold to the touch.
If you’re looking for a quick cheat-sheet on what are the best cuts, here’s a summary:
Most Tender:
The Beef tenderloin (aka Filet Mignon) is your top choice. This is cut from the mid-loin of the cow and while it is not the most flavourful, it is undisputedly the part that is most tender.
Special Occasions:
If you don’t mind breaking your wallet a little, the Top Sirloin (the most premium cut amongst the loin), the T-Bone and the Ribeye are amongst the richest, most opulent steaks you can buy.
Grilling/Out-Door:
Beef steaks are awesome for the grill! Not only are all the above-mentioned meats great for grilling, the flank, skirt and tri-tip cuts are also good (marinate them beforehand for best results.)

2. Don’t immediately cook the steak!
When you first take a steak out from the fridge, the inside of the meat tends to be much colder than the outside. This means that any cooking done will be uneven as the outer layers of the meat will cook much faster with the interior being undercooked.
A good way to make sure that the steak is of even temperature before cooking is to let it sit on the counter for 20 to 30 minutes. This will bring the steak up to room temperature and will allow you to cook it with more precision! Finally, before you throw your steak onto the grill, remember to dap them with paper towels to get rid of excess moisture.

3. War Preparations
First off is to choose the right tool for the job. Ideally, you’ll want a cast iron pan or skillet. This is because they are naturally non-stick, great at retaining heat and the materials give a better sear than stainless steel pans.
Don’t have a cast iron pan yet? Check out the LAVA Cast Iron Grill Pan with Handle at our Redmart store!
Next off, instead of using oil, we prefer to add a knob of butter onto a hot pan. Yes, remember to ensure that you heat the pan till it’s very hot before you cook the steak too! Next up, sprinkle salt, black pepper or your favourite go-to seasoning right before you place the steak on the pan.
The timing of this is crucial as salt will suck out the moisture of the meat if you add it too early.

4. Onwards, to the great sear!
Now add the steak to the pan, make sure there’s a loud sizzling noise else it means the pan is not hot enough and you should immediately remove the steak and heat the pan higher and longer.
While steaks of different thickness have different cooking times, on average, a 2cm-thick piece of steak should be cooked 2 – 3 minutes each side for rare, 3 – 4 minutes each side for medium-rare to medium and 5 – 6 minutes each side for medium-well to well-done.
Remember, turn the steak only once as the steak will dry out if you keep flipping your prized meat. Always use a tong so that you don’t pierce the meat and let the juices escape.
A trick to find out if your meat is currently at the right doneness is to touch the beef with your finger. The texture of the meat can be compared to the same texture of touching the area of skin below your thumb, at the different tension points as illustrated below.

Illustration courtesy of lifehacker.com

5. The spoils of war
Always rest your steak before serving! This isn’t because your steak is tired but it’s to make sure it’s as JUICY as possible!
Rest it on a plate for the same amount of time you’ve cooked it, giving it ample time for the juices to redistribute throughout the meat like a sponge. If you had to make some adjustments to the cooking time for whatever reason and can’t remember how long you’ve cooked it, 10 minutes is a good benchmark.
If you’re planning to sign up for cooking or baking classes, we’ve got you covered here as well 😉
Planning on preparing the perfect candlelight dinner? Be sure to check out our Valentine’s Day sale below!